List View Customer
Managing customers in BillSpree is a straightforward process. You can view your entire customer base from the list view and add new customers using the creation form.1. Navigate to Customers
To access your customer list, click on Customers in the main sidebar. This page provides a high-level overview of all users registered in your system.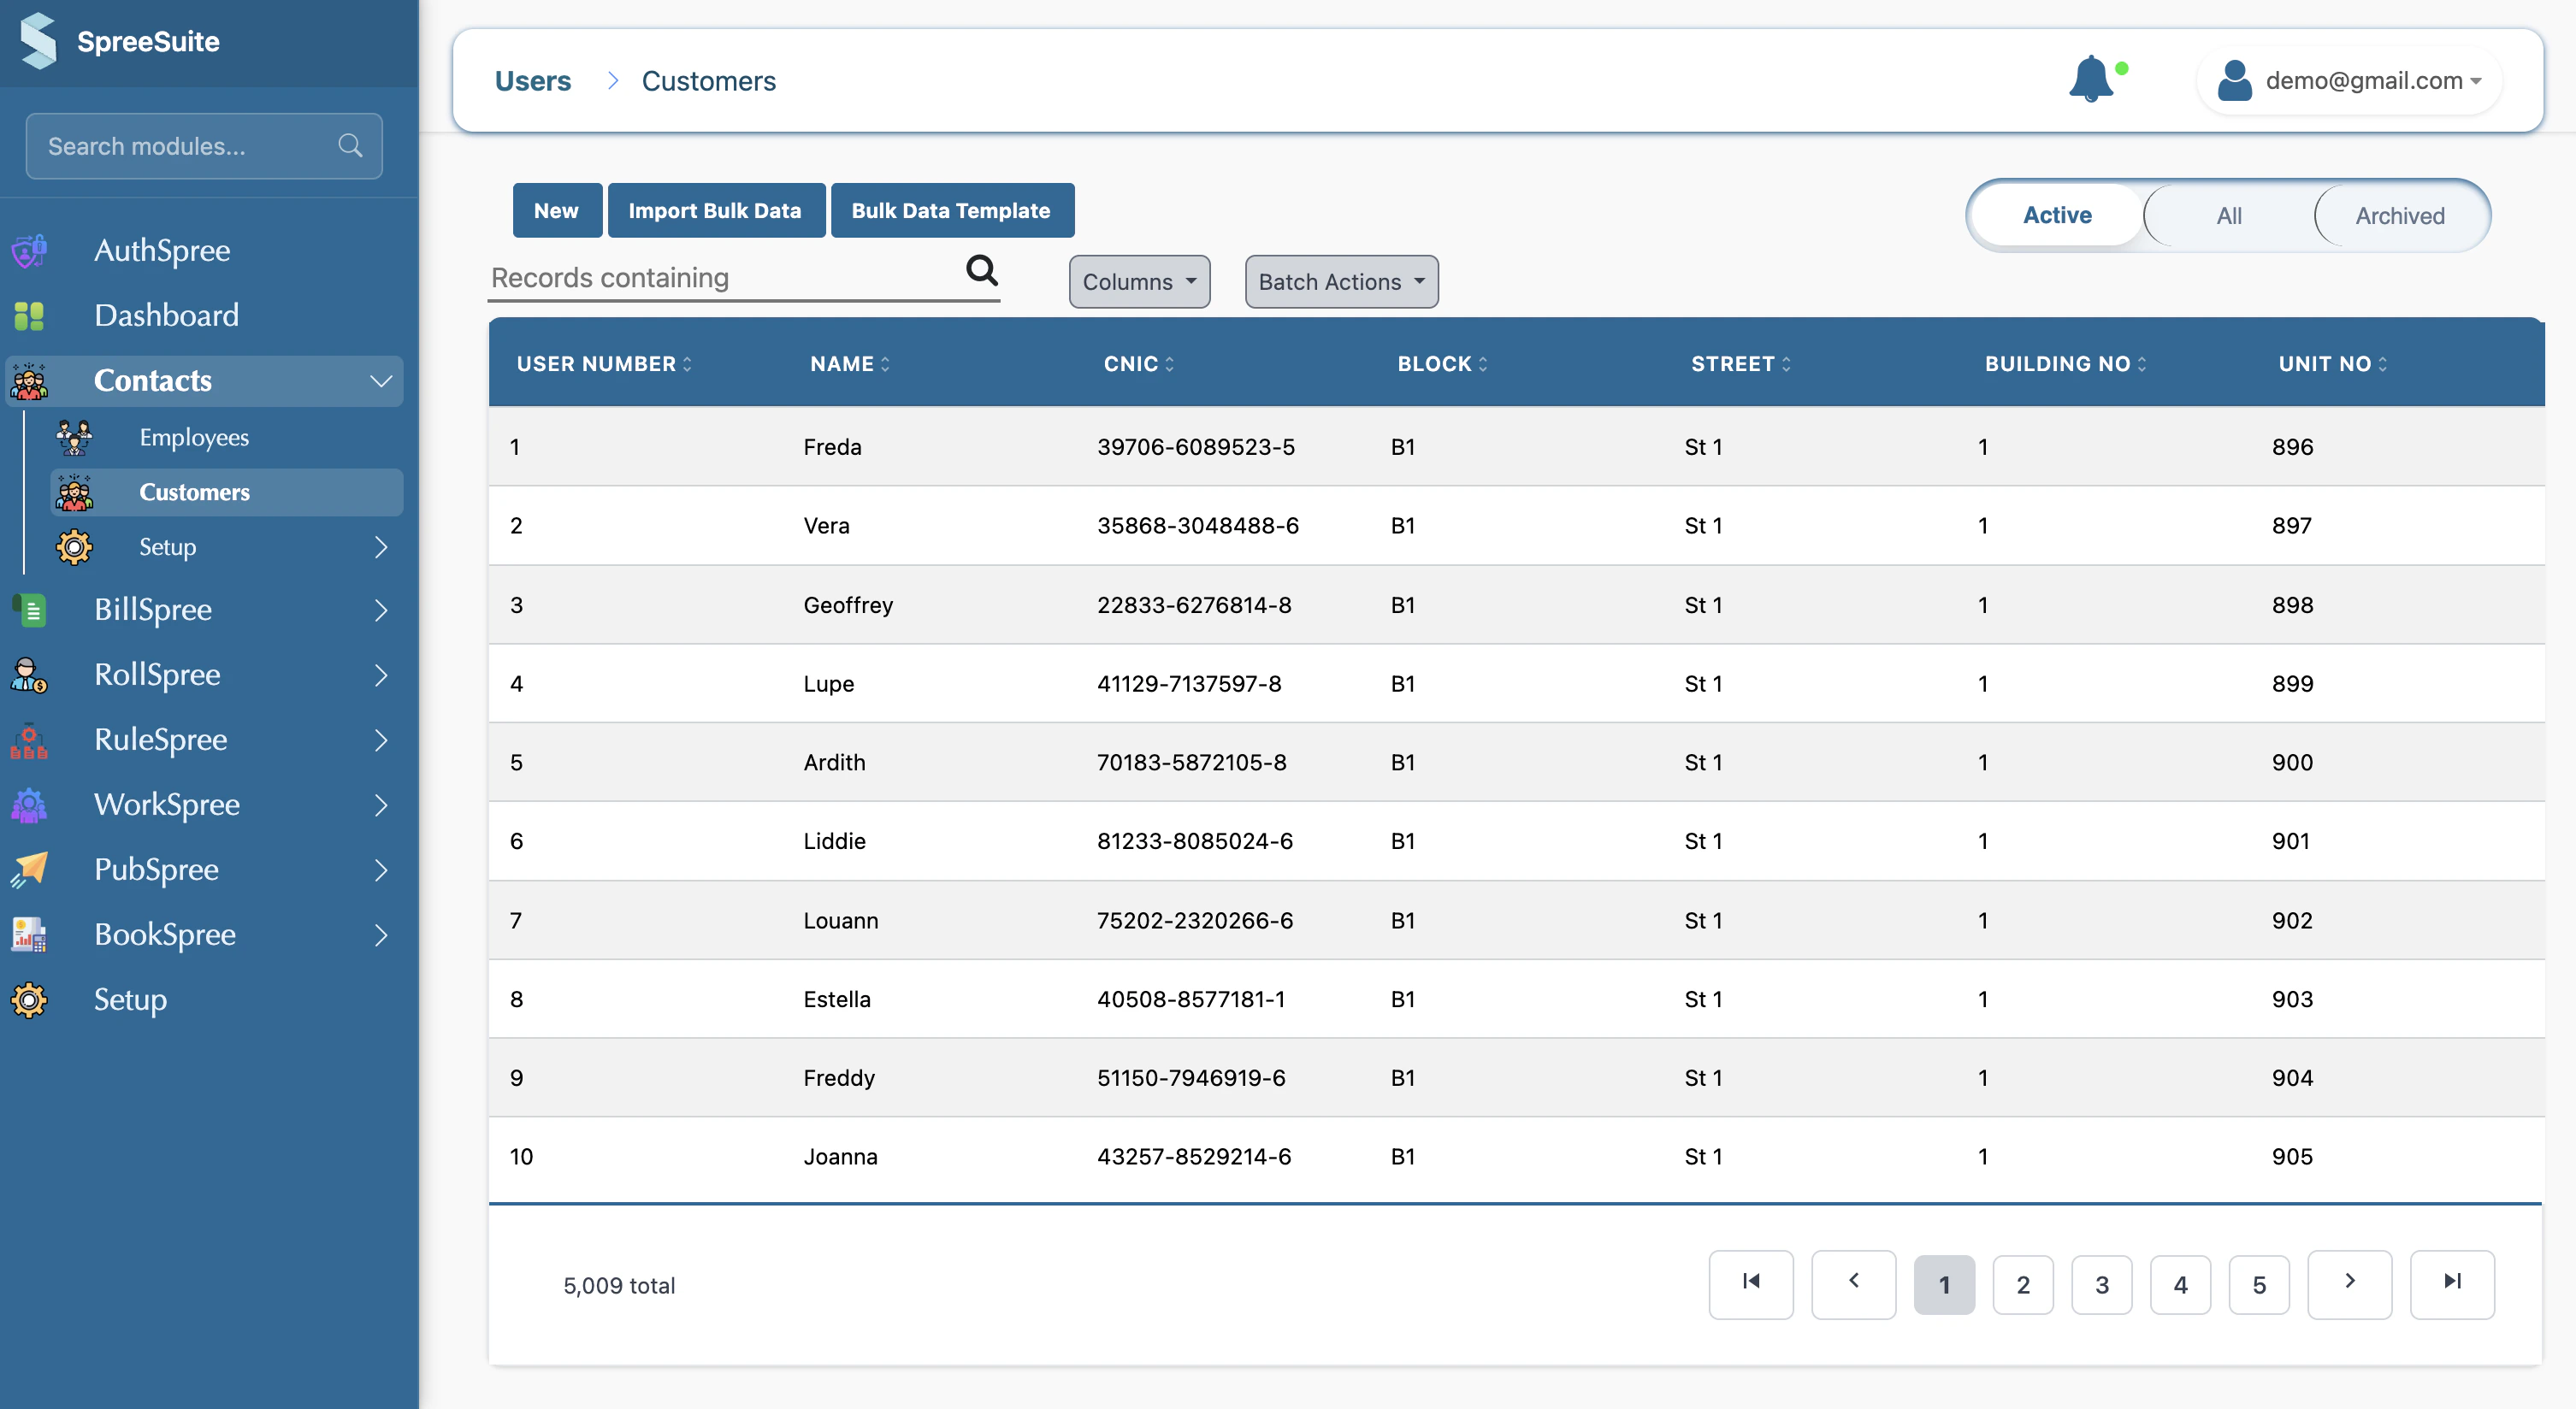
2. Add a New Customer
To add a new customer, follow these steps: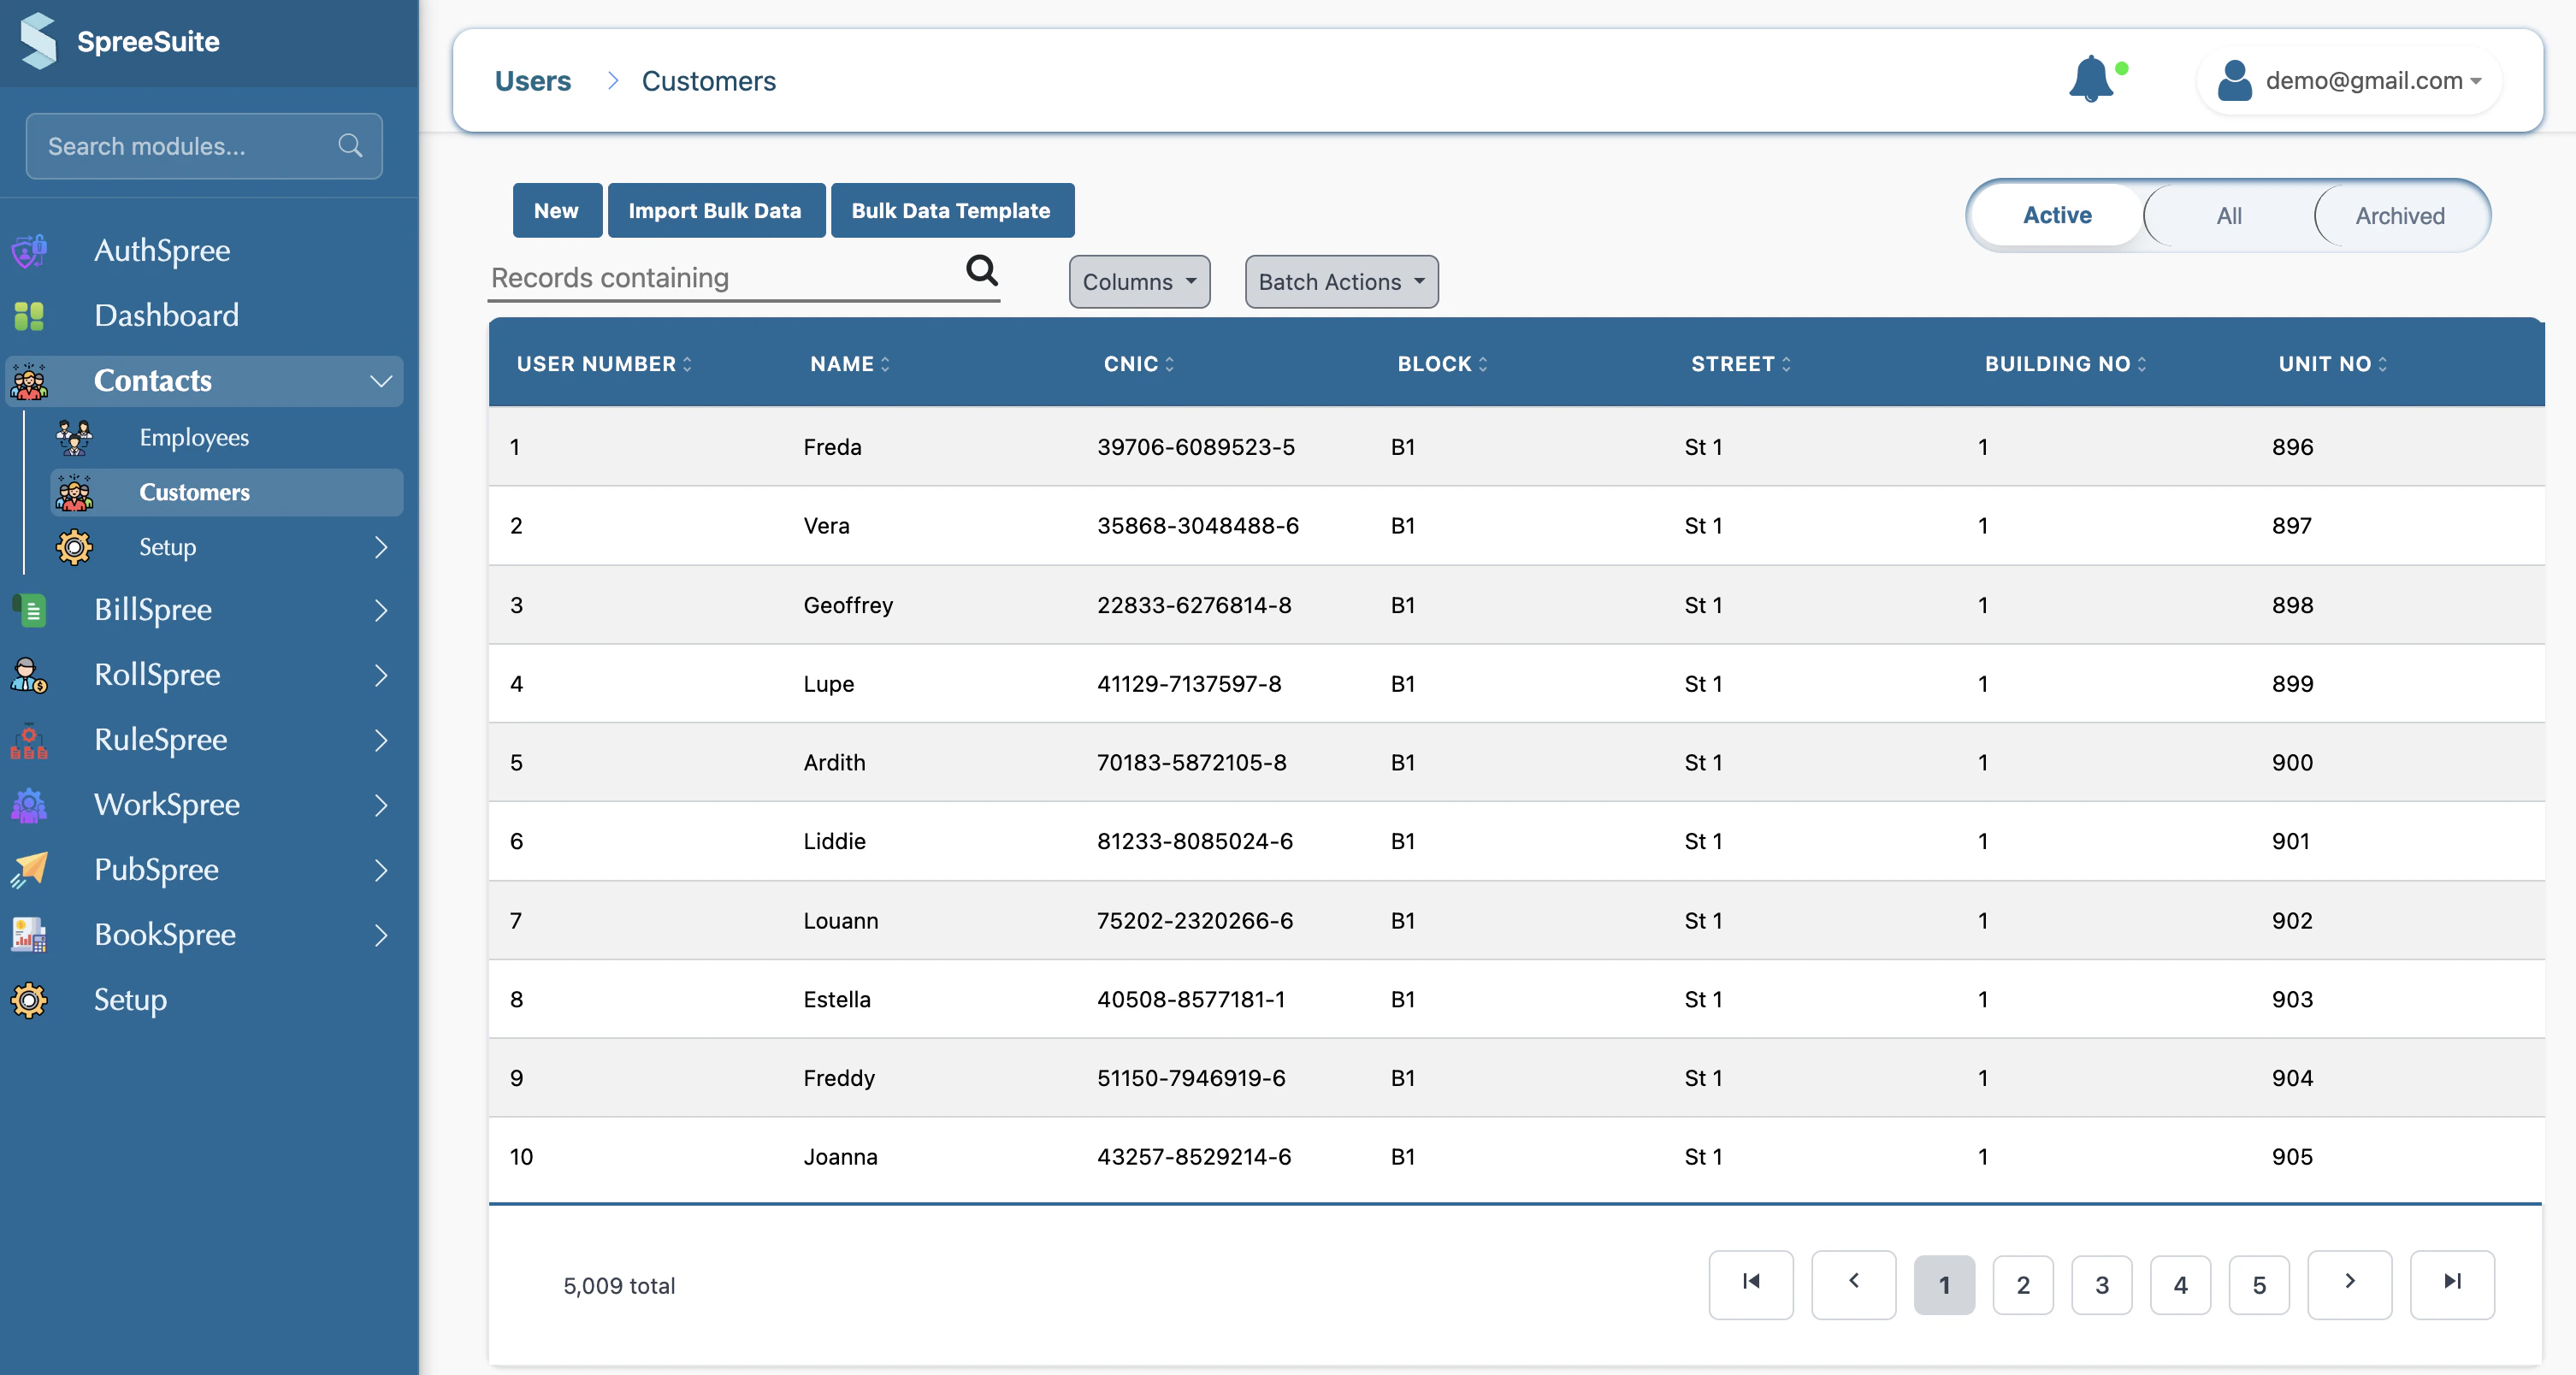
Enter General Information
Fill in the basic contact details for the customer.
- Name: The full name of the customer (Required).
- Email: The customer’s primary email address for invoicing.
- Phone Number: A contact number for the customer.
- Reference Number: Your own internal identifier if applicable.
Provide Address Information
This section is crucial for tax compliance and accurate invoice delivery.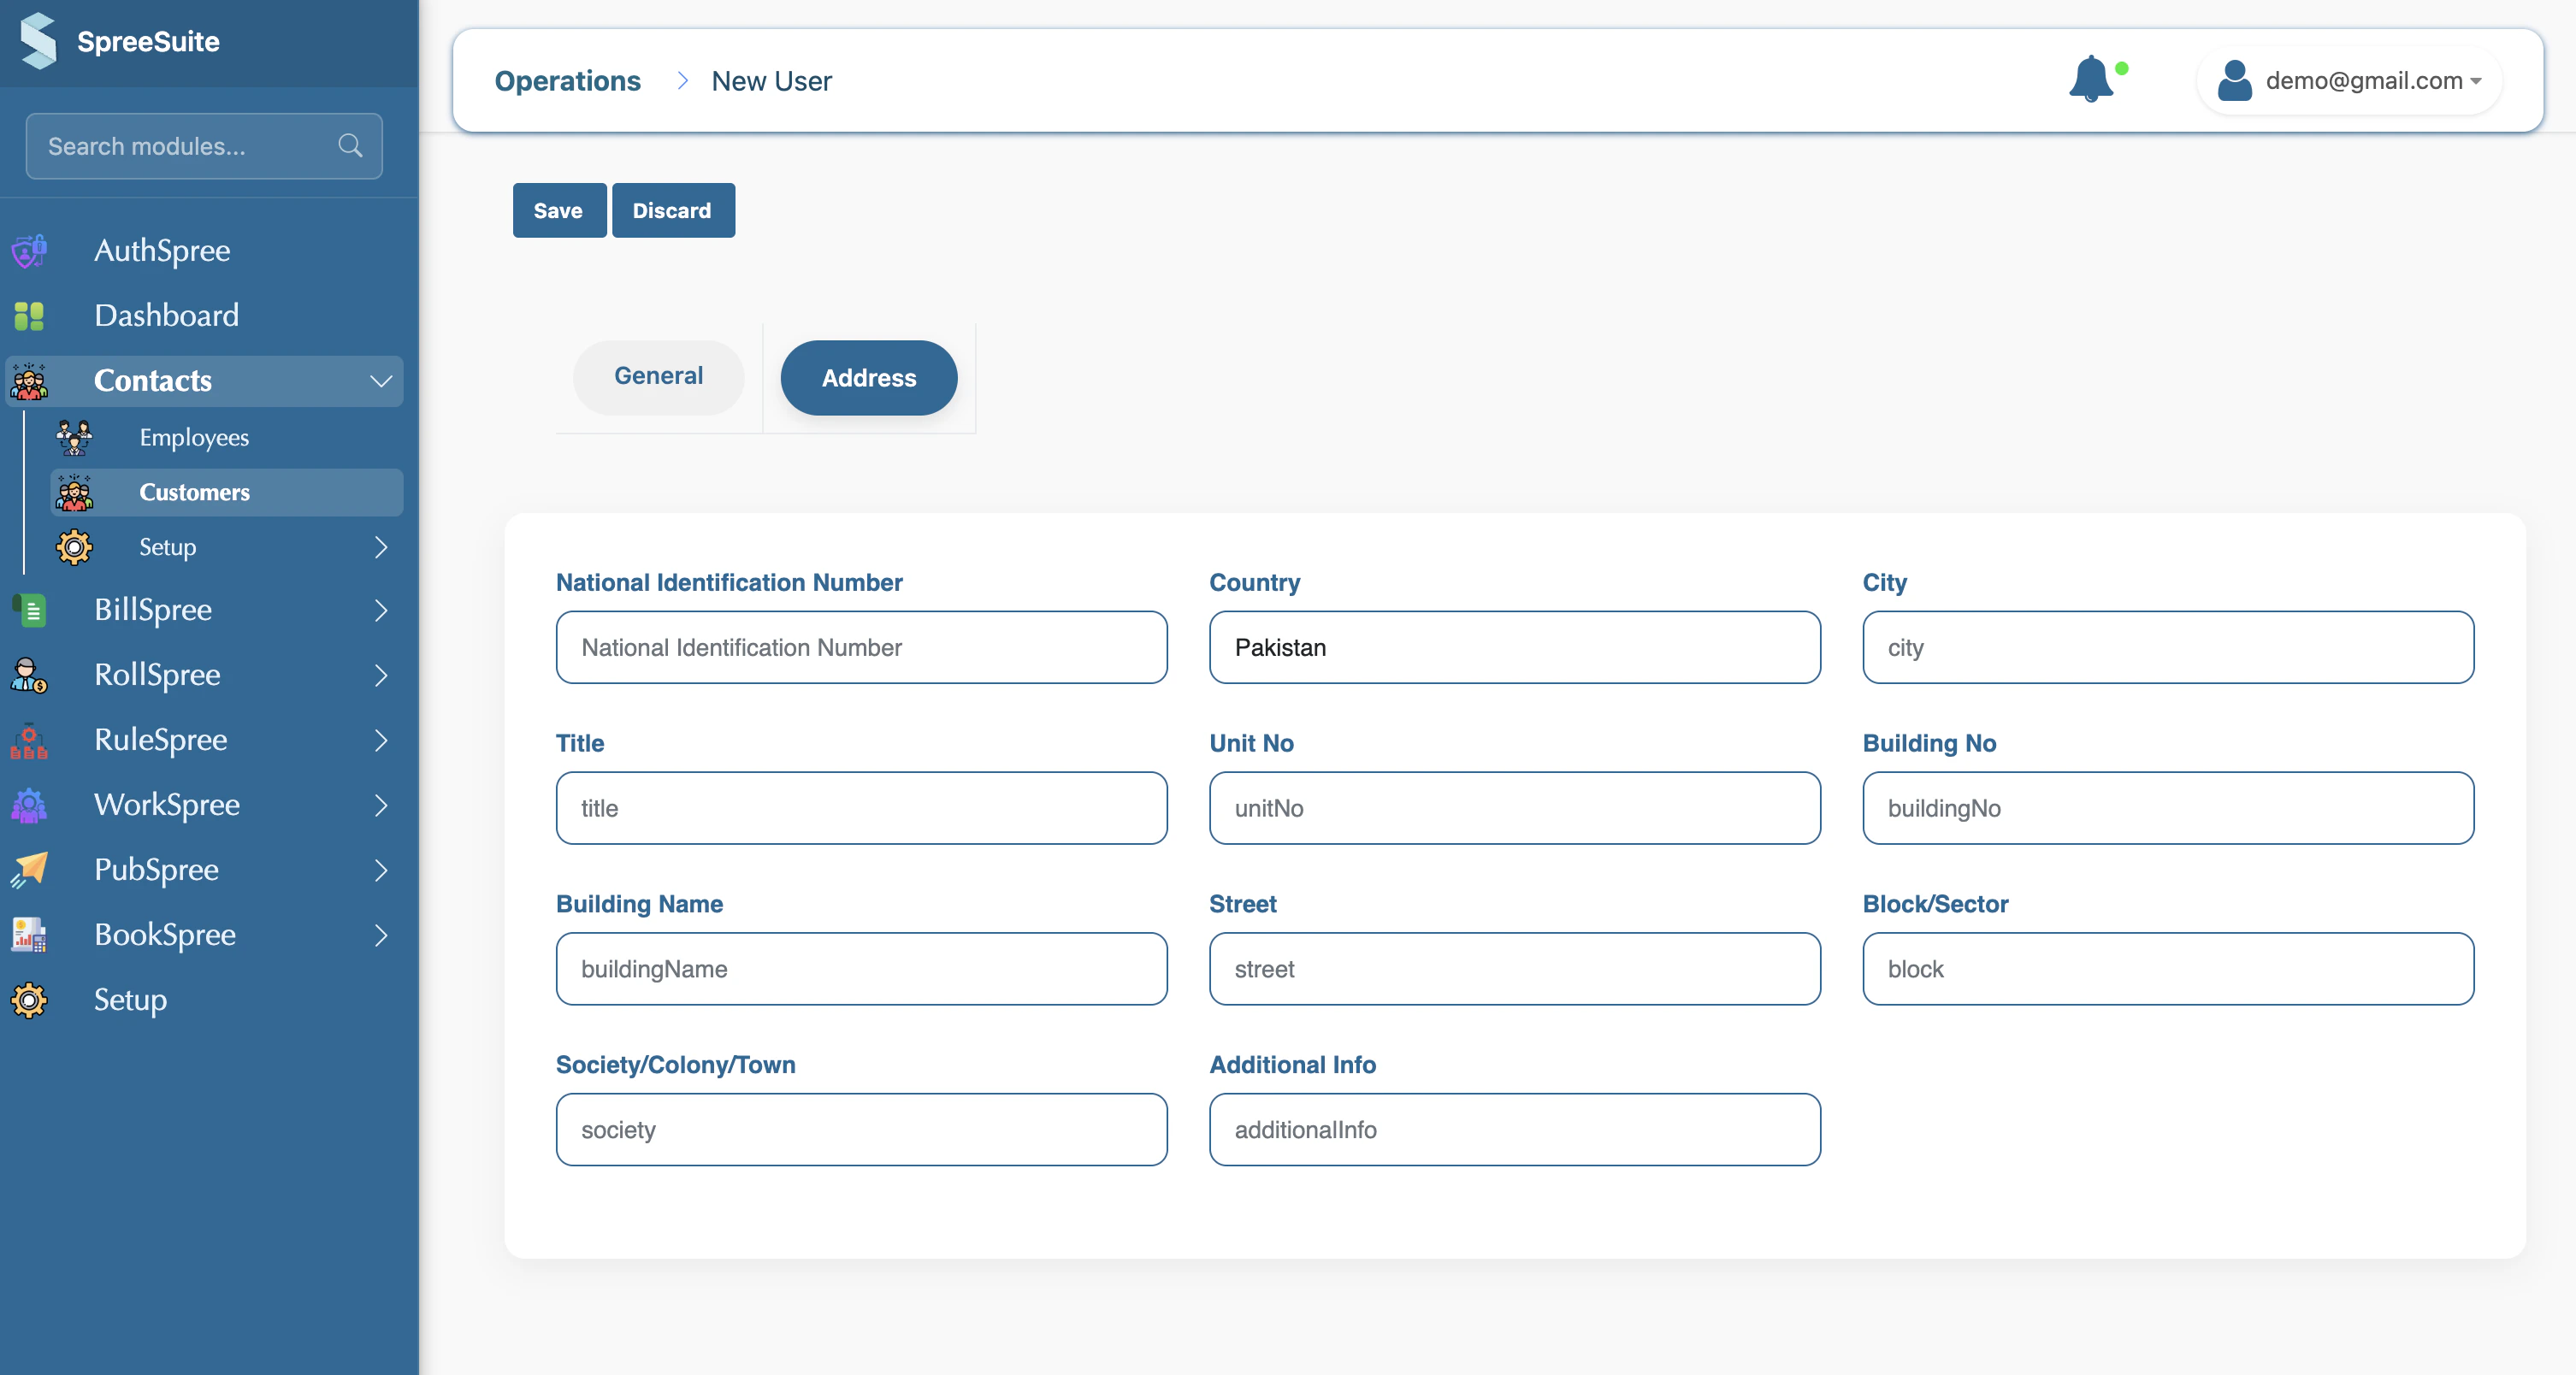
- CNIC: National identity number (if applicable in your region).
- Country: Select the customer’s country.
- Note: Other fields like Shop/Unit No, Building Name, and Street help in pinpointing the exact billing address.
Detailed Field Guide
1. General Information
| Field | Description | Requirement |
|---|---|---|
| Name | Full name of the individual or business. | Required |
| Primary email for digital invoice delivery. | Optional | |
| Phone Number | Primary contact number. | Optional |
| Reference Number | A unique ID from your legacy system or CRM. | Optional |
2. Address Information
| Field | Description |
|---|---|
| CNIC | Customer’s National Identity Card number. |
| Title | A label for the address (e.g., Home, Office). |
| Shop / Unit No | Specific unit or shop number within a building. |
| Building Name | Name or number of the building/complex. |
| Street | Name of the street or road. |
| Block / Sector | Area designation within a city. |
| Society / Colony | Broad neighborhood or township name. |
| Additional Info | Any extra details for the delivery team. |
Importing Customers in Bulk
For large-scale onboarding, you can import customers efficiently using a CSV template. This process allows you to add hundreds of customers in a single action.1. The Bulk Import Workflow
Follow these steps to successfully import your customer data:Download the Template
In the Customers dashboard, click on the Bulk Data Template button. This will download a standard 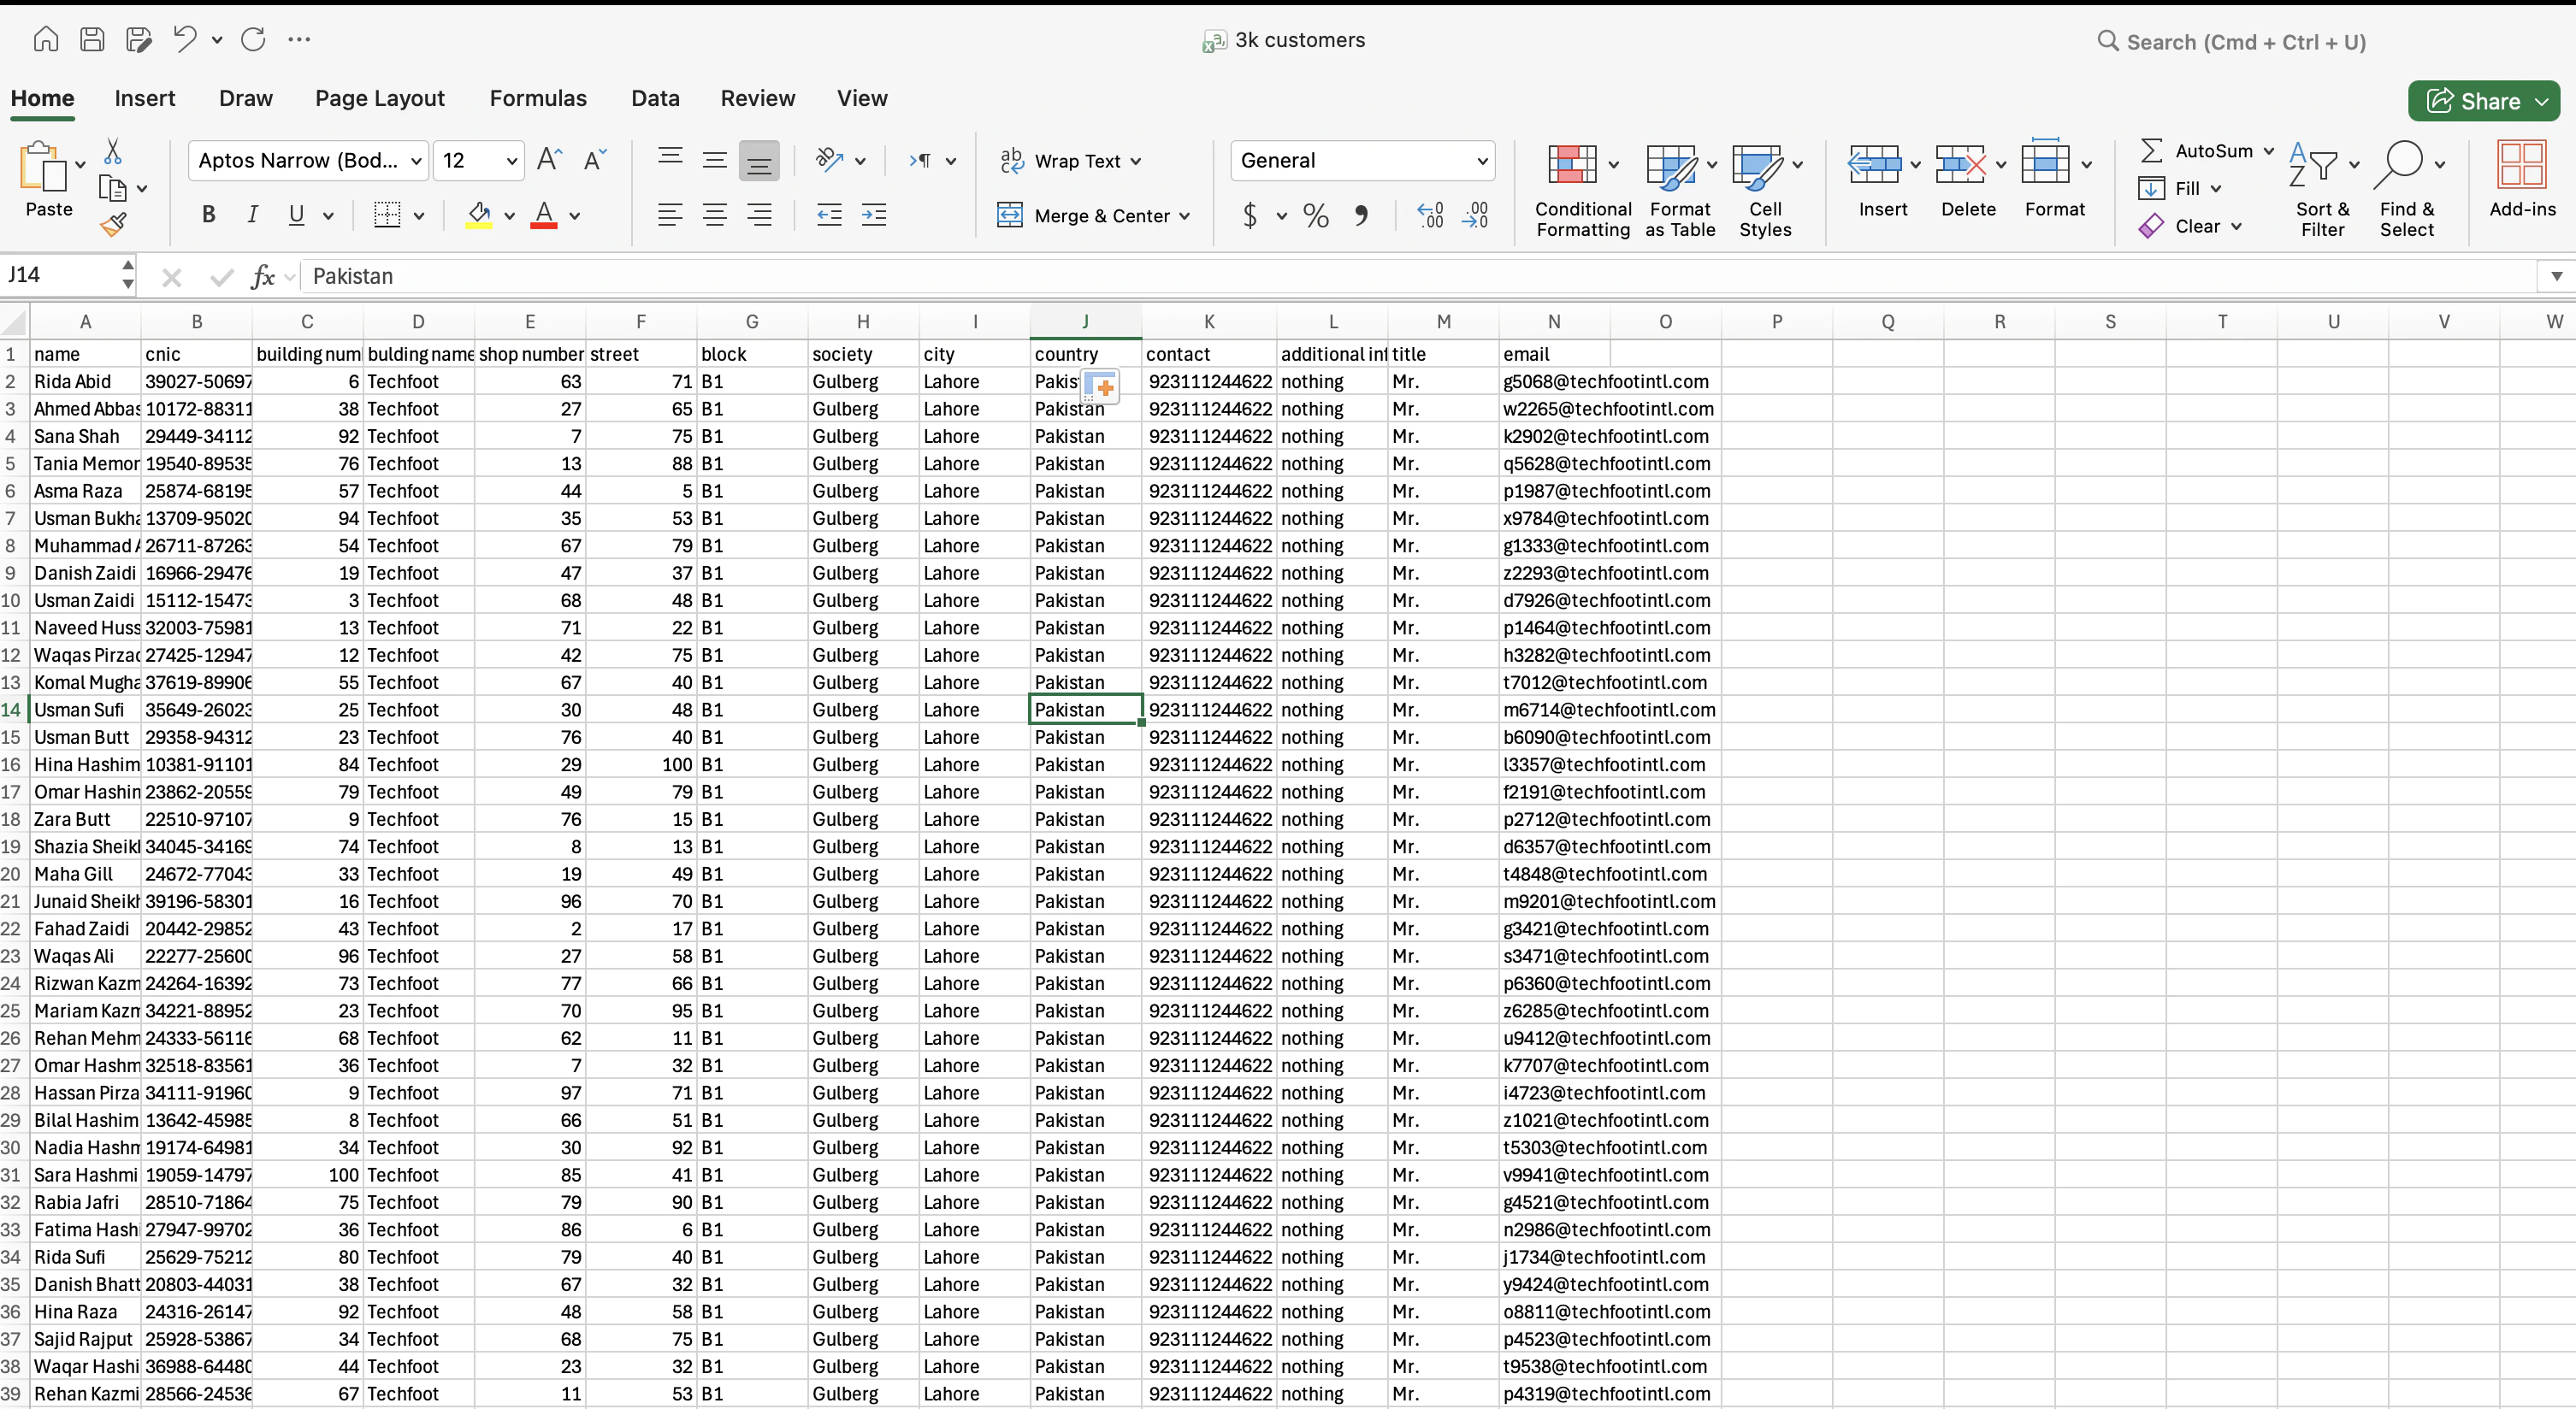
customer.csv file with all the required headers.Fill in the Data
Open the downloaded file in a spreadsheet application (like Excel or Google Sheets). Fill in the columns as per the headers:
- Mandatory Fields: Ensure the
namecolumn is populated for every row. - Optional Details: You can provide
cnic,email,contact, and detailed address information (building_name,street,city, etc.). - Identifiers: Add
reference_numberif you are migrating from another system.