> ## Documentation Index
> Fetch the complete documentation index at: https://docs.techfootintl.com/llms.txt
> Use this file to discover all available pages before exploring further.
# BillSpree Billing Strategies: B2B vs. B2C
BillSpree is a unified platform that can handle both complex enterprise contracts (B2B) and high-volume retail subscriptions (B2C). Below is the step-by-step mapping for both scenarios.
***
## 1. Unified Workflow Diagram
```mermaid theme={null}
graph TD
Start((New Customer)) --> Type{Party Type?}
subgraph B2B_Path [B2B / Recurly Model]
Type -->|Business| B1[Custom Plan / Negotiated]
B1 --> B2[Net 30/60 Terms]
B2 --> B3[Metered Usage Upload]
B3 --> B4[Manual Payment Record]
end
subgraph B2C_Path [B2C / Bunny Model]
Type -->|Individual| C1[Standard Fixed Plan]
C1 --> C2[Immediate Due Date]
C2 --> C3[Flat Subscription]
C3 --> C4[Automated Stripe Charge]
end
B4 --> End((Revenue Collected))
C4 --> End
```
***
## 2. Comparison of Models in BillSpree
| Business Need | B2B | B2C |
| :----------------- | :-------------------------------- | :------------------------------------ |
| **Customer Type** | **Business Party** (Companies) | **Individual Party** (Regular People) |
| **Pricing Model** | Custom Quotes / Volume Tiers | Fixed Monthly/Yearly Plans |
| **Billing Terms** | Net 30/60 (Invoiced) | Instant / Due on Receipt |
| **Usage Logic** | Metered Add-ons (e.g., API calls) | Flat Subscription (Access-based) |
| **Payment Method** | ACH, Wire, or Corporate Card | Credit / Debit Card Only |
***
## 3. Scenario A: B2B Workflow
This flow is designed for negotiated contracts and high-touch business relationships.
### Step-by-Step Flow:
1. **Onboarding**: Create a **Party** with the type `Business`. Capture Tax IDs and corporate billing addresses.
2. **Contracting**: Create a custom **Plan**. Use "Volume Tiering" (e.g., $0.10/unit for first 1k, $0.05/unit thereafter).
3. **Subscription**: Create a **Connection**.
* *Critical Setting*: Set **Due Date Offset** to `30`. This allows the business time to pay the invoice after receiving it.
4. **Usage Injection**: At the end of the month, upload **Metered Inputs** (e.g., total storage used or transactions processed).
5. **Invoicing**: Run the **Process** and **Post** cycle. BillSpree generates a detailed PDF breakdown.
6. **Collection**: The business pays via Bank Transfer. Go to the **Payments** module and manually record the receipt to clear the invoice.
***
## 4. Scenario B: B2C Workflow
This flow is designed for automated, high-speed, self-service subscriptions.
### Step-by-Step Flow:
Creating and configuring a Pricing Template is done directly in the admin console. Below is the step-by-step flow of how to navigate the template builder interface and configure each core structural pillar.
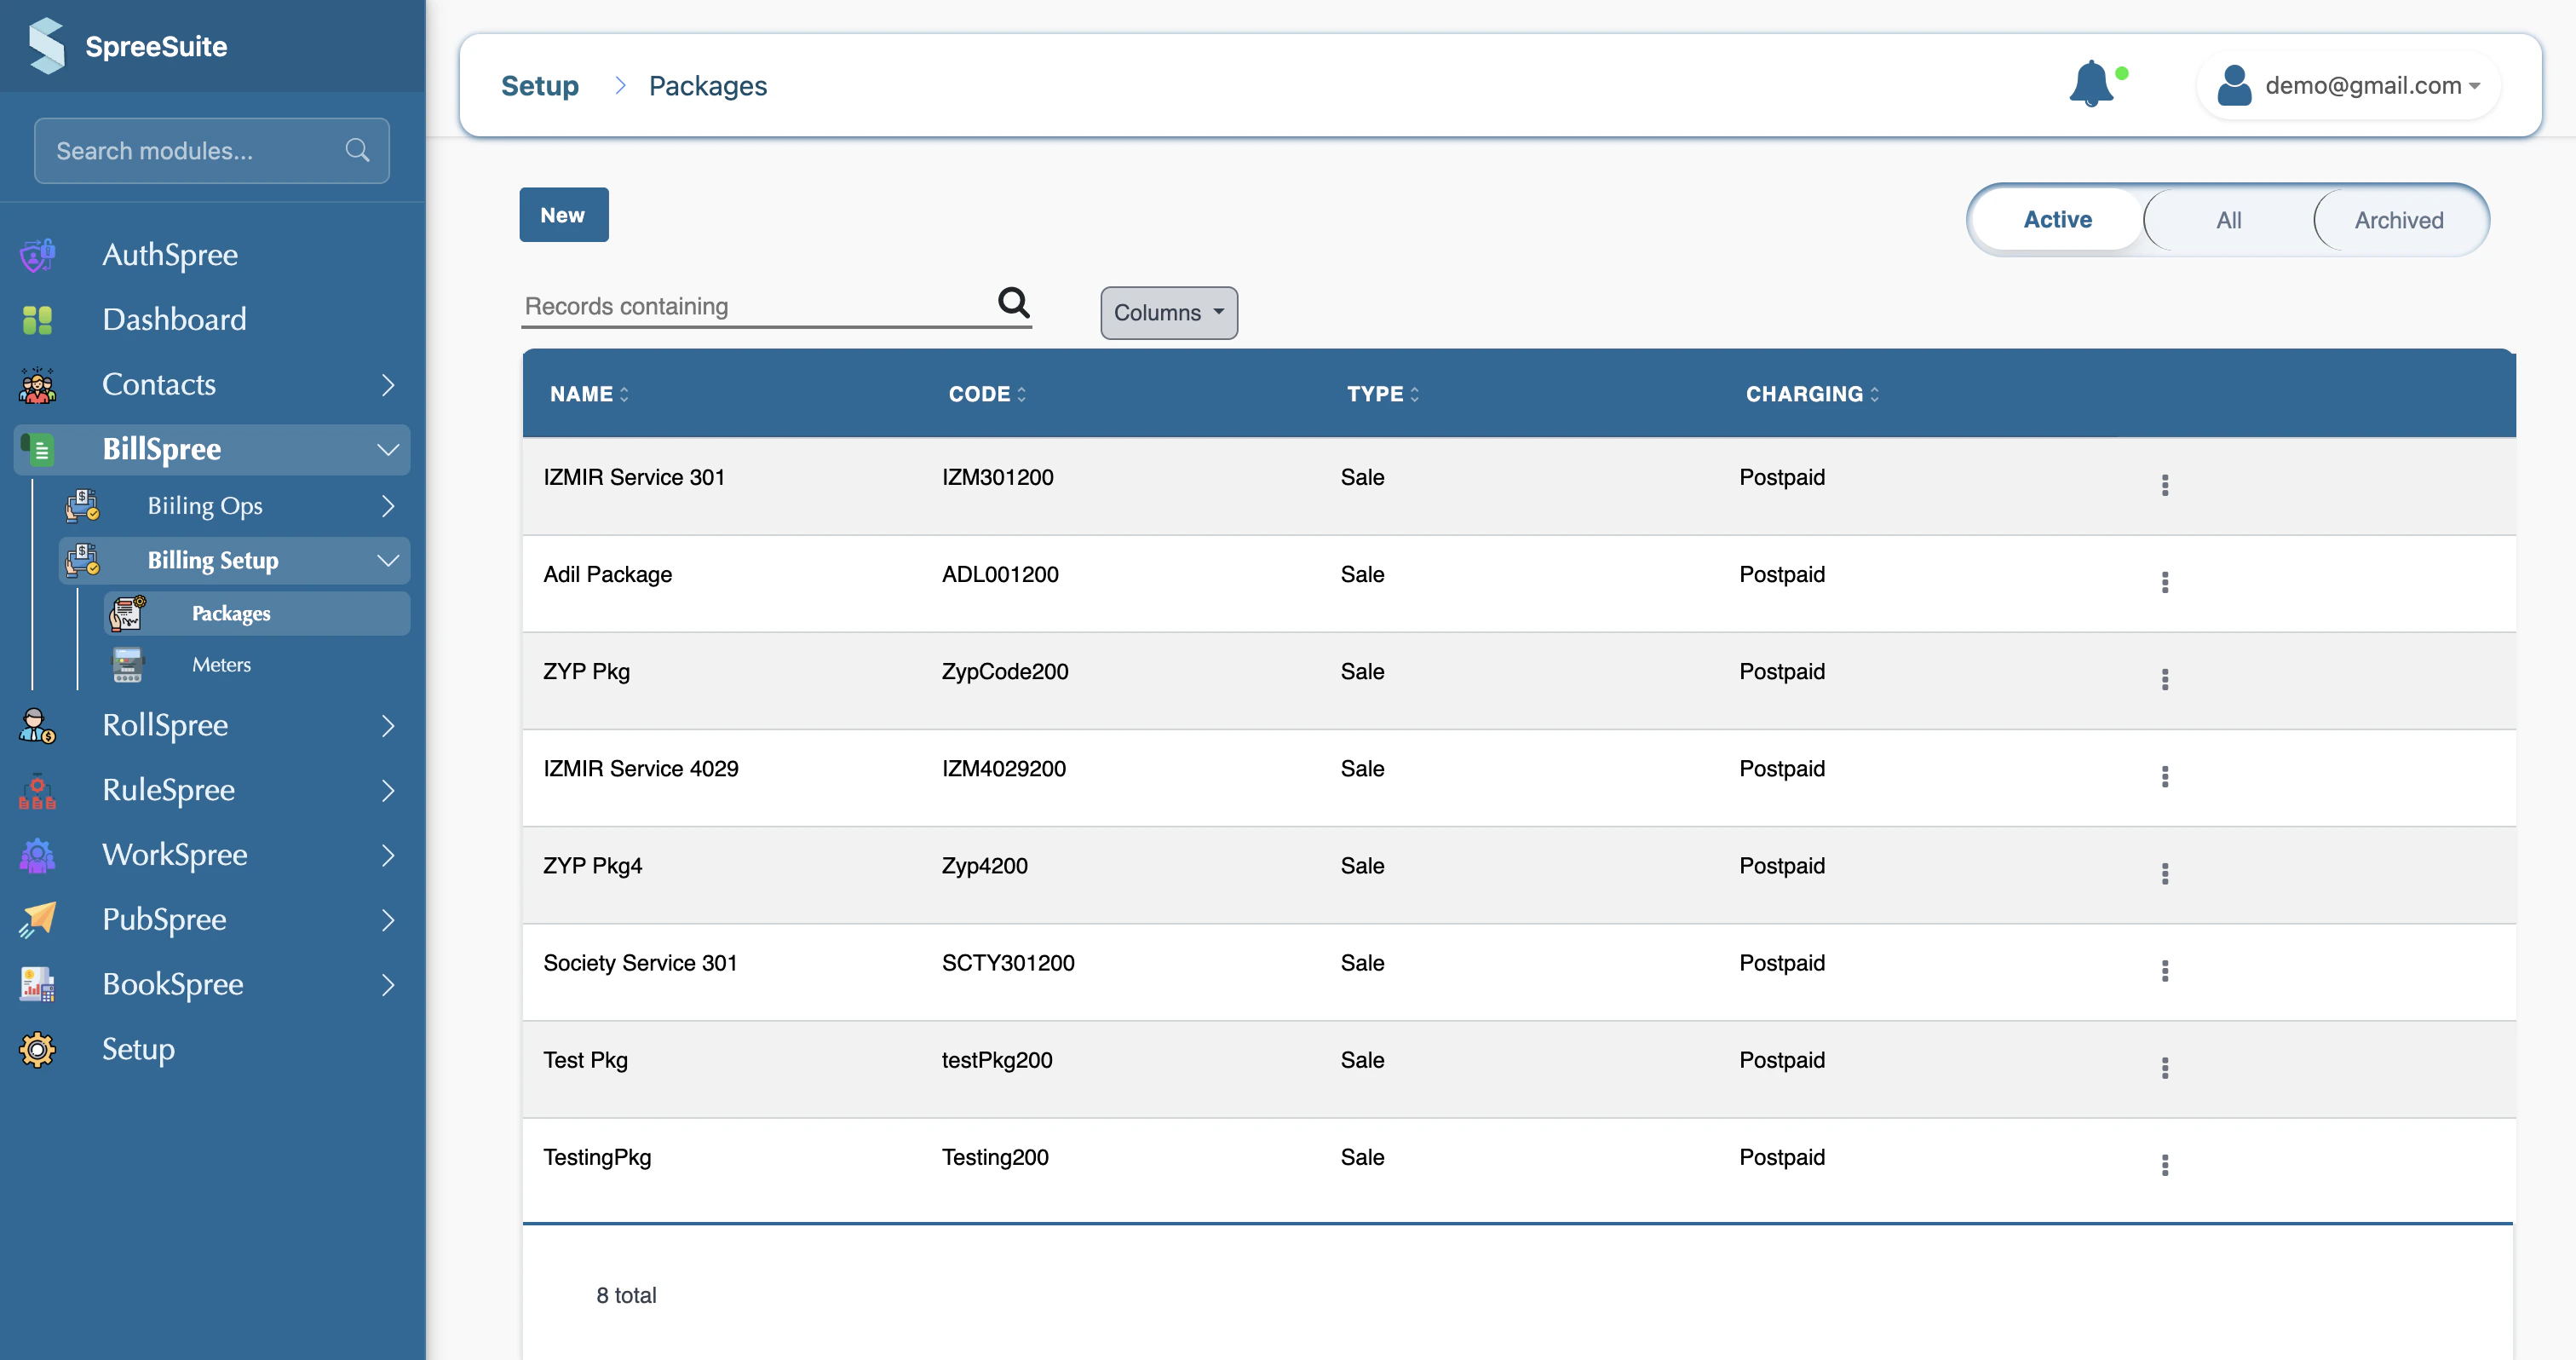
### Step 1: List Pricing Templates
Navigate to: **BillSpree** → **Billing Setup** → **Pricing Templates**. This displays the list of all existing Pricing Templates. From here, you can create, edit, archive, or open a template to manage plans and billing setups.
 ### Step 2: Create a New Template
Click on the **New** button in the upper right corner of the Pricing Templates screen to launch the template creator.
### Step 2: Create a New Template
Click on the **New** button in the upper right corner of the Pricing Templates screen to launch the template creator.
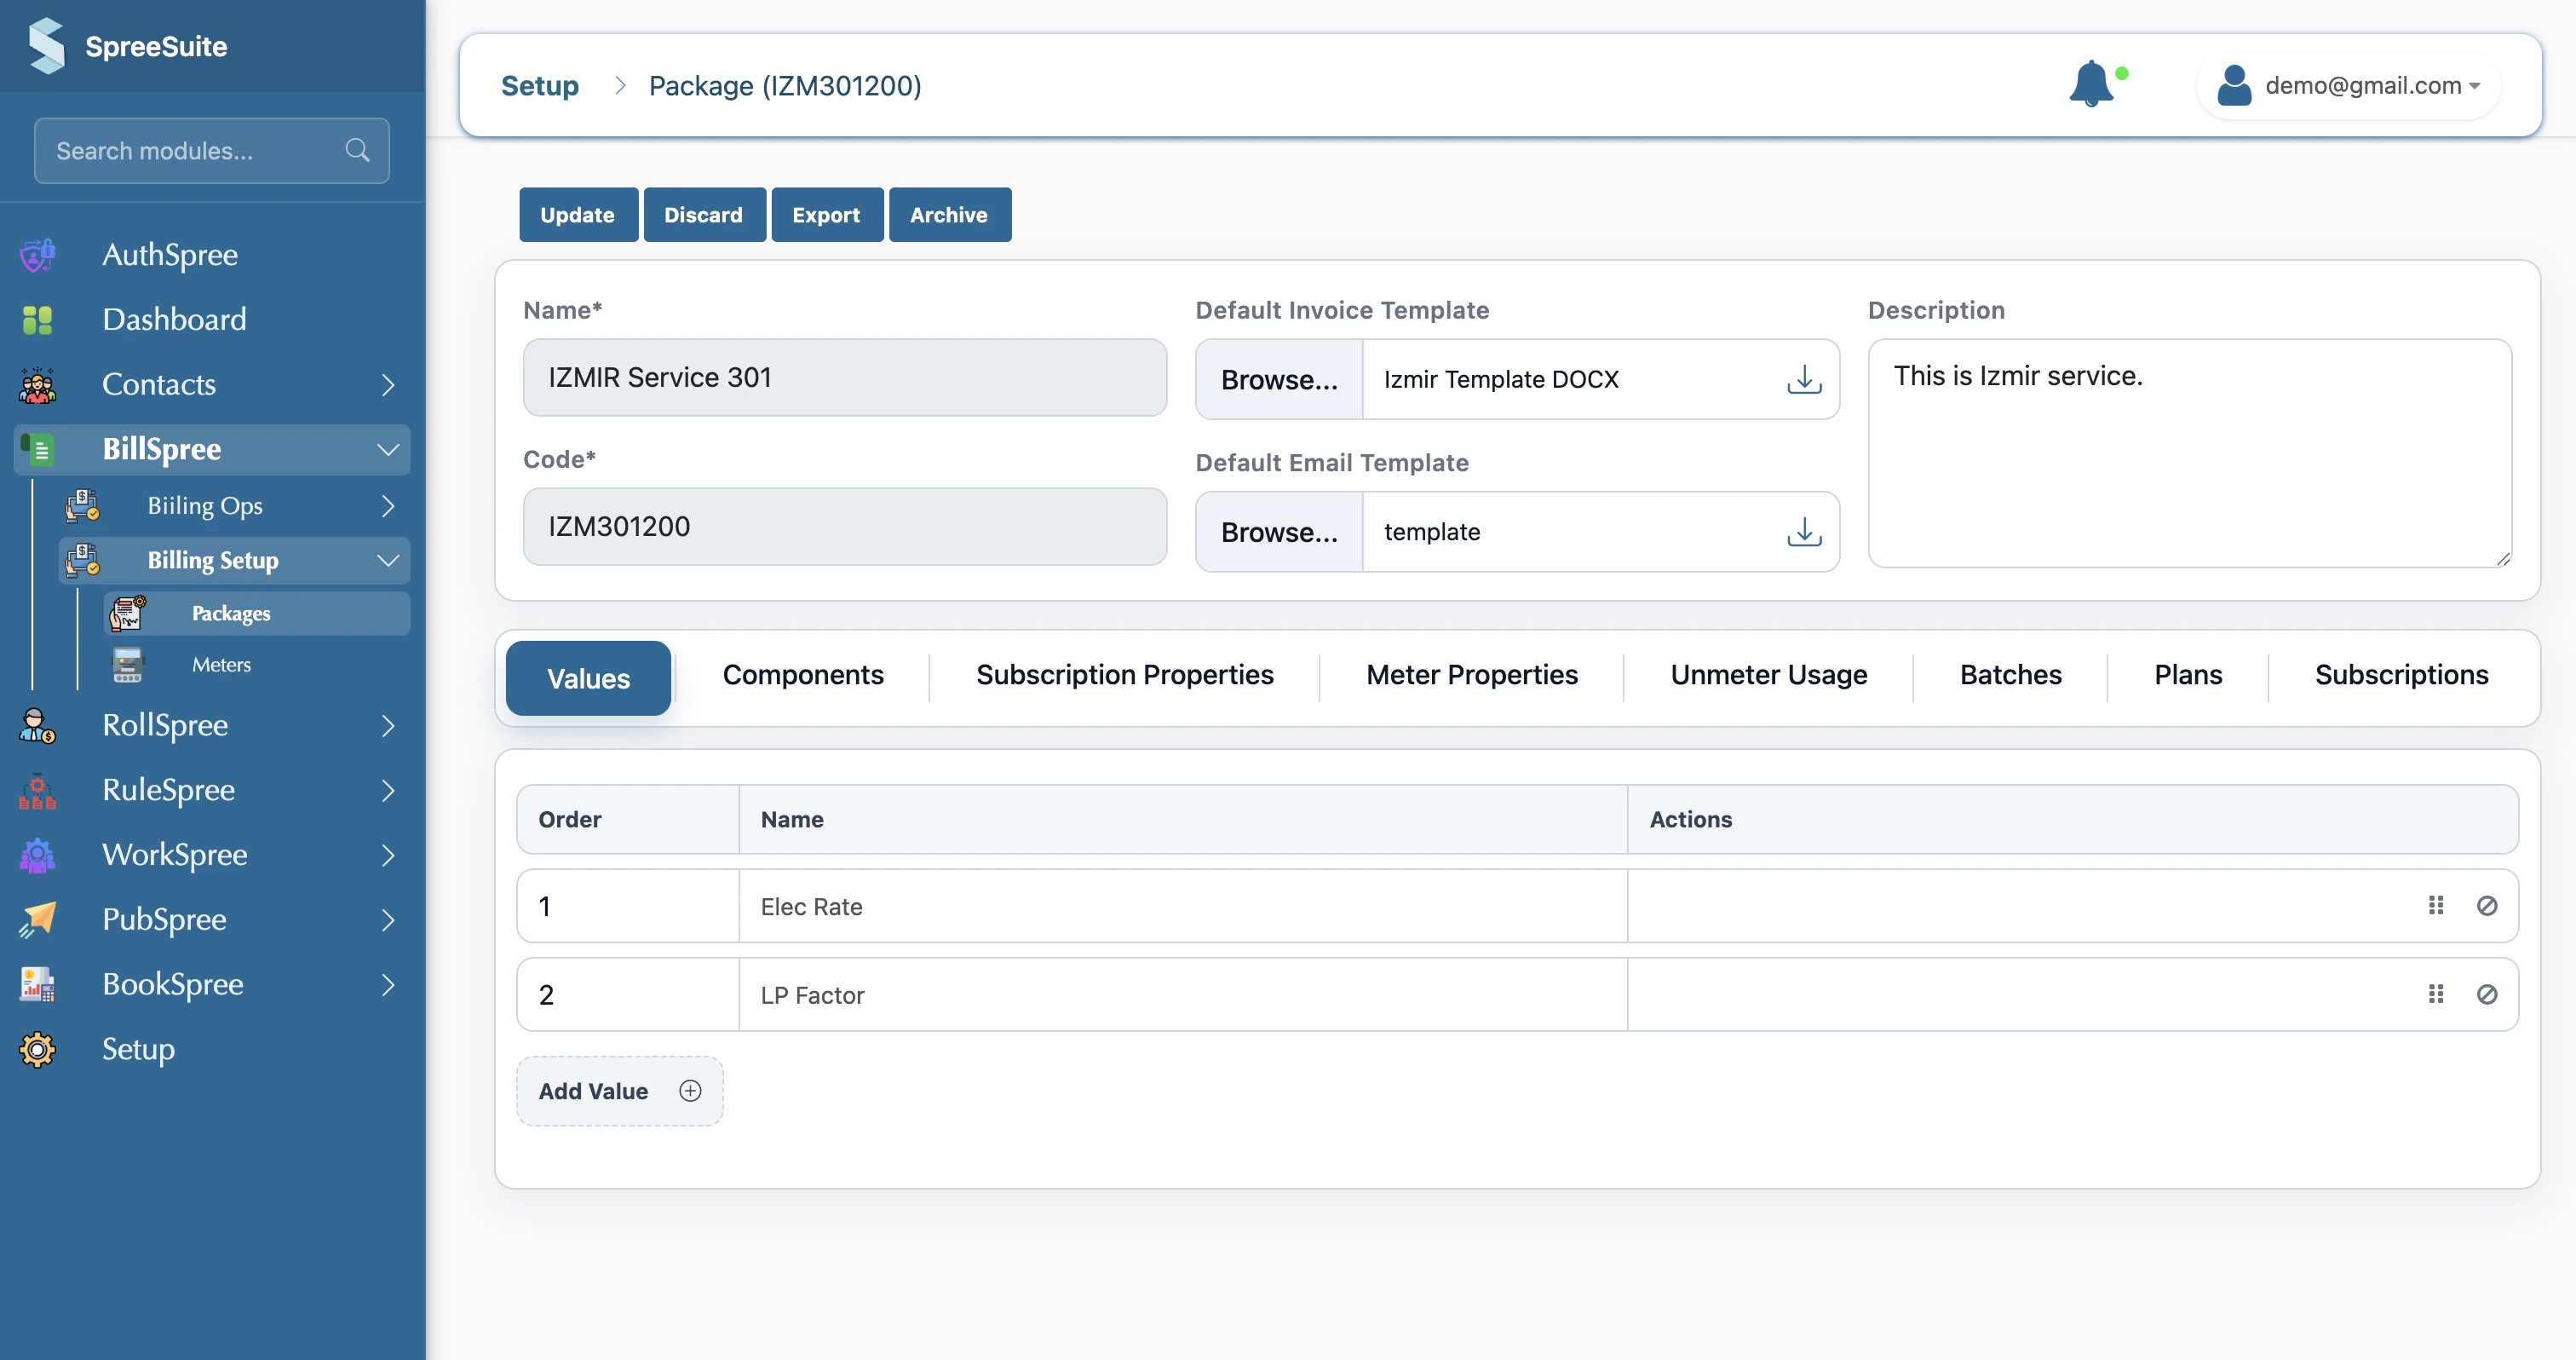
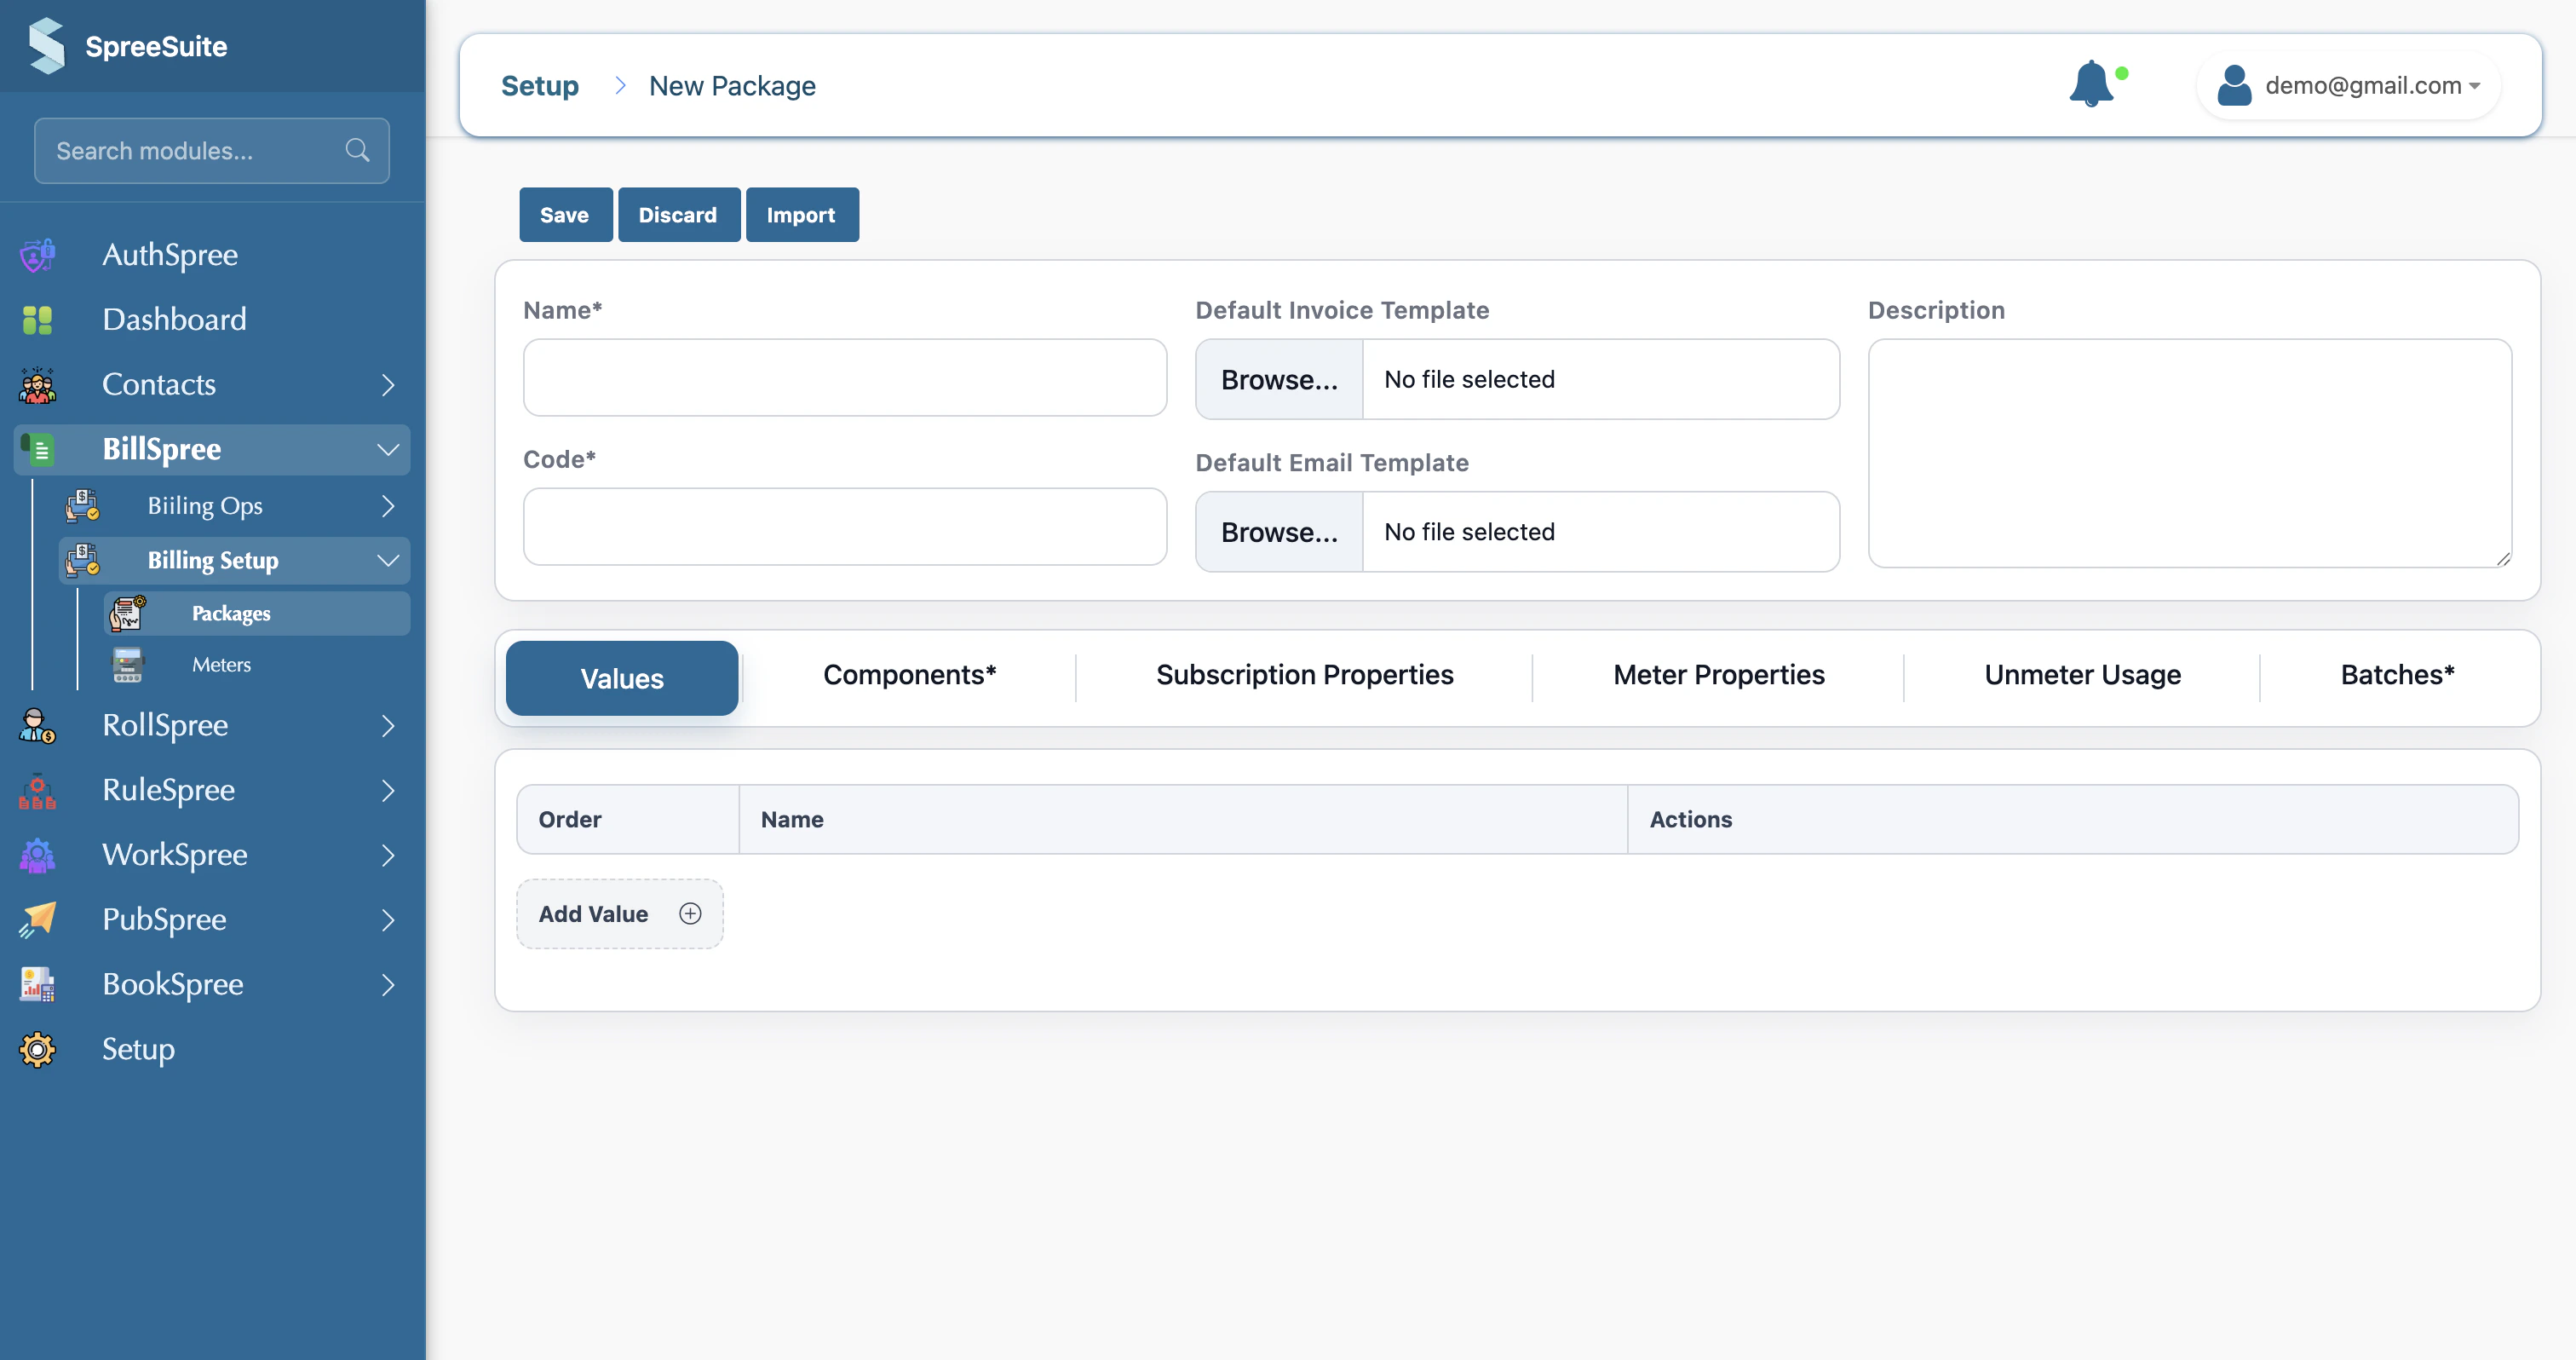 ### Step 3: Configure Identity Information & Invoice Template (The "Values" Tab)
Click on the **Values** tab. Here, you configure the core identity of the Pricing Template and attach the master bill layout:
* **Identity Information:** Define general metadata such as **Name**, **Code**, and **Description** to identify the template.
* **Invoice Template Attachment:** You can attach a master invoice template—typically a Word document (.docx)—which serves as the master visual layout for customer bills. This template contains merge placeholders (enclosed in curly braces `{}` like `{partyName}`, `{Electricity Charges}`, or `{KWH_currentReading}`) representing the Rate List components, Charge List components, and meter properties that the billing engine will automatically populate.
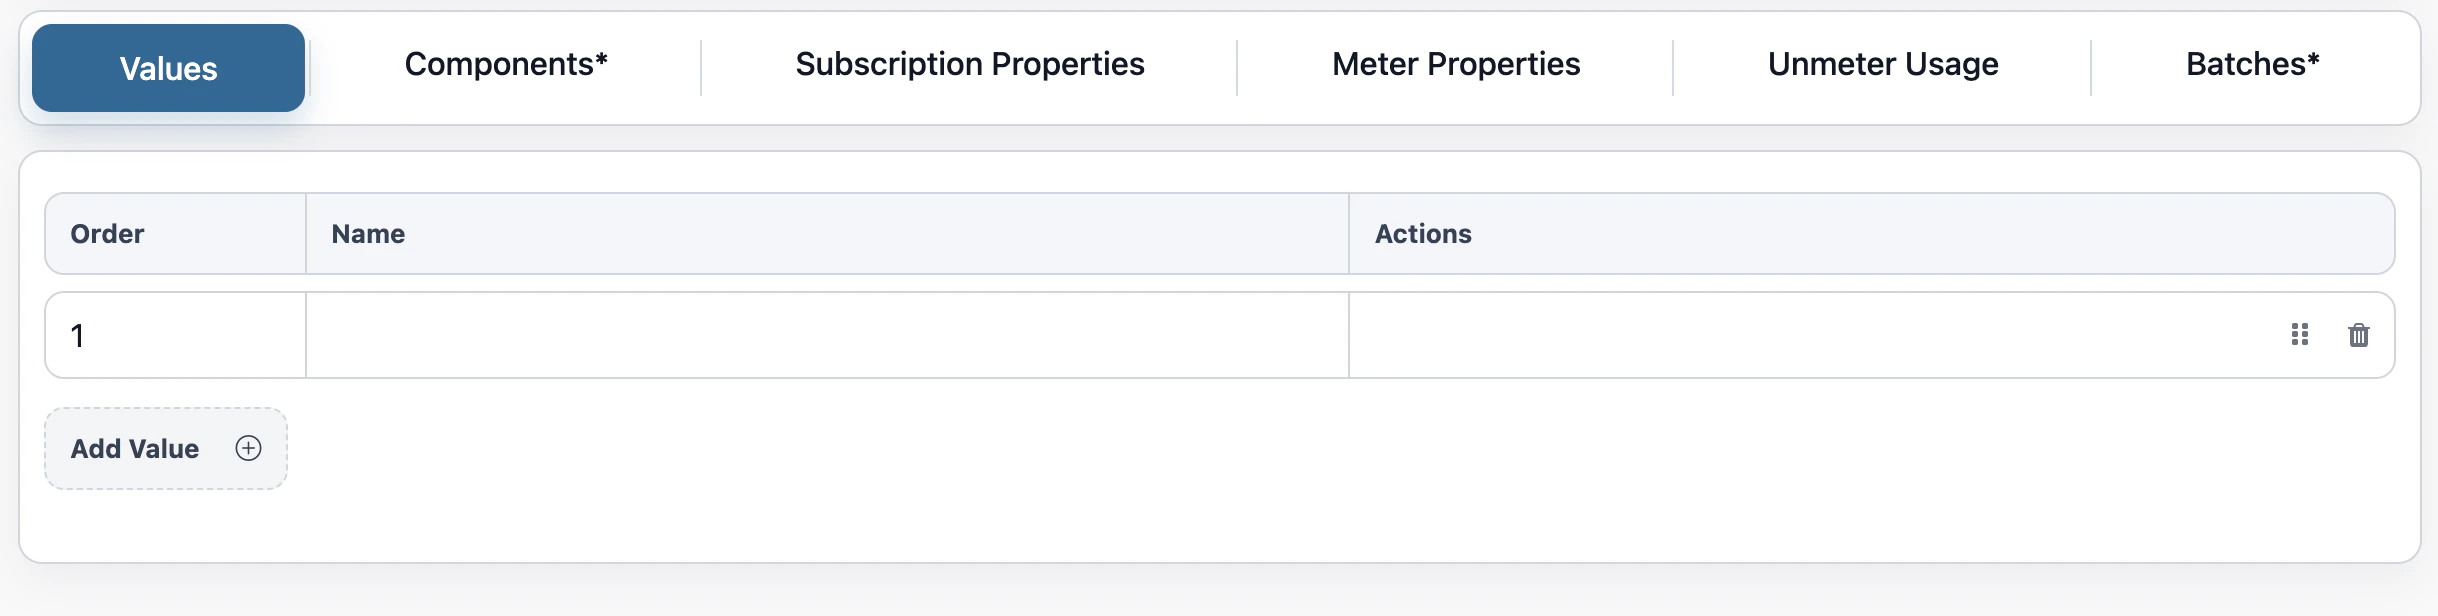
### Step 4: Configure Rate List Components (The "Values" Tab)
Within the same **Values** tab, define your **Rate List Components** (the pricing placeholders or "slots" that will have actual monetary values assigned later when creating a Plan). These placeholders should align with the Rate List fields used in your attached Invoice Template:
* **Base Pricing Slots:** Placeholders for fixed access fees (e.g., "Platform Access Fee").
* **Unit Pricing Slots:** Placeholders for consumption rates (e.g., "Per-GB Storage Rate", "Per-User License Rate").
* **Tiered Pricing Slots:** Structures for volume discounts (e.g., "First 100 API Calls", "Next 900 API Calls").
### Step 3: Configure Identity Information & Invoice Template (The "Values" Tab)
Click on the **Values** tab. Here, you configure the core identity of the Pricing Template and attach the master bill layout:
* **Identity Information:** Define general metadata such as **Name**, **Code**, and **Description** to identify the template.
* **Invoice Template Attachment:** You can attach a master invoice template—typically a Word document (.docx)—which serves as the master visual layout for customer bills. This template contains merge placeholders (enclosed in curly braces `{}` like `{partyName}`, `{Electricity Charges}`, or `{KWH_currentReading}`) representing the Rate List components, Charge List components, and meter properties that the billing engine will automatically populate.
### Step 4: Configure Rate List Components (The "Values" Tab)
Within the same **Values** tab, define your **Rate List Components** (the pricing placeholders or "slots" that will have actual monetary values assigned later when creating a Plan). These placeholders should align with the Rate List fields used in your attached Invoice Template:
* **Base Pricing Slots:** Placeholders for fixed access fees (e.g., "Platform Access Fee").
* **Unit Pricing Slots:** Placeholders for consumption rates (e.g., "Per-GB Storage Rate", "Per-User License Rate").
* **Tiered Pricing Slots:** Structures for volume discounts (e.g., "First 100 API Calls", "Next 900 API Calls").
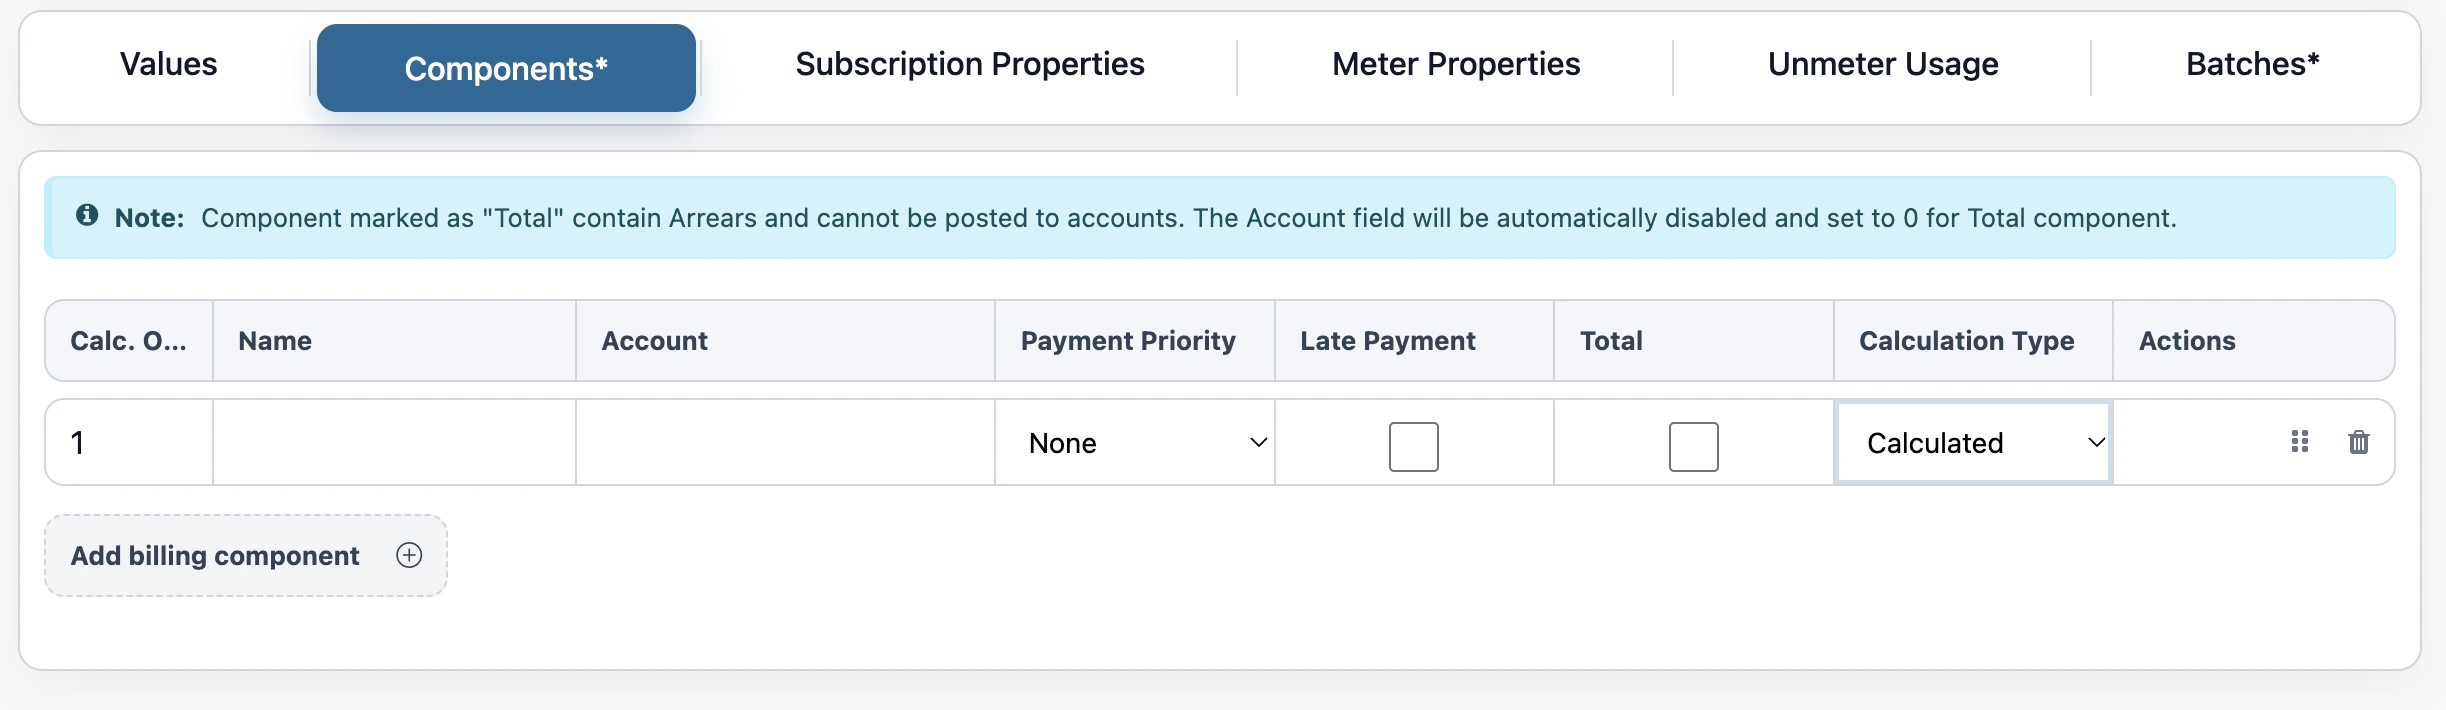
 ### Step 5: Configure Charge List Components (The "Component" Tab)
Click on the **Component** tab. This is where you configure your **Charge List Components**—the core calculation models that process rates, properties, and usage into final invoice line items. These are divided into:
* **Calculated Charge Components (Require Rating Rules):** Dynamically computed by the system's billing engine and *must* have Rating Rules governing their execution (e.g., "State/VAT Tax Calculations", "Regional Surcharges", or "Percentage-based Partner Discounts").
* **Manual Charge Components (No Rating Rules Required):** Fixed, static, or ad-hoc items that require no automated computation (e.g., one-off flat adjustments, discretionary service credits, or custom professional services).
### Step 5: Configure Charge List Components (The "Component" Tab)
Click on the **Component** tab. This is where you configure your **Charge List Components**—the core calculation models that process rates, properties, and usage into final invoice line items. These are divided into:
* **Calculated Charge Components (Require Rating Rules):** Dynamically computed by the system's billing engine and *must* have Rating Rules governing their execution (e.g., "State/VAT Tax Calculations", "Regional Surcharges", or "Percentage-based Partner Discounts").
* **Manual Charge Components (No Rating Rules Required):** Fixed, static, or ad-hoc items that require no automated computation (e.g., one-off flat adjustments, discretionary service credits, or custom professional services).
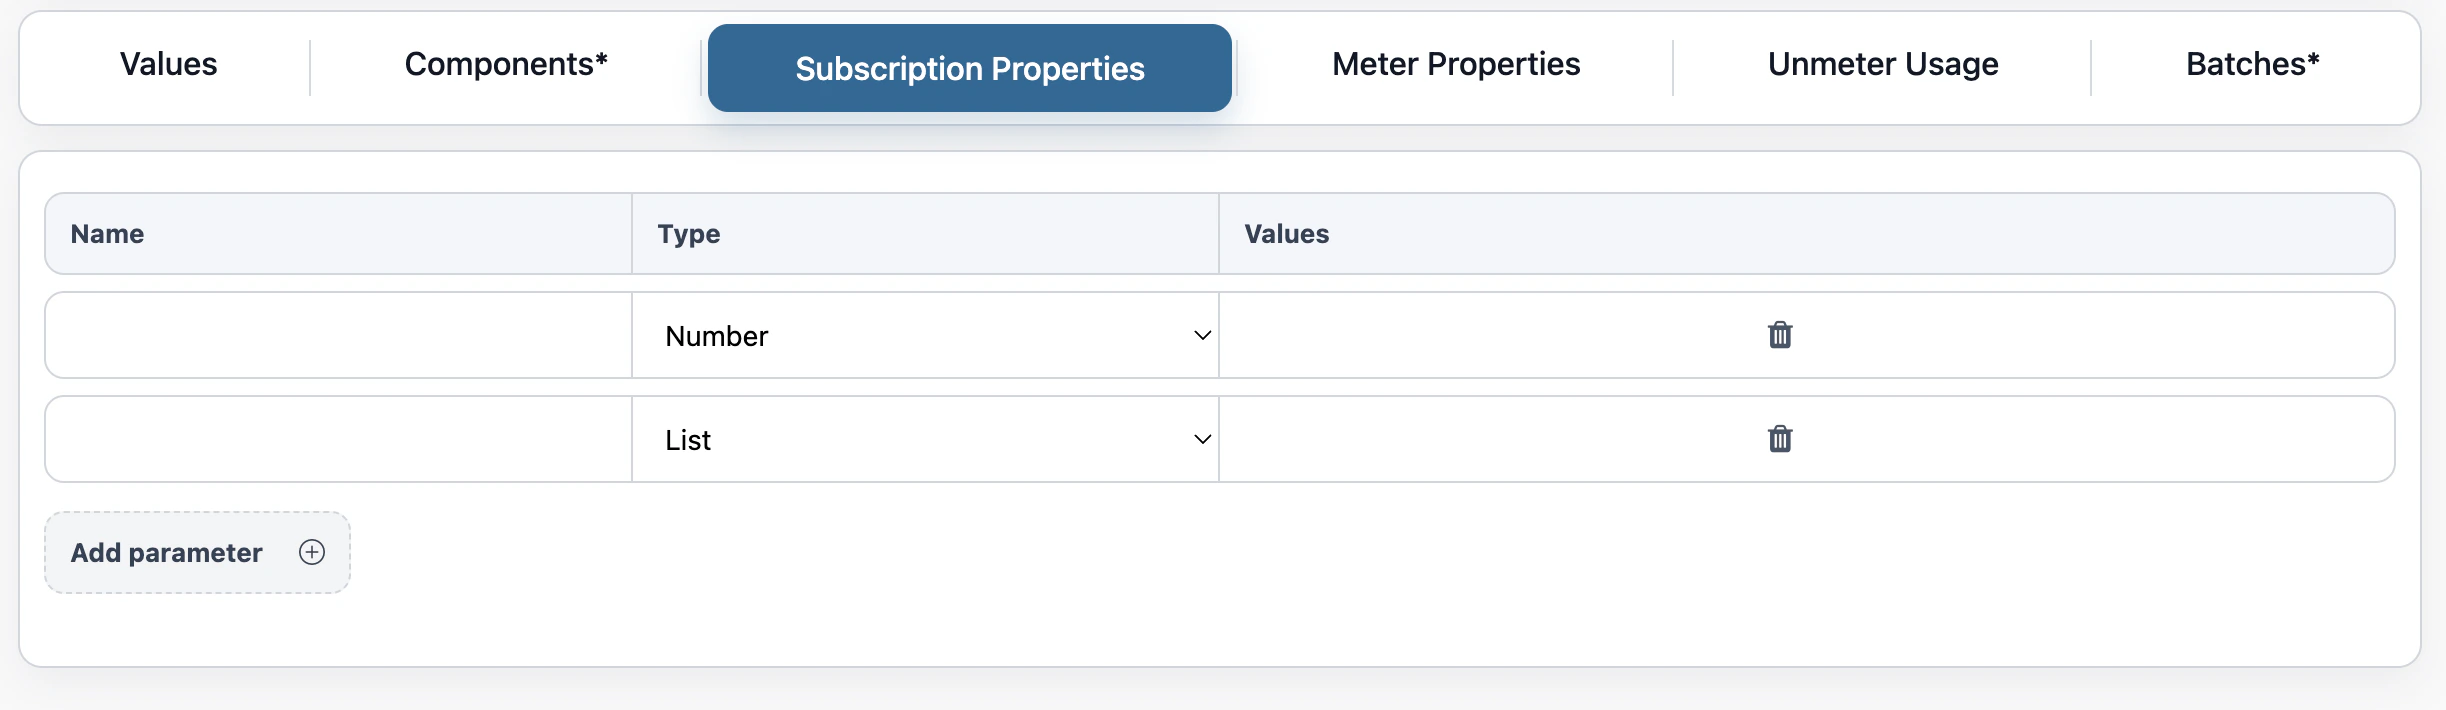
 ### Step 6: Configure Subscription Properties (The "Subscription Properties" Tab)
Click on the **Subscription Properties** tab. Here, you set up the dynamic data parameter fields (the "customer profile" hooks) required from the customer during checkout and used as inputs for your rating rules:
* **Number Inputs:** Numeric fields (e.g., `Committed_Seats`, `Included_API_Quota`).
* **Dropdown Lists:** Pre-defined text selections (e.g., `SLA_Level`: \["Gold", "Silver", "Bronze"], `Deployment_Region`: \["US-East", "EU-West"]).
* **Yes/No Flags:** Simple toggles (e.g., `Is_Tax_Exempt`, `Has_Premium_Support`).
### Step 6: Configure Subscription Properties (The "Subscription Properties" Tab)
Click on the **Subscription Properties** tab. Here, you set up the dynamic data parameter fields (the "customer profile" hooks) required from the customer during checkout and used as inputs for your rating rules:
* **Number Inputs:** Numeric fields (e.g., `Committed_Seats`, `Included_API_Quota`).
* **Dropdown Lists:** Pre-defined text selections (e.g., `SLA_Level`: \["Gold", "Silver", "Bronze"], `Deployment_Region`: \["US-East", "EU-West"]).
* **Yes/No Flags:** Simple toggles (e.g., `Is_Tax_Exempt`, `Has_Premium_Support`).
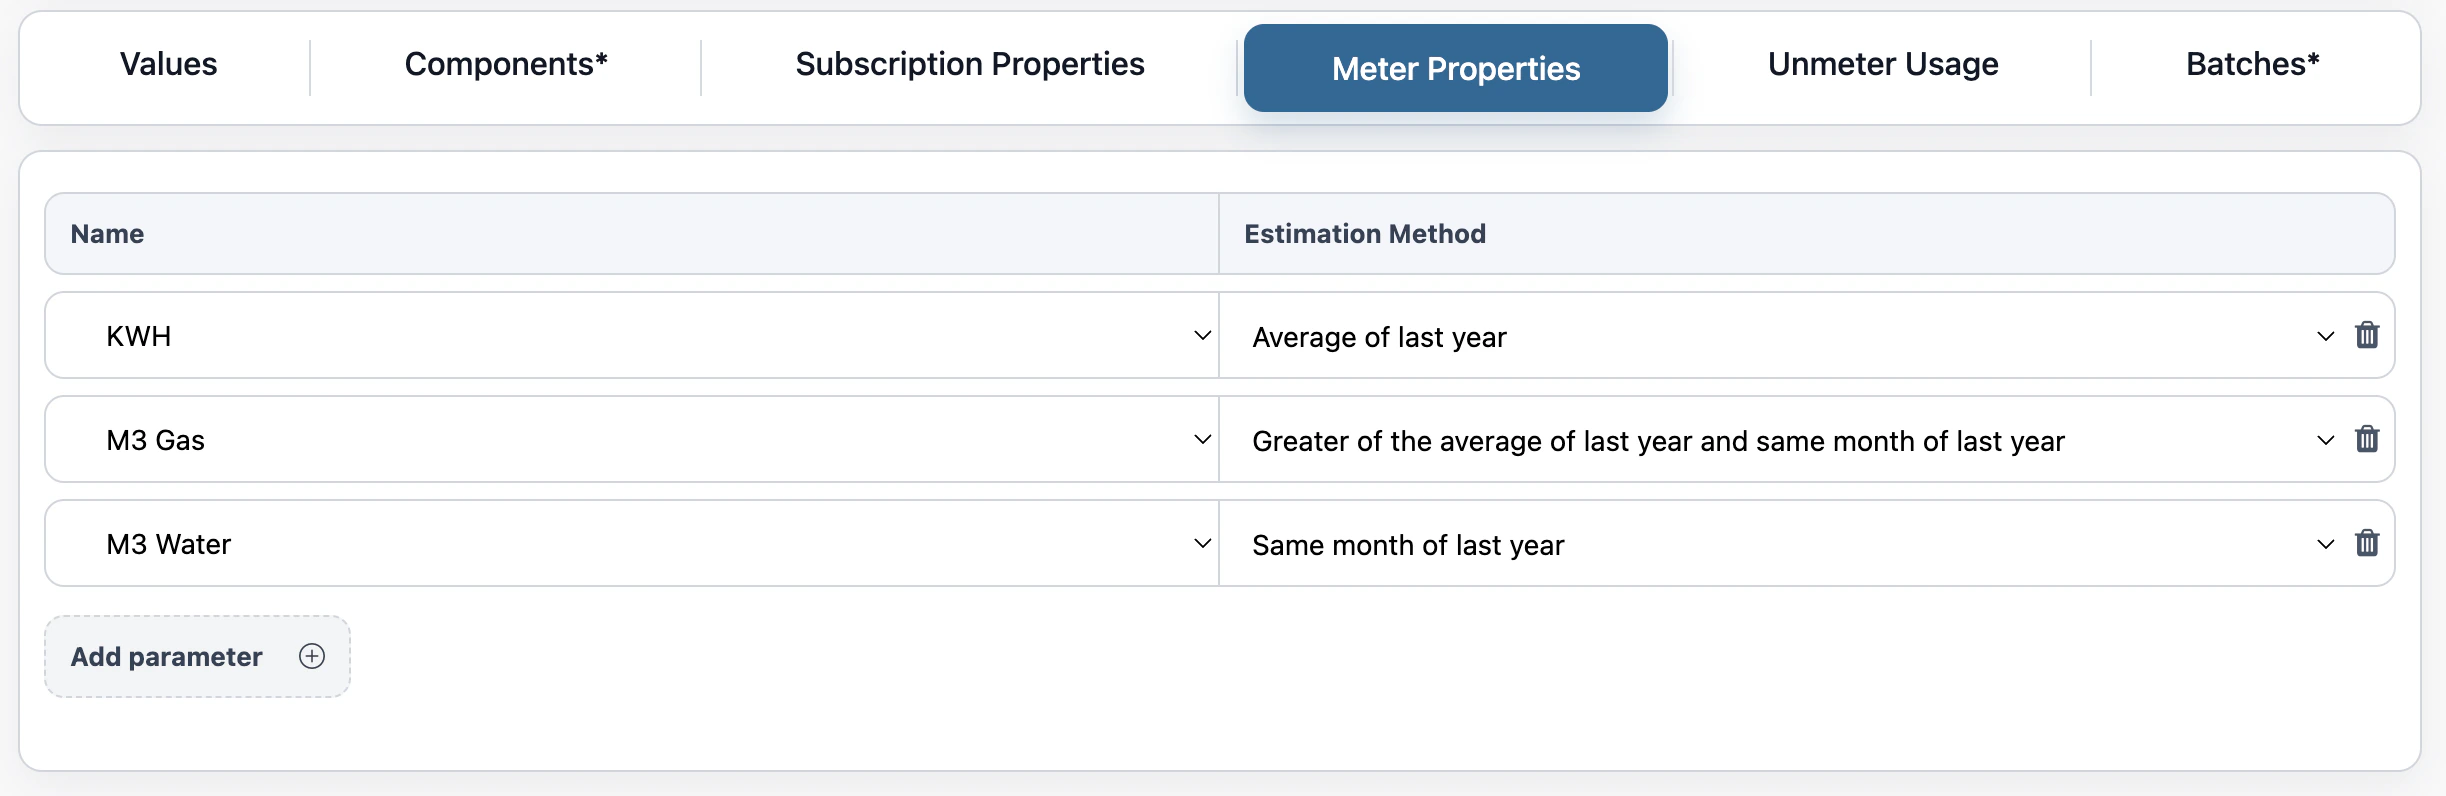
 ### Step 7: Configure Metered Usage (The "Meter Properties" Tab)
Click on the **Meter Properties** tab. Define the tracking hooks to receive **final readings** from a physical or digital meter where continuous/odometer tracking is involved:
* **Odometer / Continuous Readings:** The billing engine expects to receive final/current readings at the end of the billing cycle. It then calculates the net usage by subtracting the previous reading recorded in the previous bill (`Net Consumption = Current Cycle Final Reading - Previous Cycle Final Reading`).
* *Example:* An energy meter reads `15,000 kWh` this month. Last month it read `14,200 kWh`. The billing engine rates the net `800 kWh`.
### Step 7: Configure Metered Usage (The "Meter Properties" Tab)
Click on the **Meter Properties** tab. Define the tracking hooks to receive **final readings** from a physical or digital meter where continuous/odometer tracking is involved:
* **Odometer / Continuous Readings:** The billing engine expects to receive final/current readings at the end of the billing cycle. It then calculates the net usage by subtracting the previous reading recorded in the previous bill (`Net Consumption = Current Cycle Final Reading - Previous Cycle Final Reading`).
* *Example:* An energy meter reads `15,000 kWh` this month. Last month it read `14,200 kWh`. The billing engine rates the net `800 kWh`.
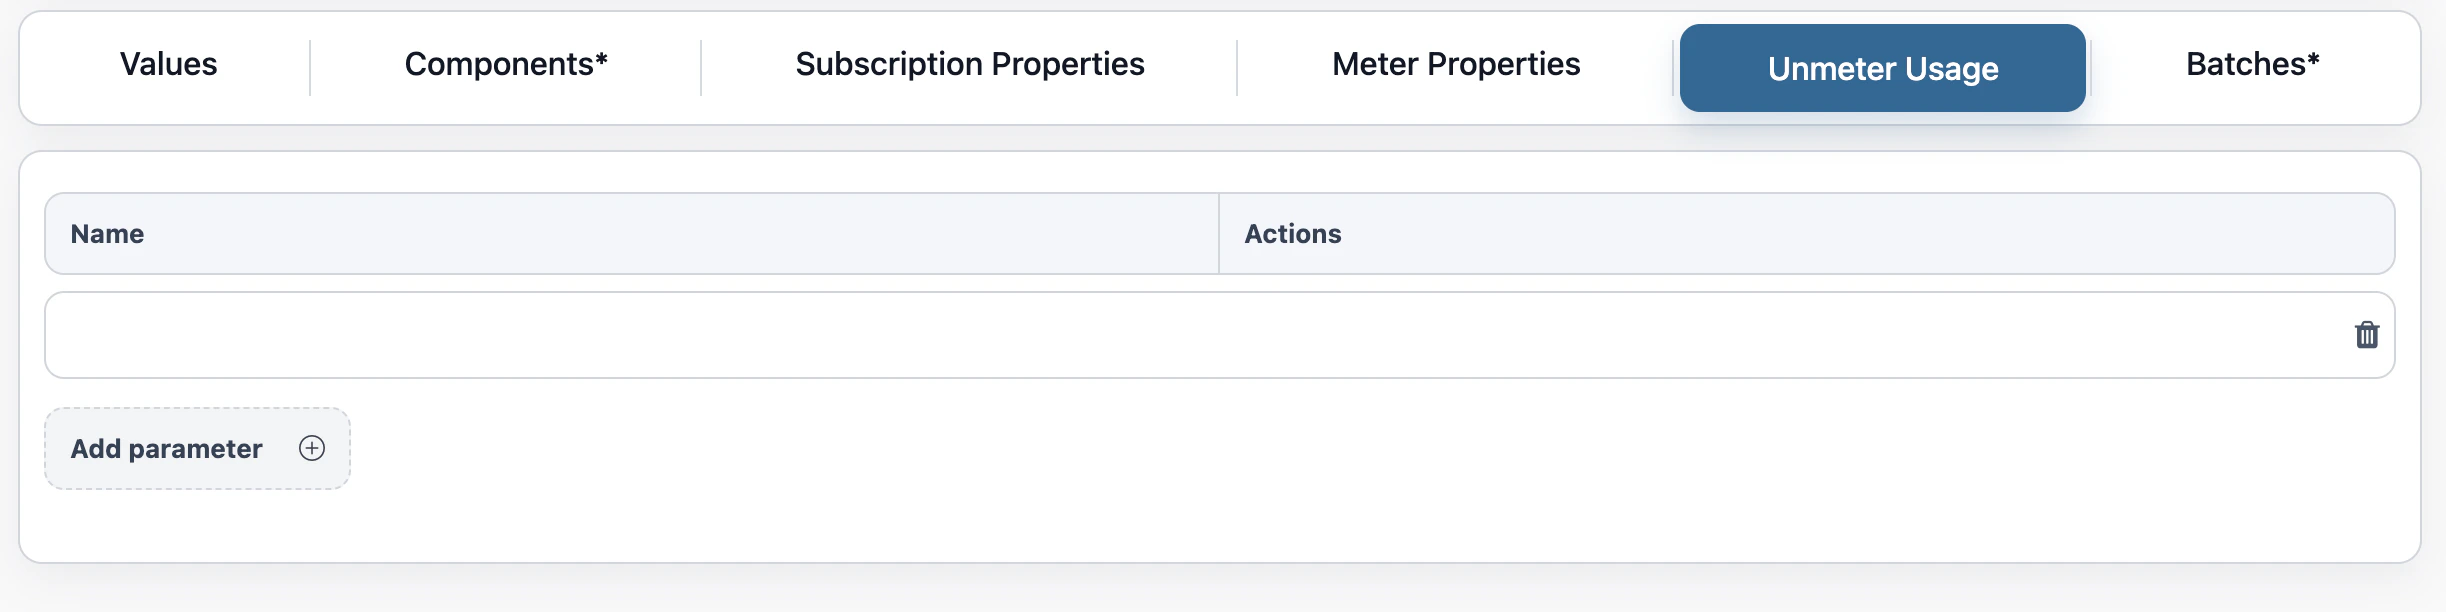
 ### Step 8: Configure Unmetered Usage (The "Unmetered Usage" Tab)
Click on the **Unmetered Usage** tab. Set up hooks to receive direct, already calculated consumption amounts (**delta usage**) where no continuous meter is involved:
* Since the provided data is already the net consumption volume, the billing engine does not need to perform any subtraction or difference calculations.
* *Examples:* Receiving a direct record of `50 GB` of bandwidth consumed or `10 hours` of support time delivered during the billing period.
### Step 8: Configure Unmetered Usage (The "Unmetered Usage" Tab)
Click on the **Unmetered Usage** tab. Set up hooks to receive direct, already calculated consumption amounts (**delta usage**) where no continuous meter is involved:
* Since the provided data is already the net consumption volume, the billing engine does not need to perform any subtraction or difference calculations.
* *Examples:* Receiving a direct record of `50 GB` of bandwidth consumed or `10 hours` of support time delivered during the billing period.
 ***
## Pricing Template Setup
1- Setup Pricing Template first.
***
## Pricing Template Setup
1- Setup Pricing Template first.
 [Setup Pricing Template →](/billing/package)
***
## Base Plan Setup
1. Click on the Plan Variants tab
[Setup Pricing Template →](/billing/package)
***
## Base Plan Setup
1. Click on the Plan Variants tab
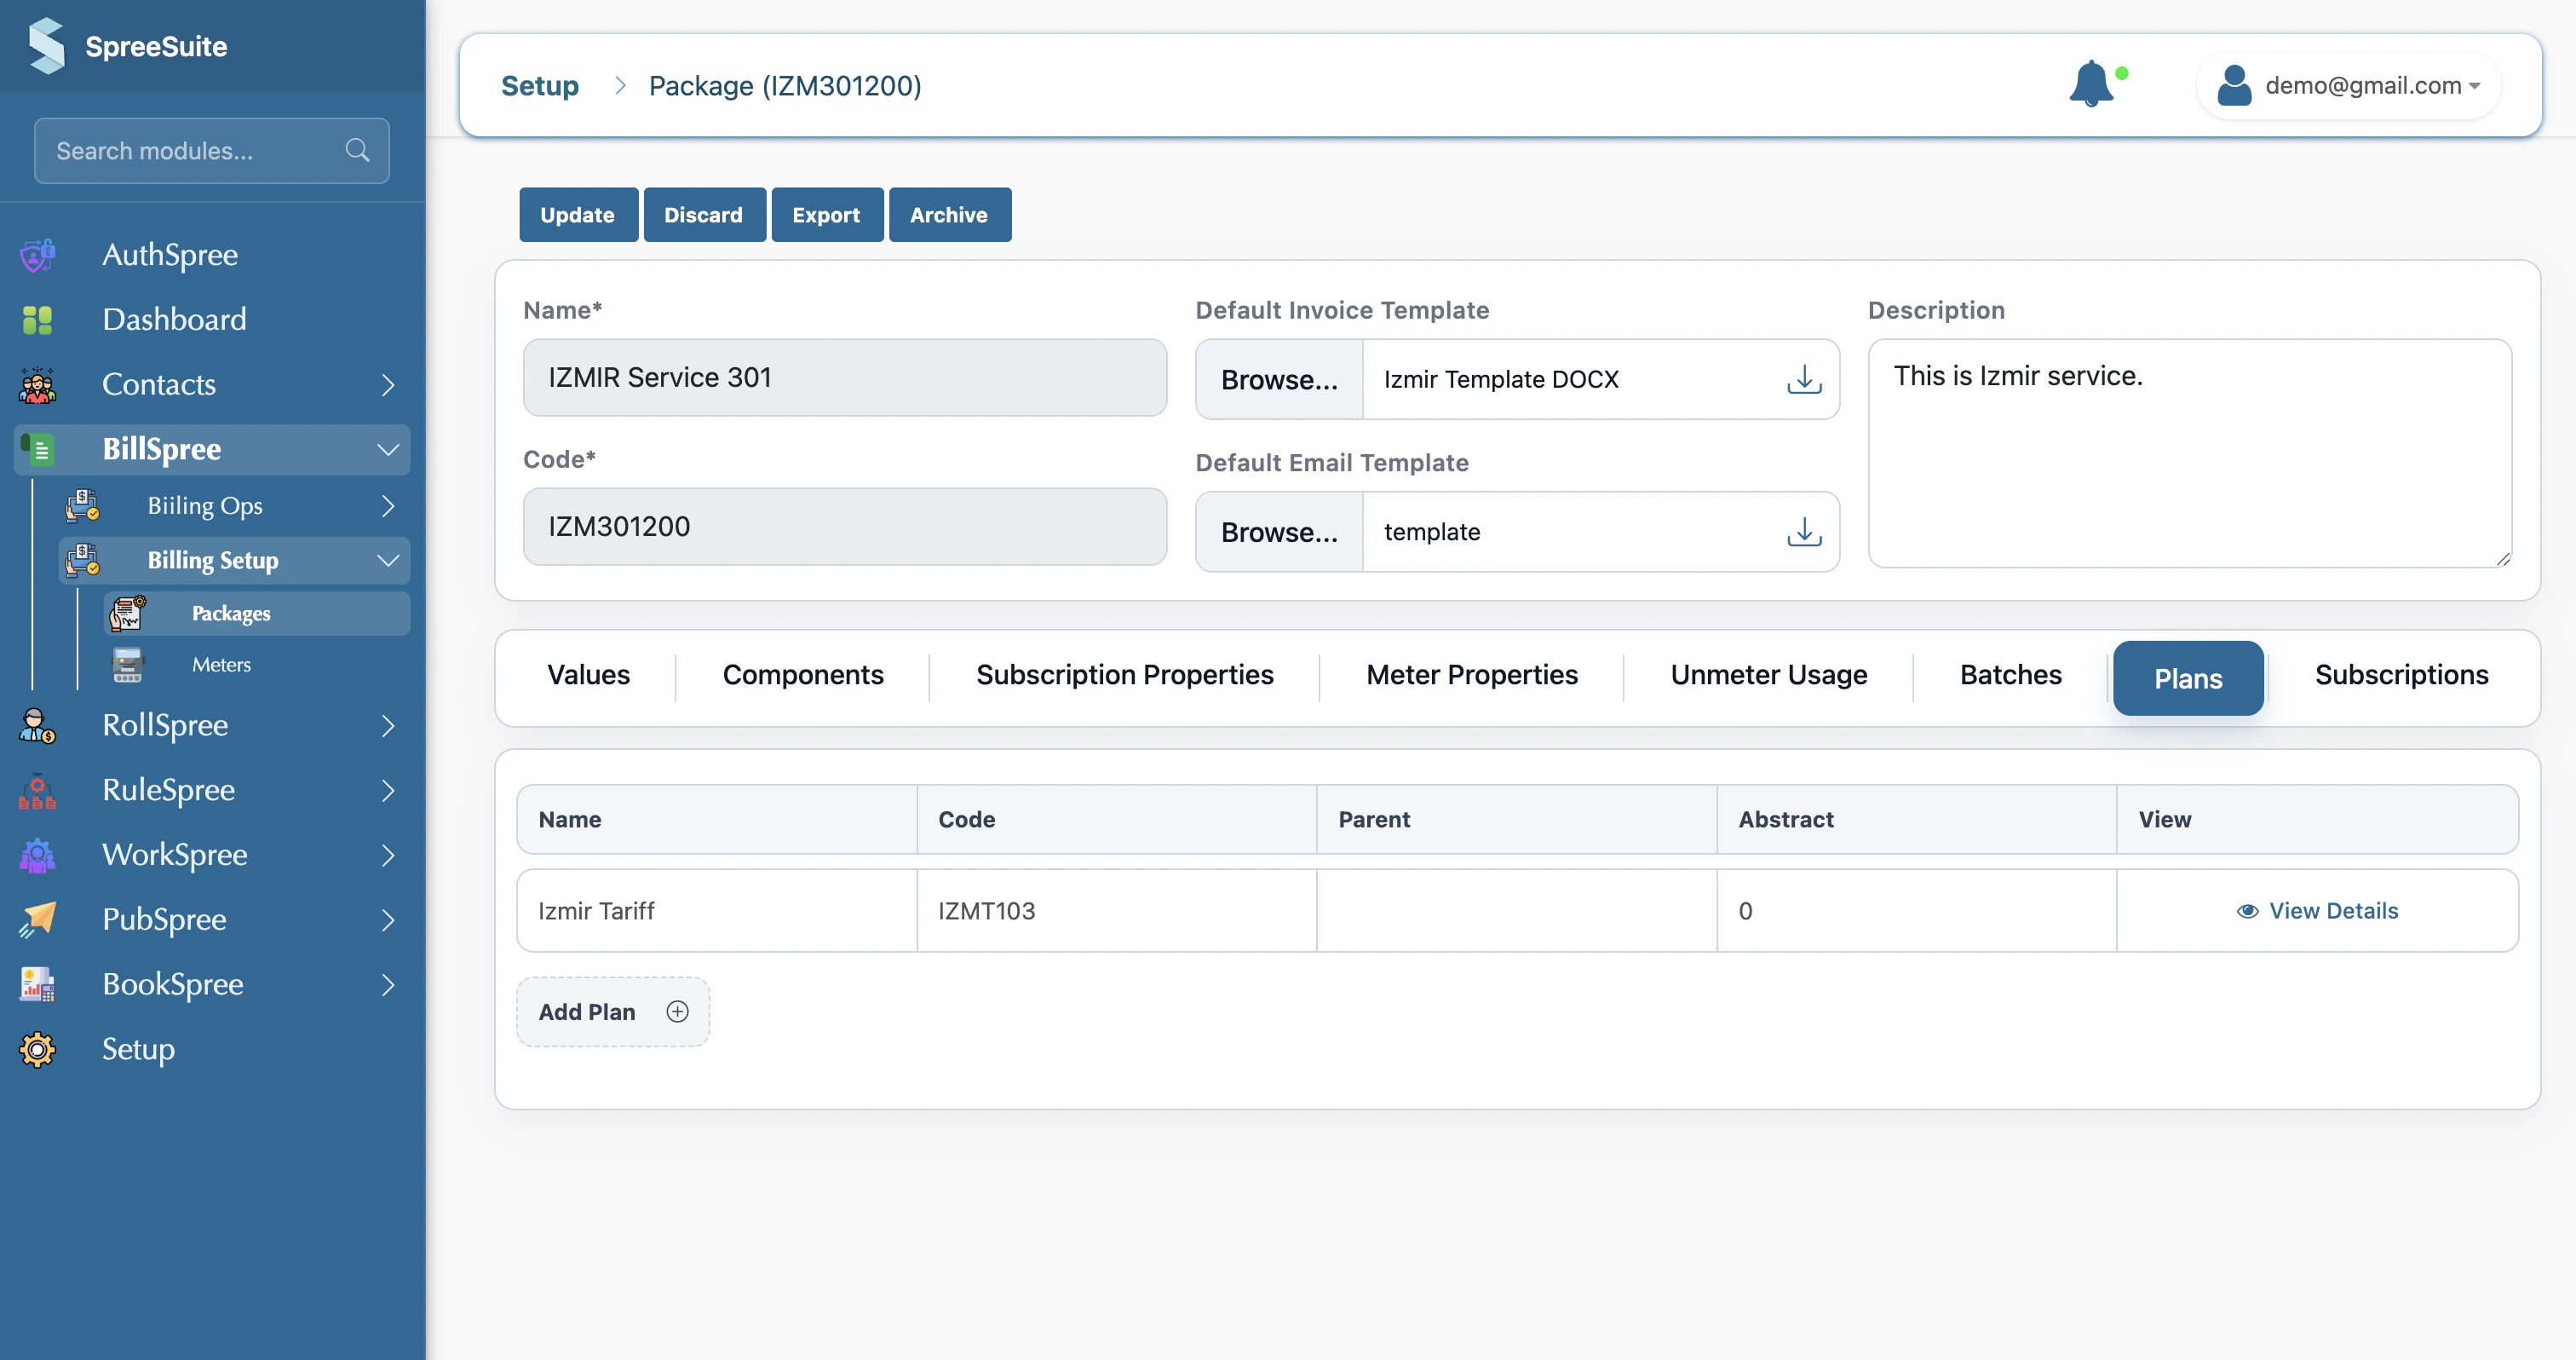 2. Click on Add Plan Variant
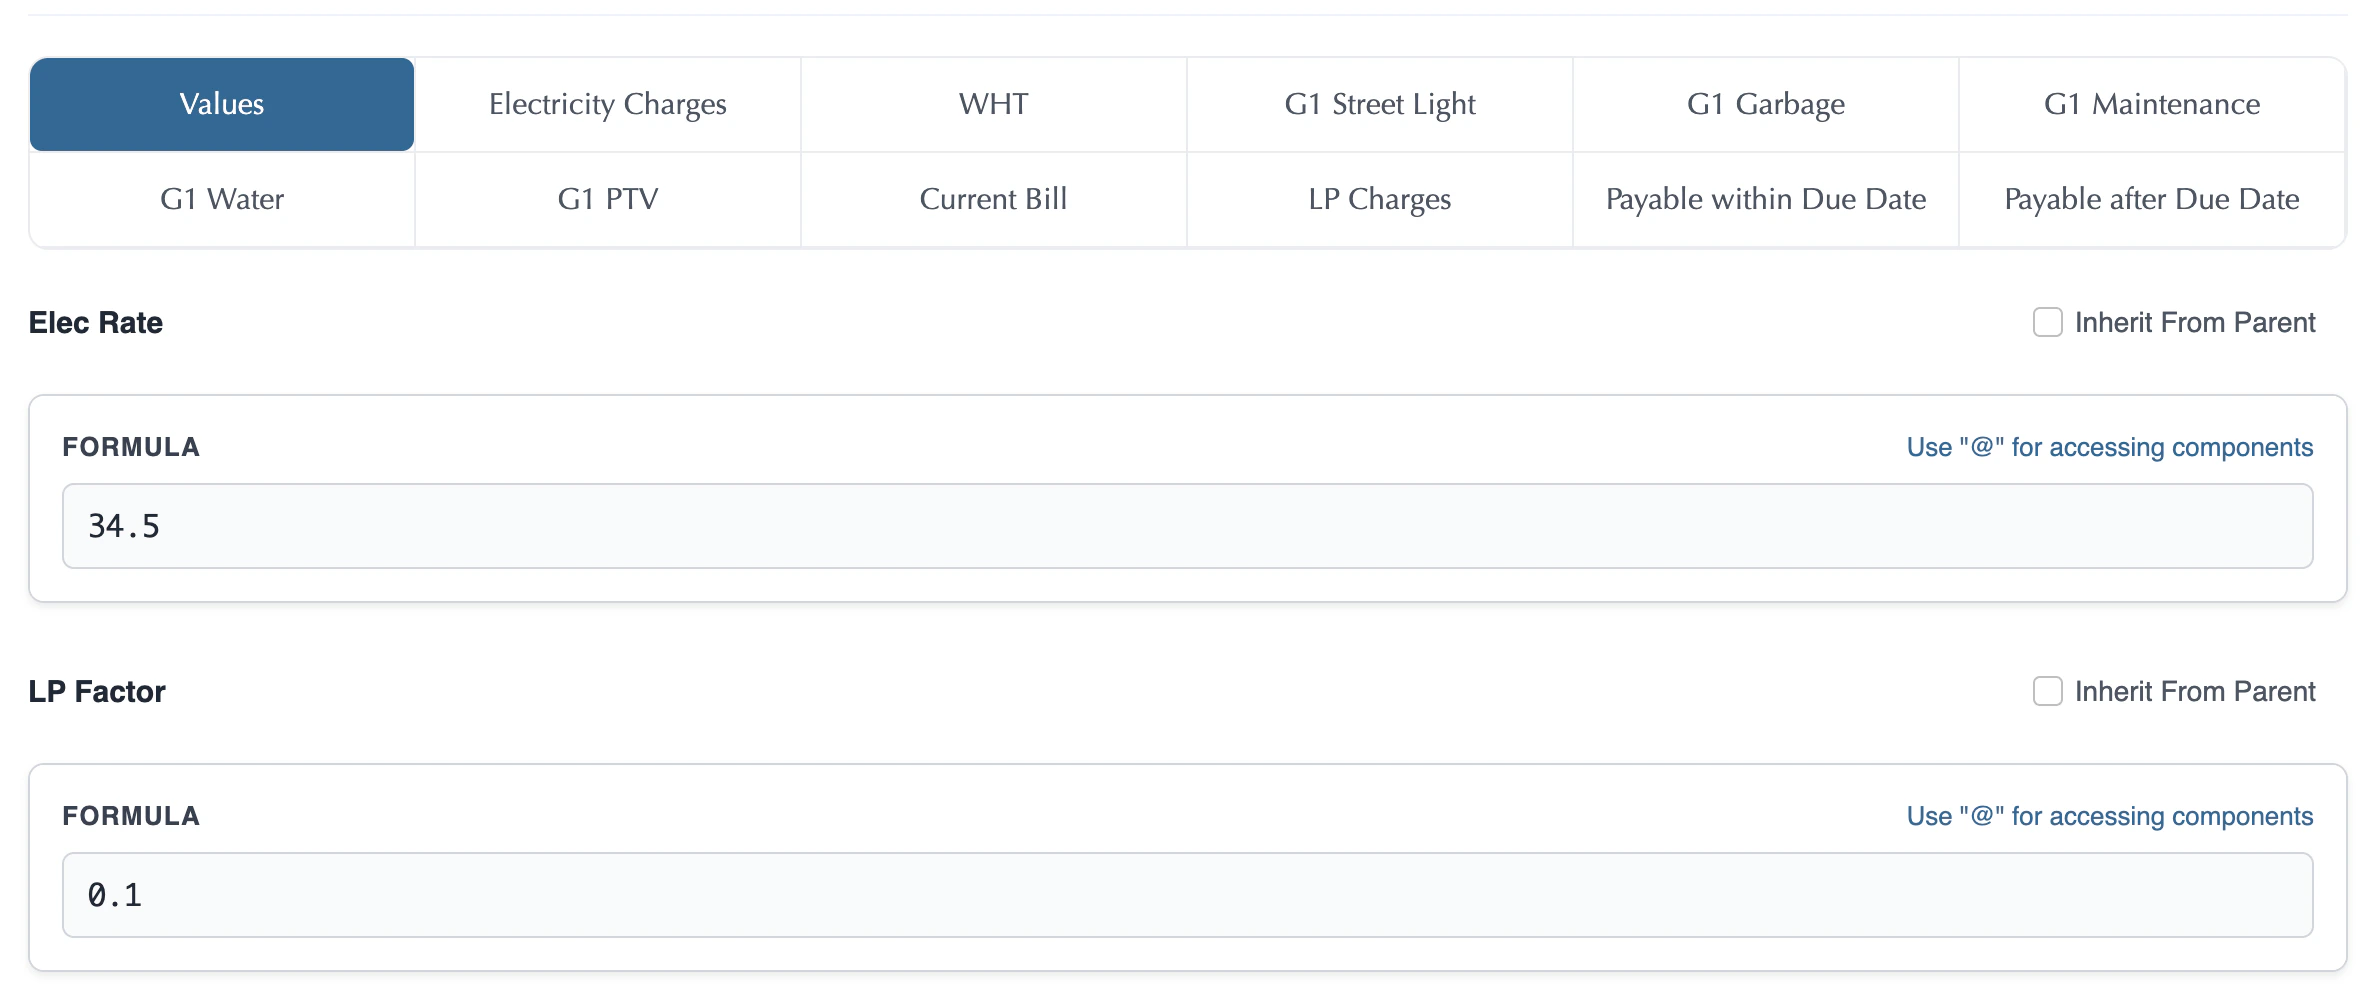
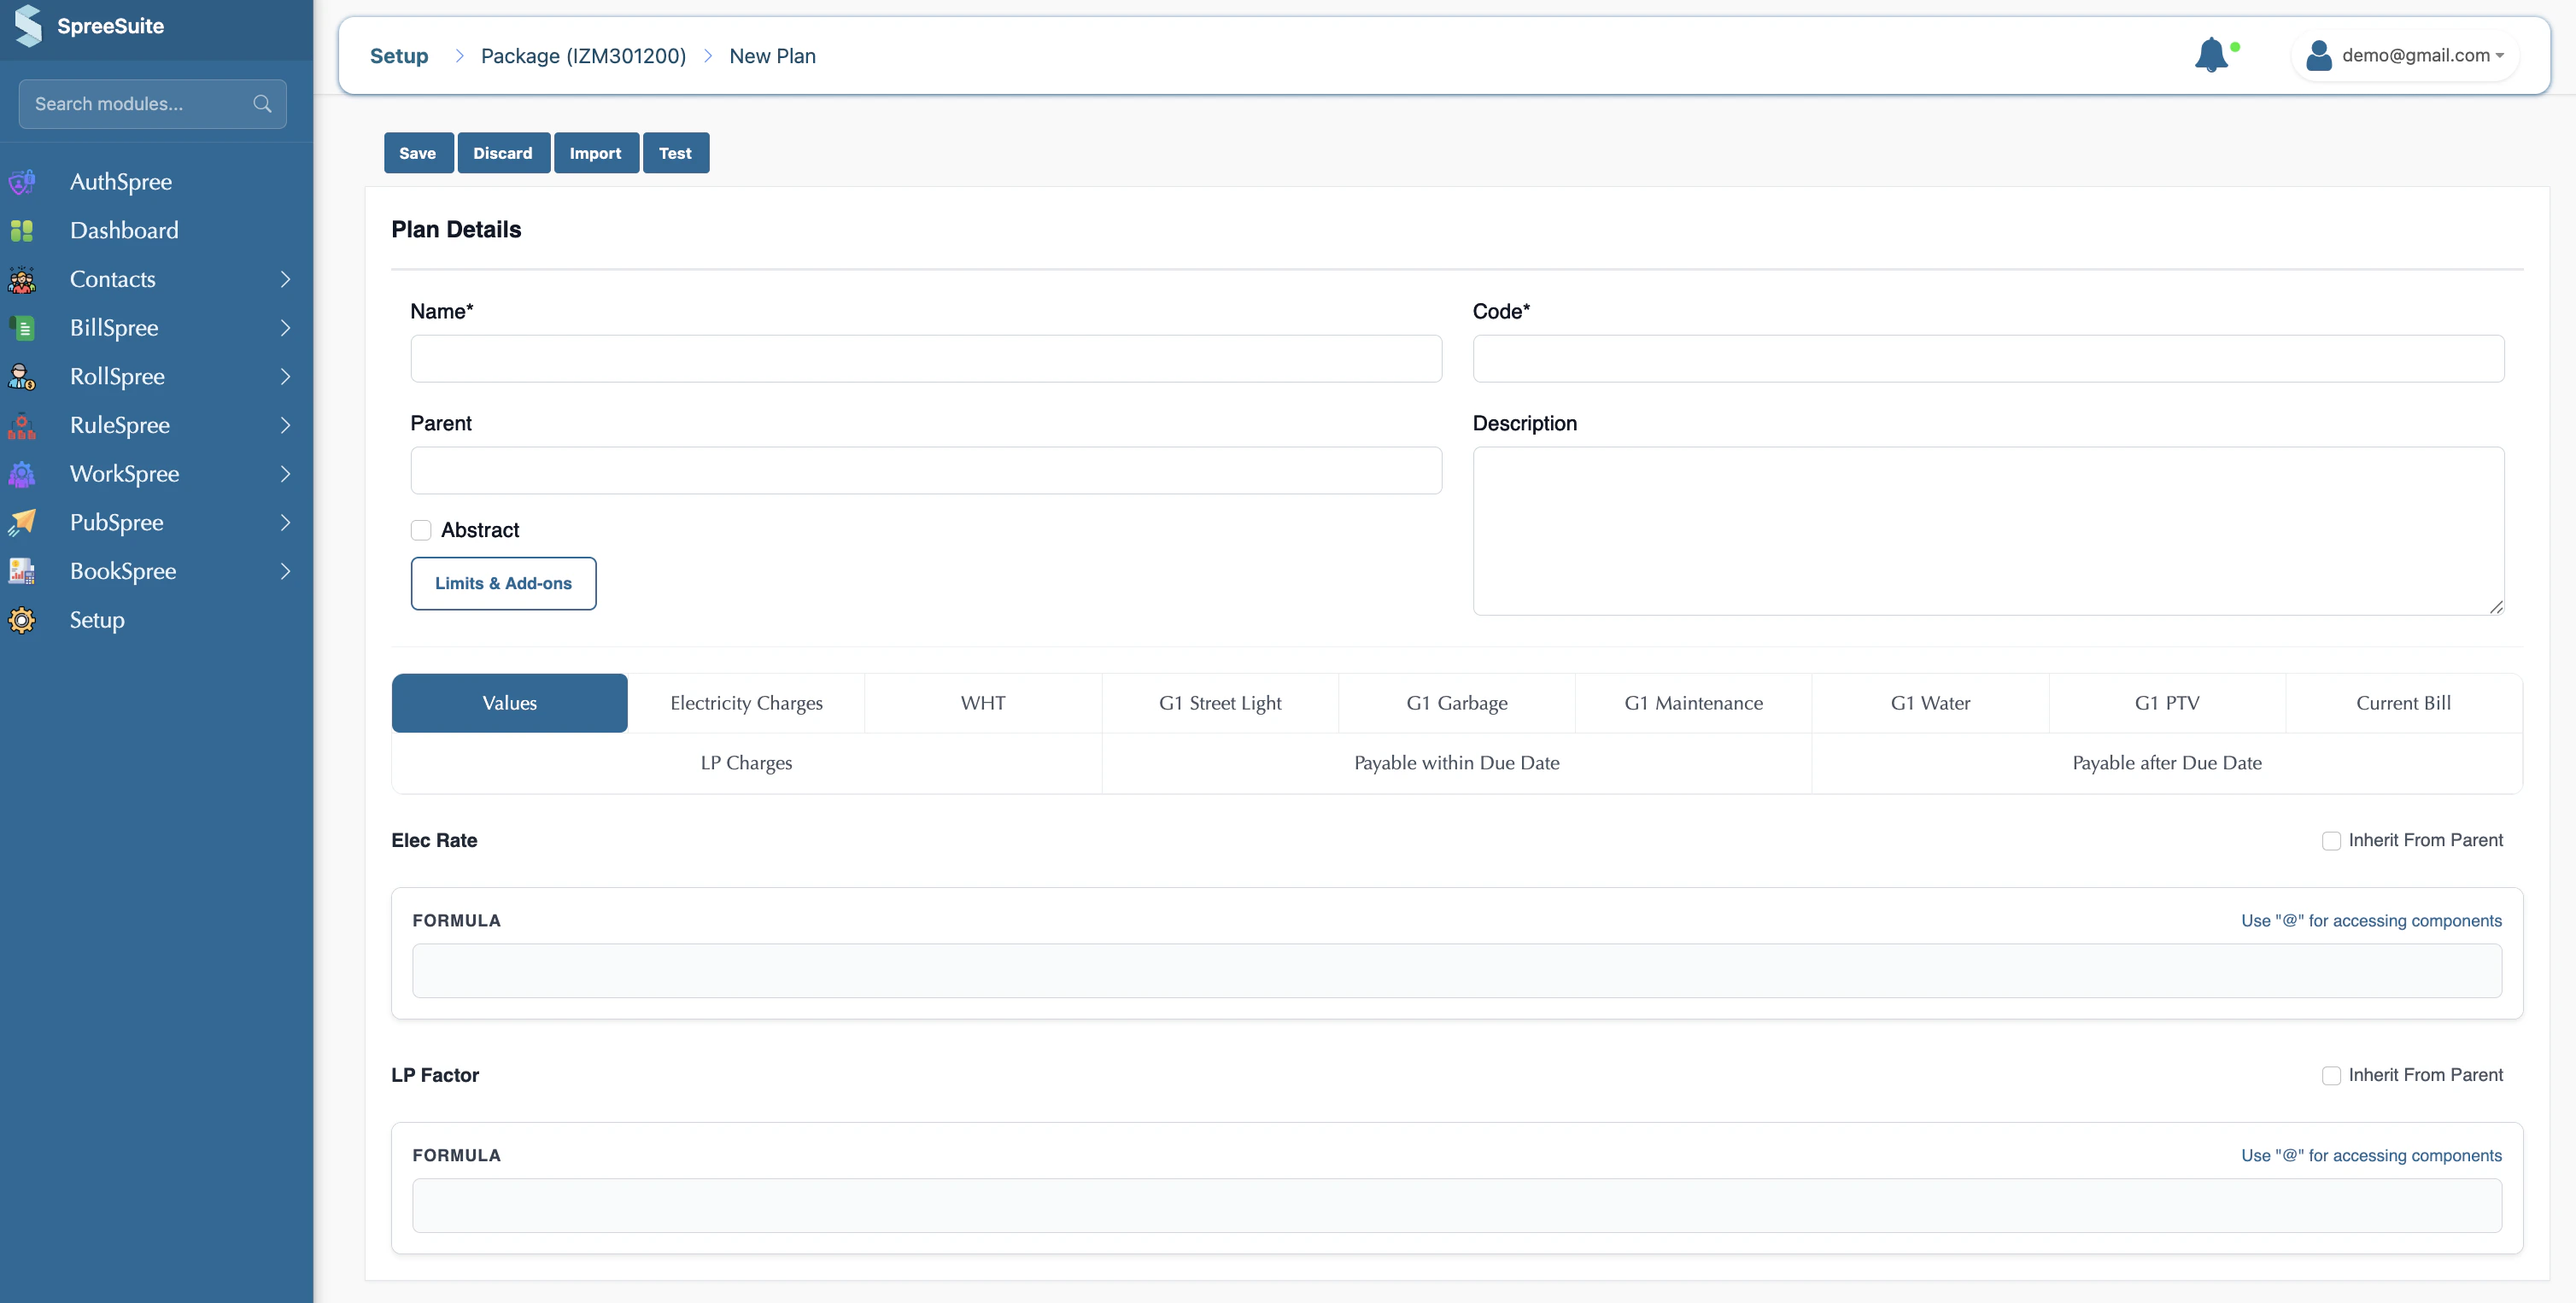 3. Your Pricing Template values and components show here in the Base Plan as tabs
 4. Give your rates in Values
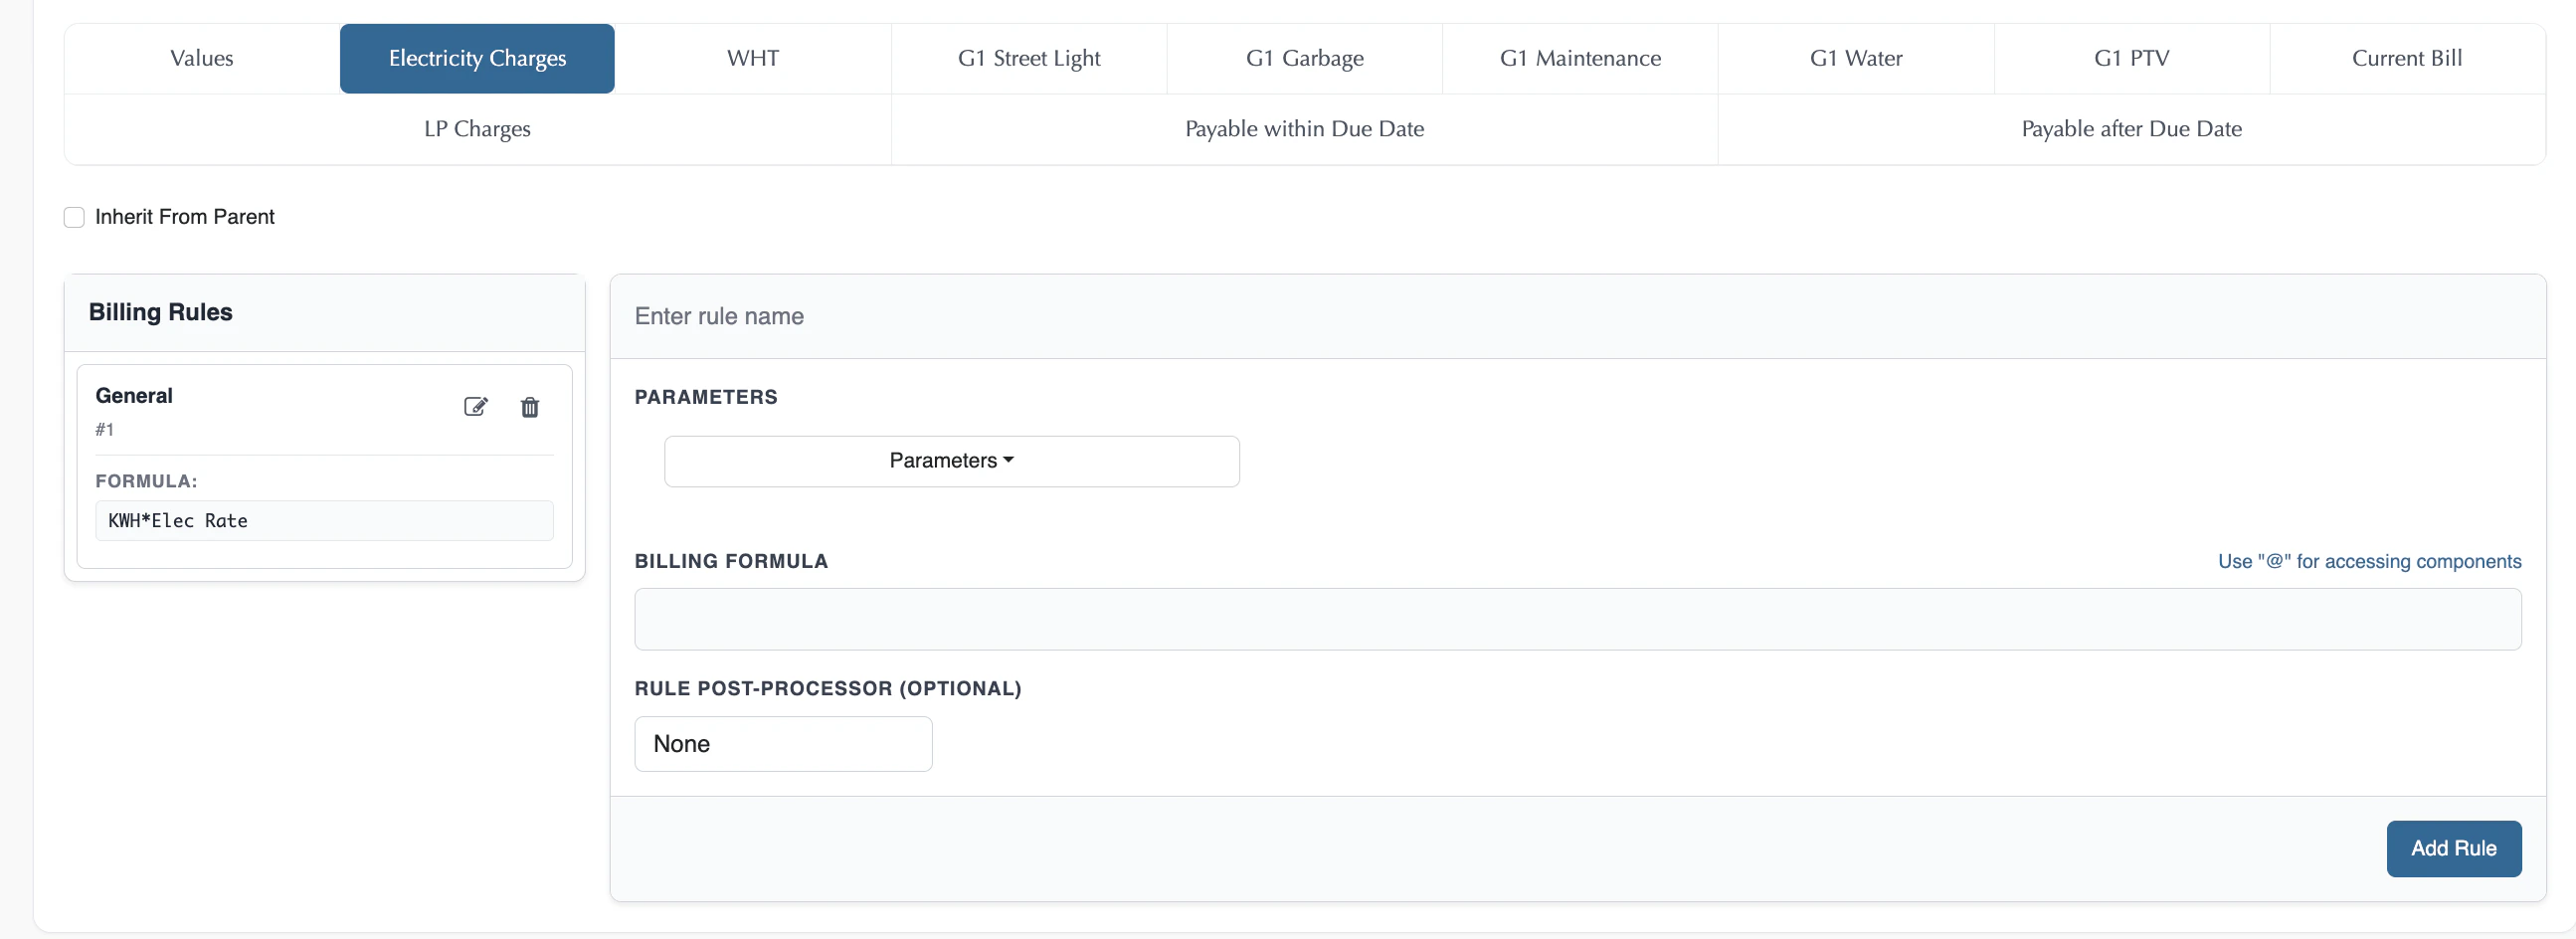
 Component
5. Click each component tab, and add your formulas for all components.
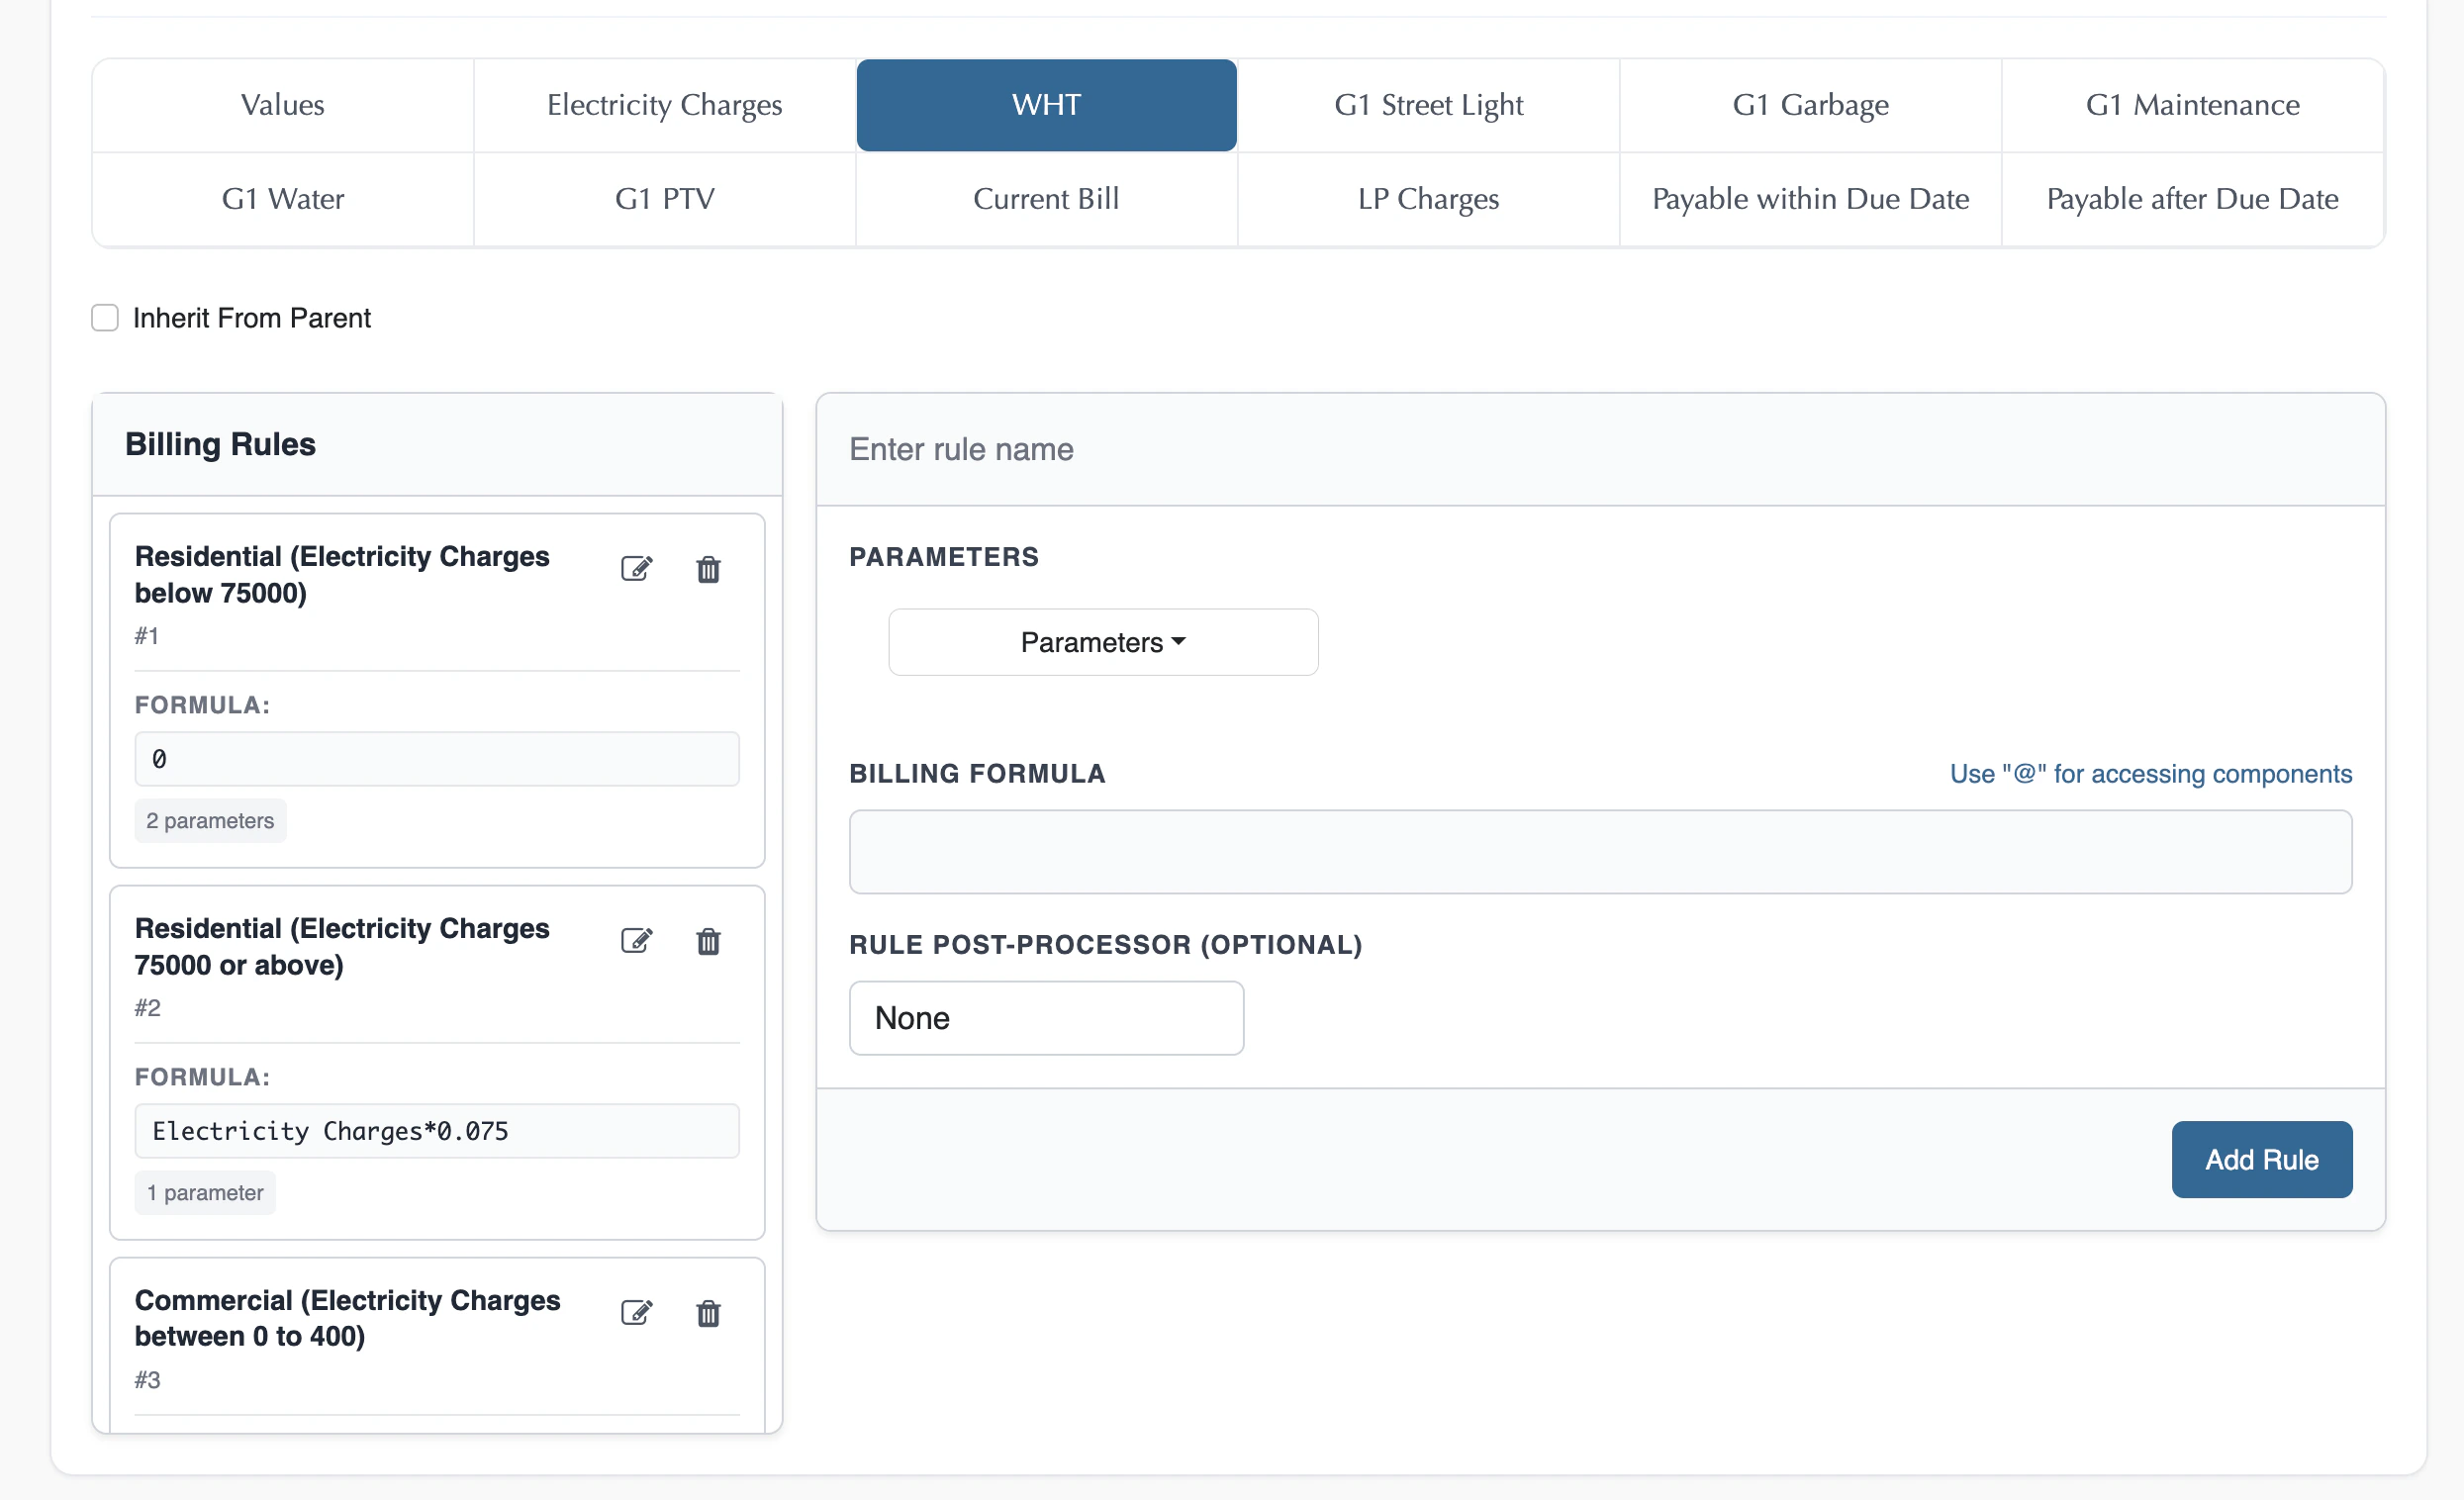
You see all your components here in tabs. While making a billing rule, you can pass the previous components as a parameter
Component
5. Click each component tab, and add your formulas for all components.
You see all your components here in tabs. While making a billing rule, you can pass the previous components as a parameter

 ### Rule
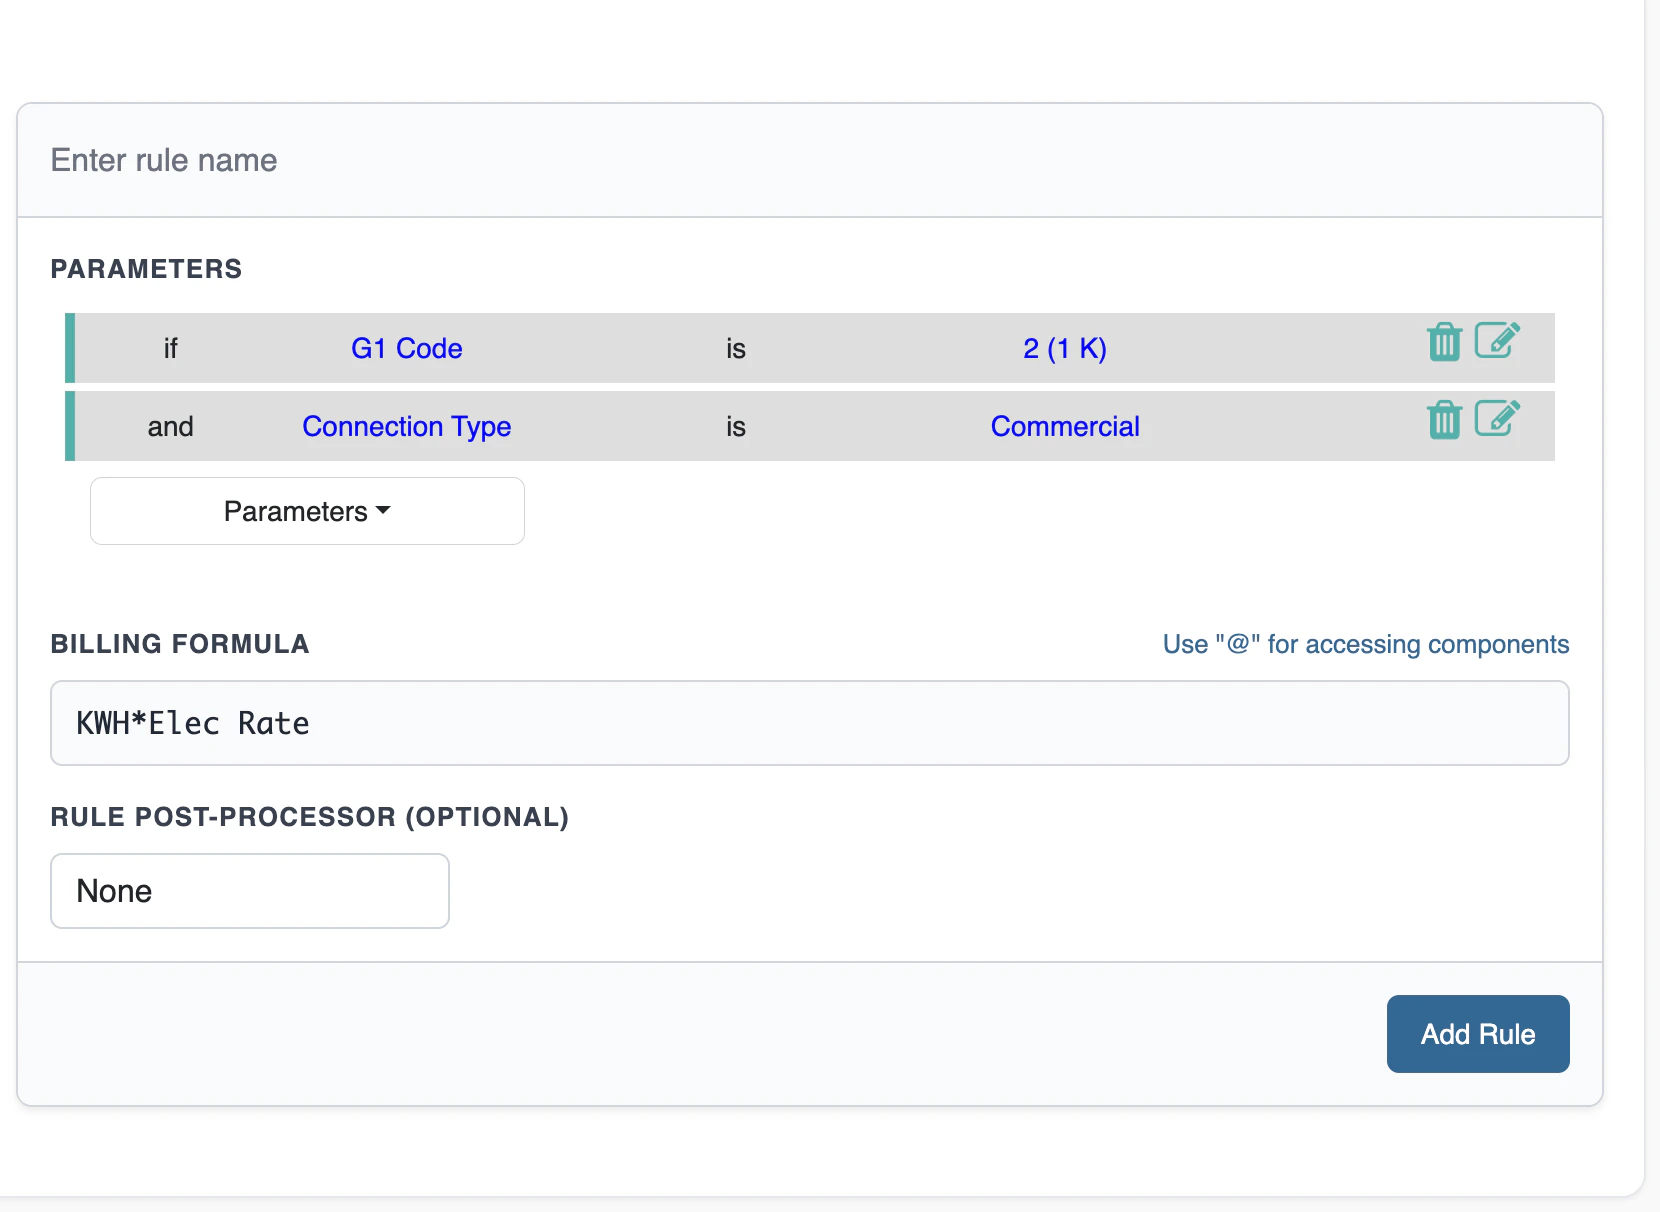
The rule is basically a combination of Condition and Billing Formula
### Conditions
We have conditions in the Base Plan for each component. We have multiple conditions
### Rule
The rule is basically a combination of Condition and Billing Formula
### Conditions
We have conditions in the Base Plan for each component. We have multiple conditions
 ### Formula
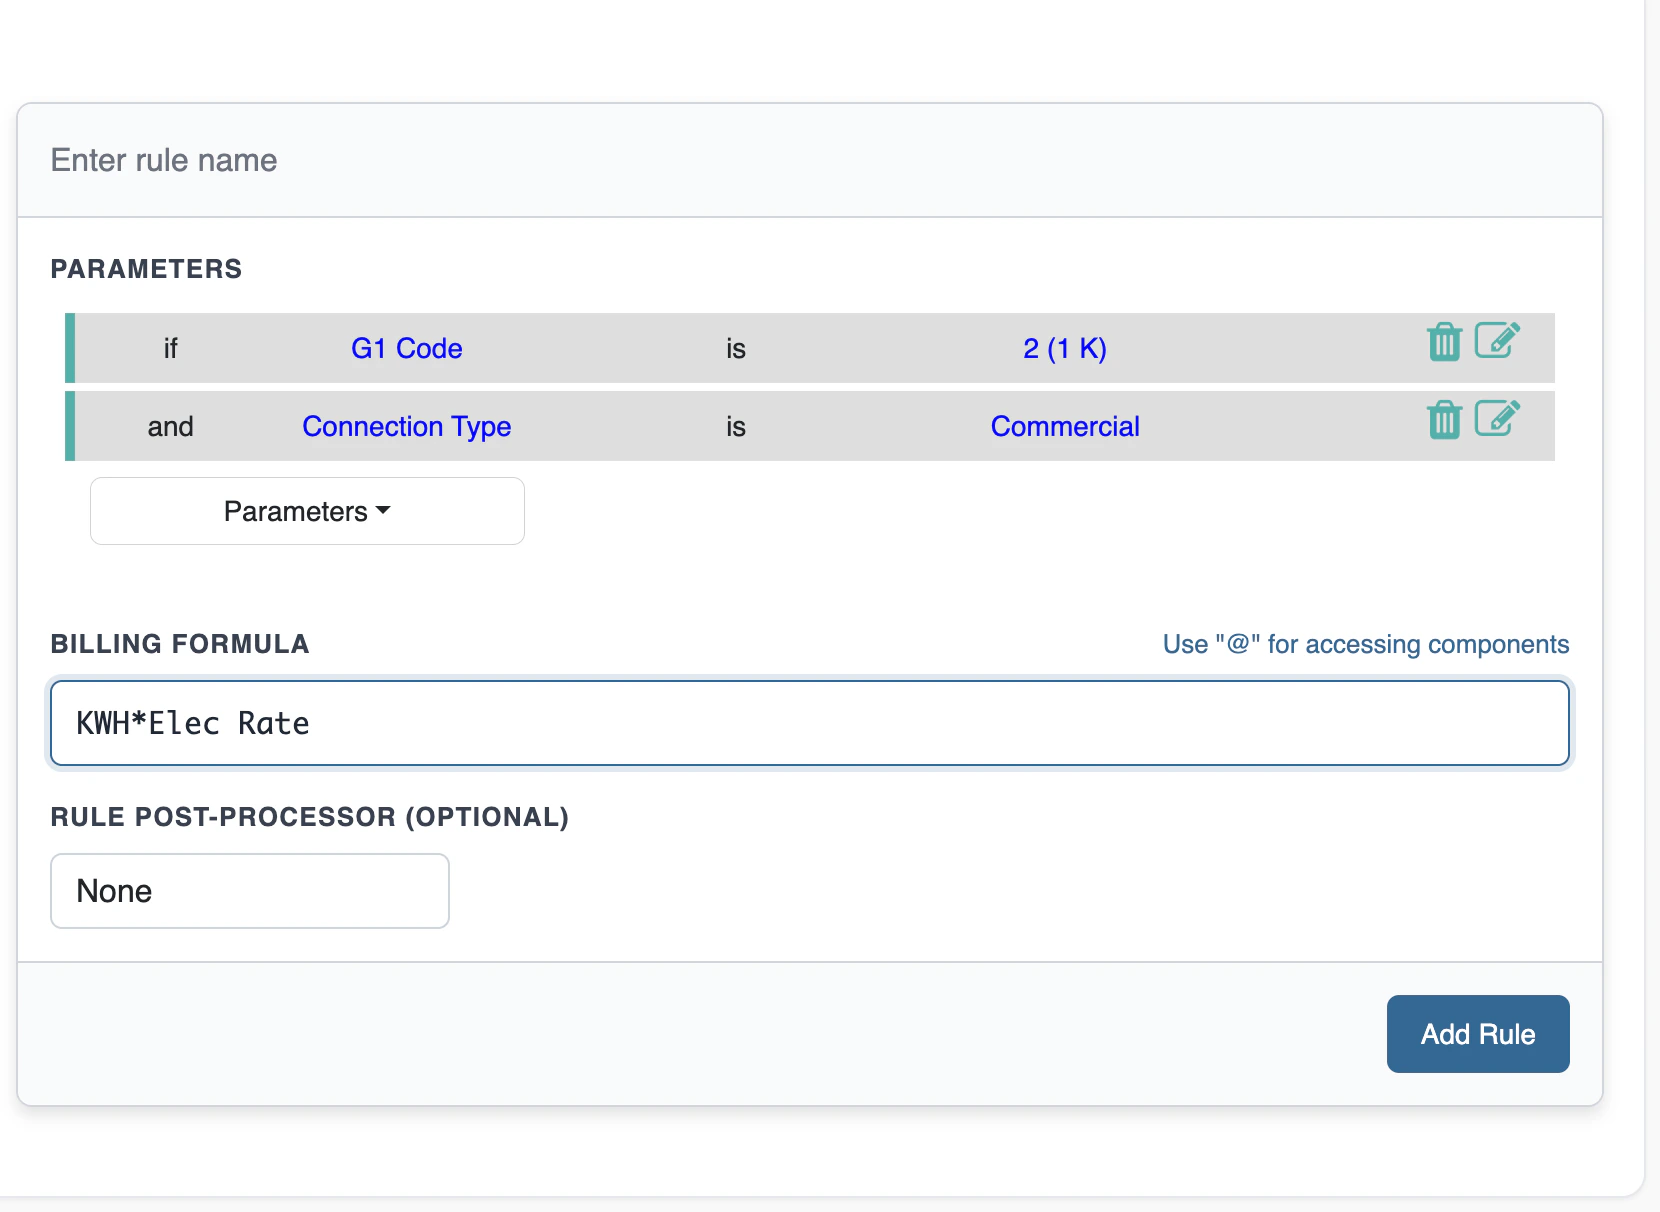
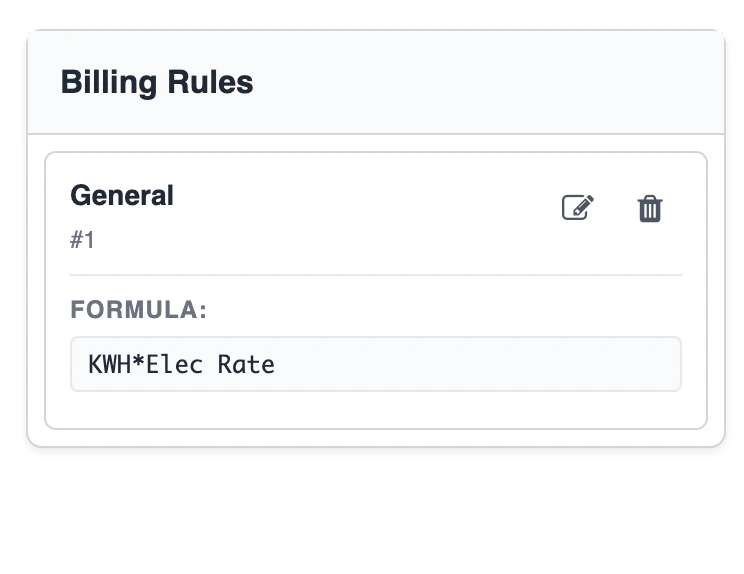
We have a formula in the Base Plan for each component. One formula for multiple conditions
### Formula
We have a formula in the Base Plan for each component. One formula for multiple conditions
 ***
## Test Plan
**Test Plan** lets you run the Base Plan with sample inputs and see each component’s result, before it is used in live billing.
1. Open the **Plan** screen for the Base Plan you want to check.
***
## Test Plan
**Test Plan** lets you run the Base Plan with sample inputs and see each component’s result, before it is used in live billing.
1. Open the **Plan** screen for the Base Plan you want to check.
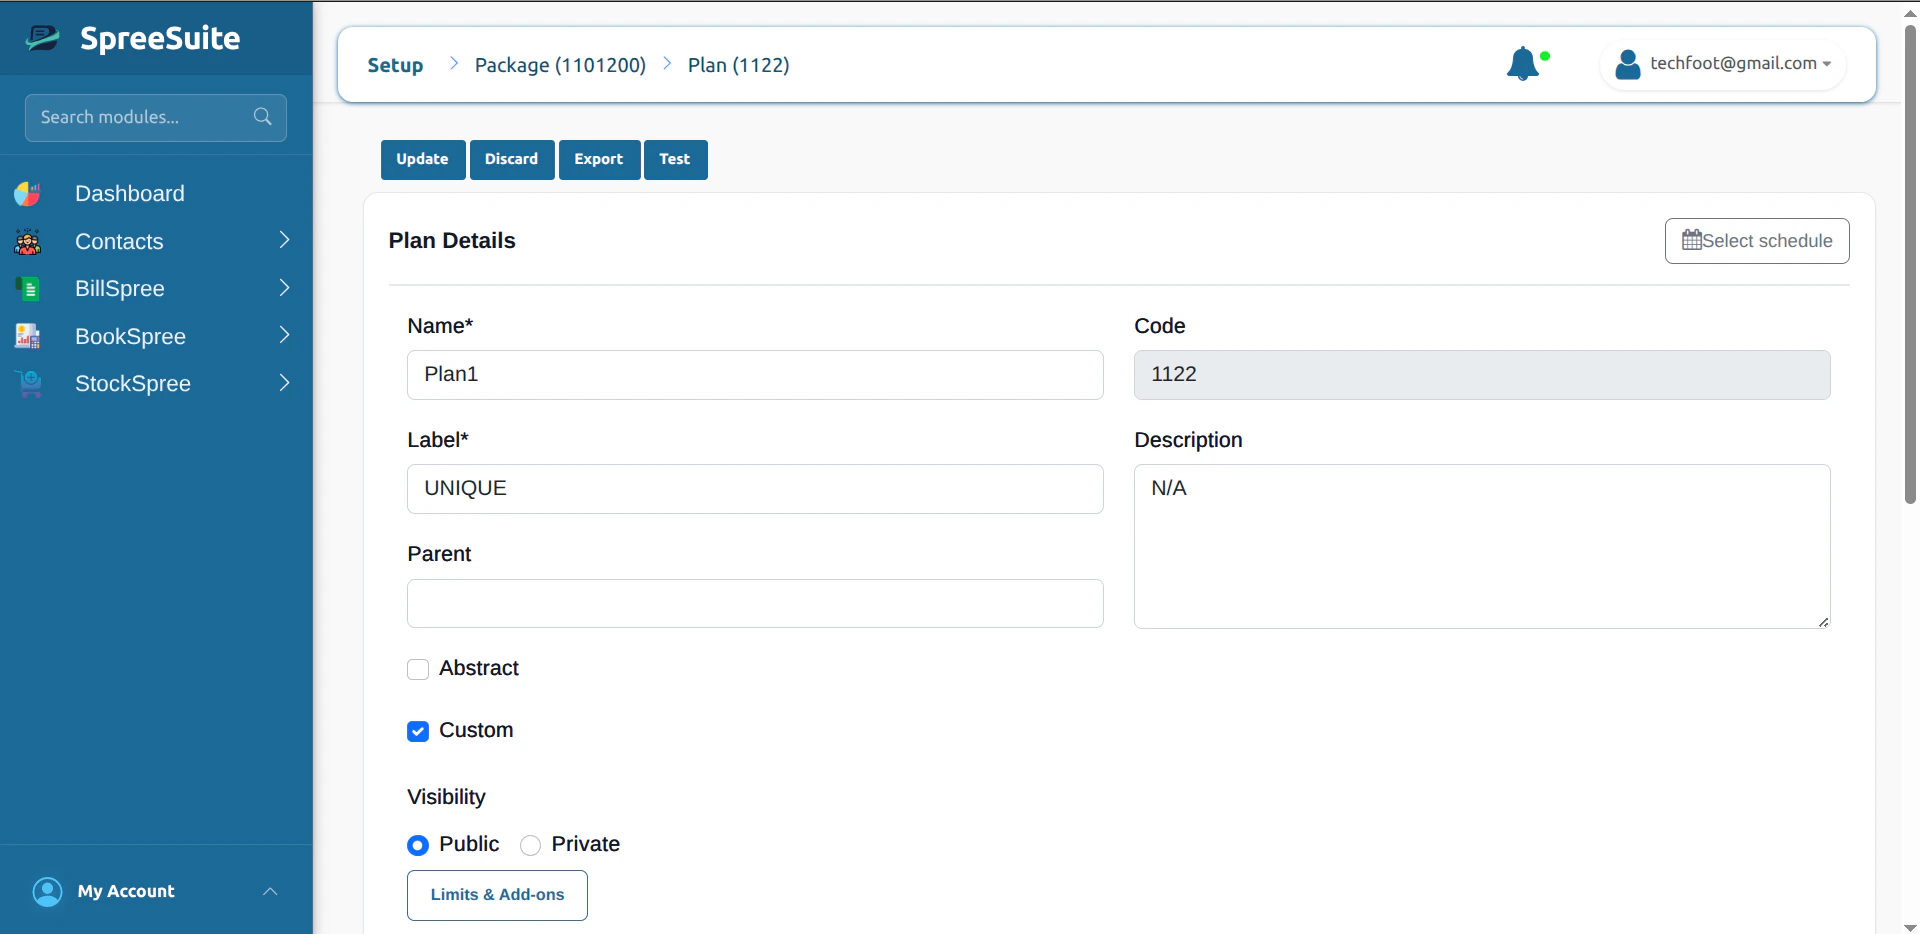 2. Click **Test** in the plan header (with **Update**, **Discard**, and **Export**).
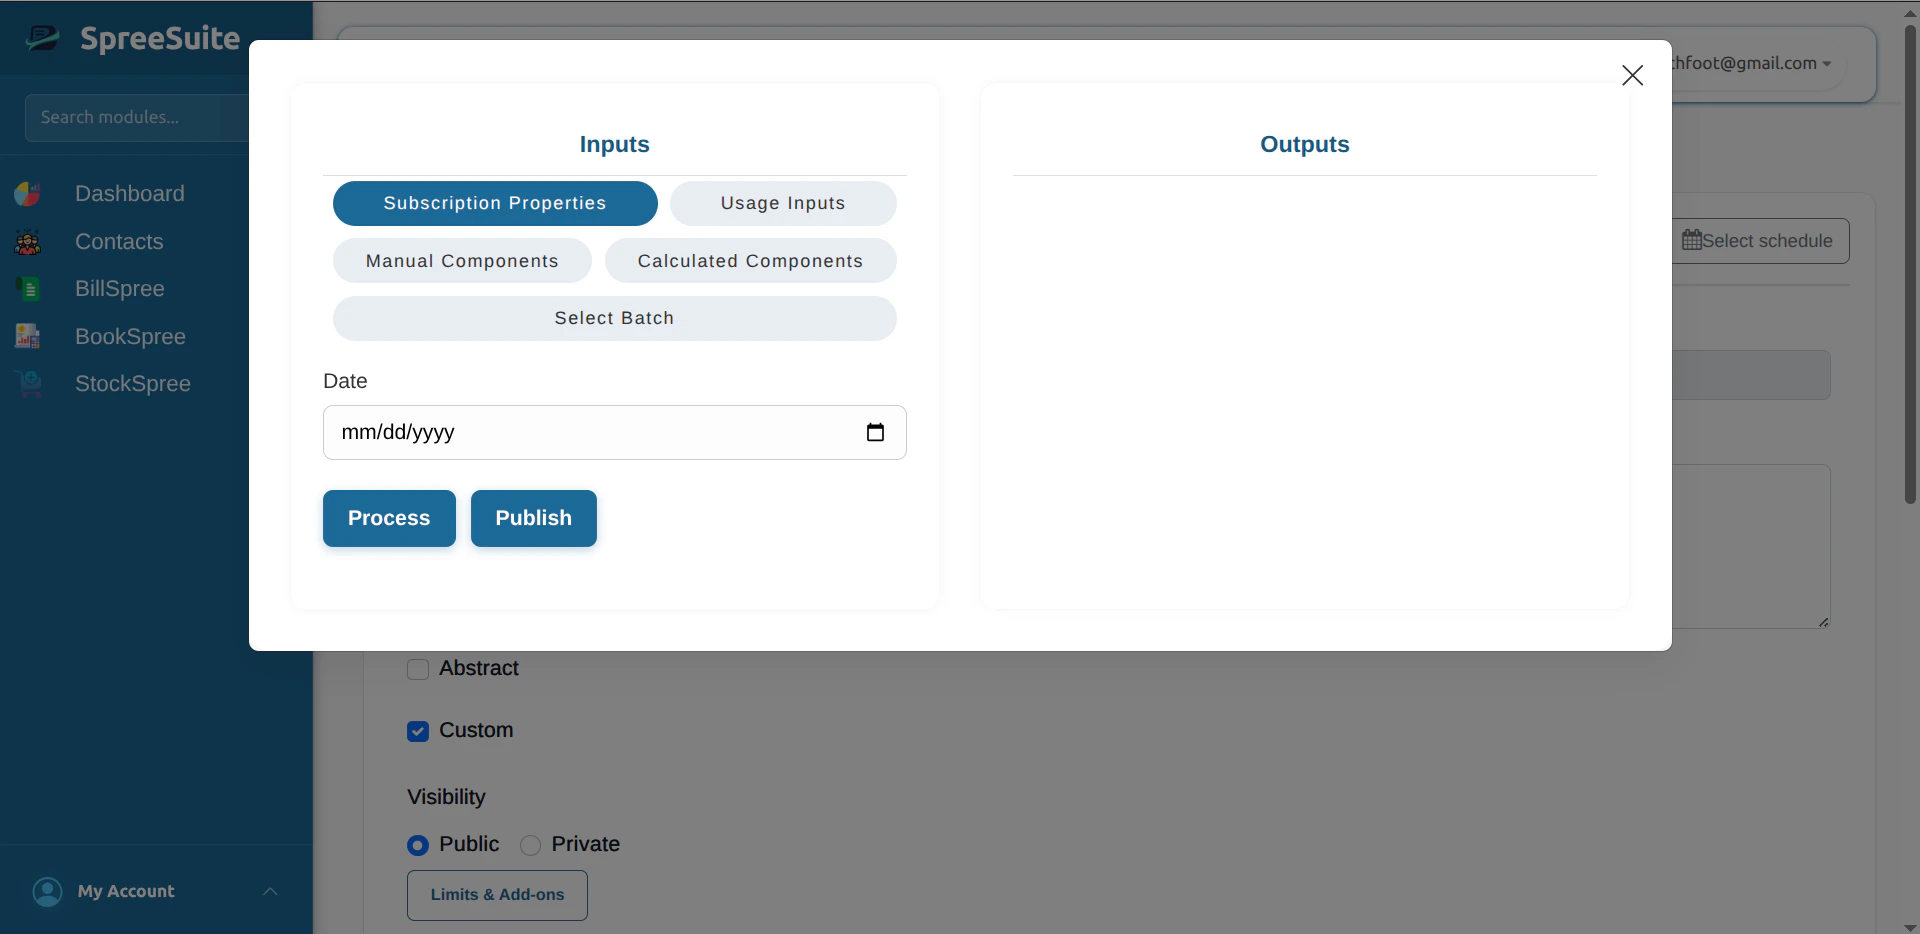 3. Enter sample values for your **date**, **components** and **usage** inputs (and any other fields your package defines).
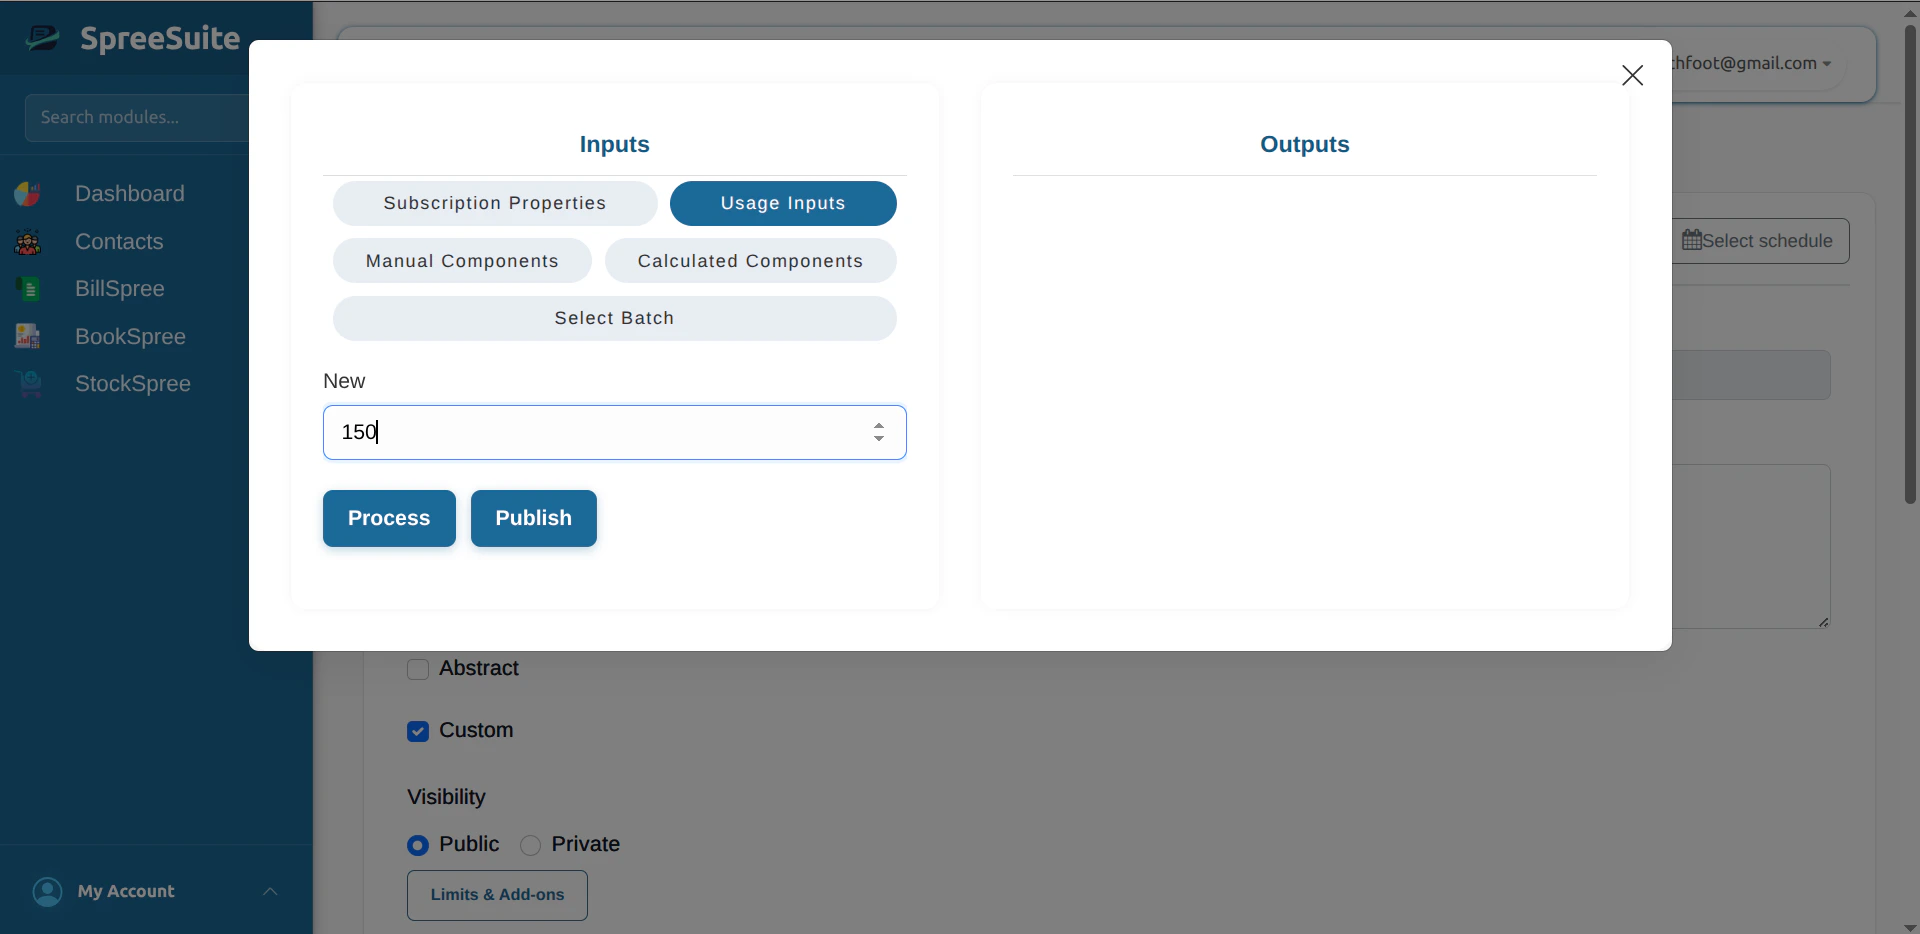 4. Click **Process** to calculate the bill for those inputs.
5. Read **Outputs**: you see each billing **component** with the amount your **conditions** and **formula** produced.
4. Click **Process** to calculate the bill for those inputs.
5. Read **Outputs**: you see each billing **component** with the amount your **conditions** and **formula** produced.
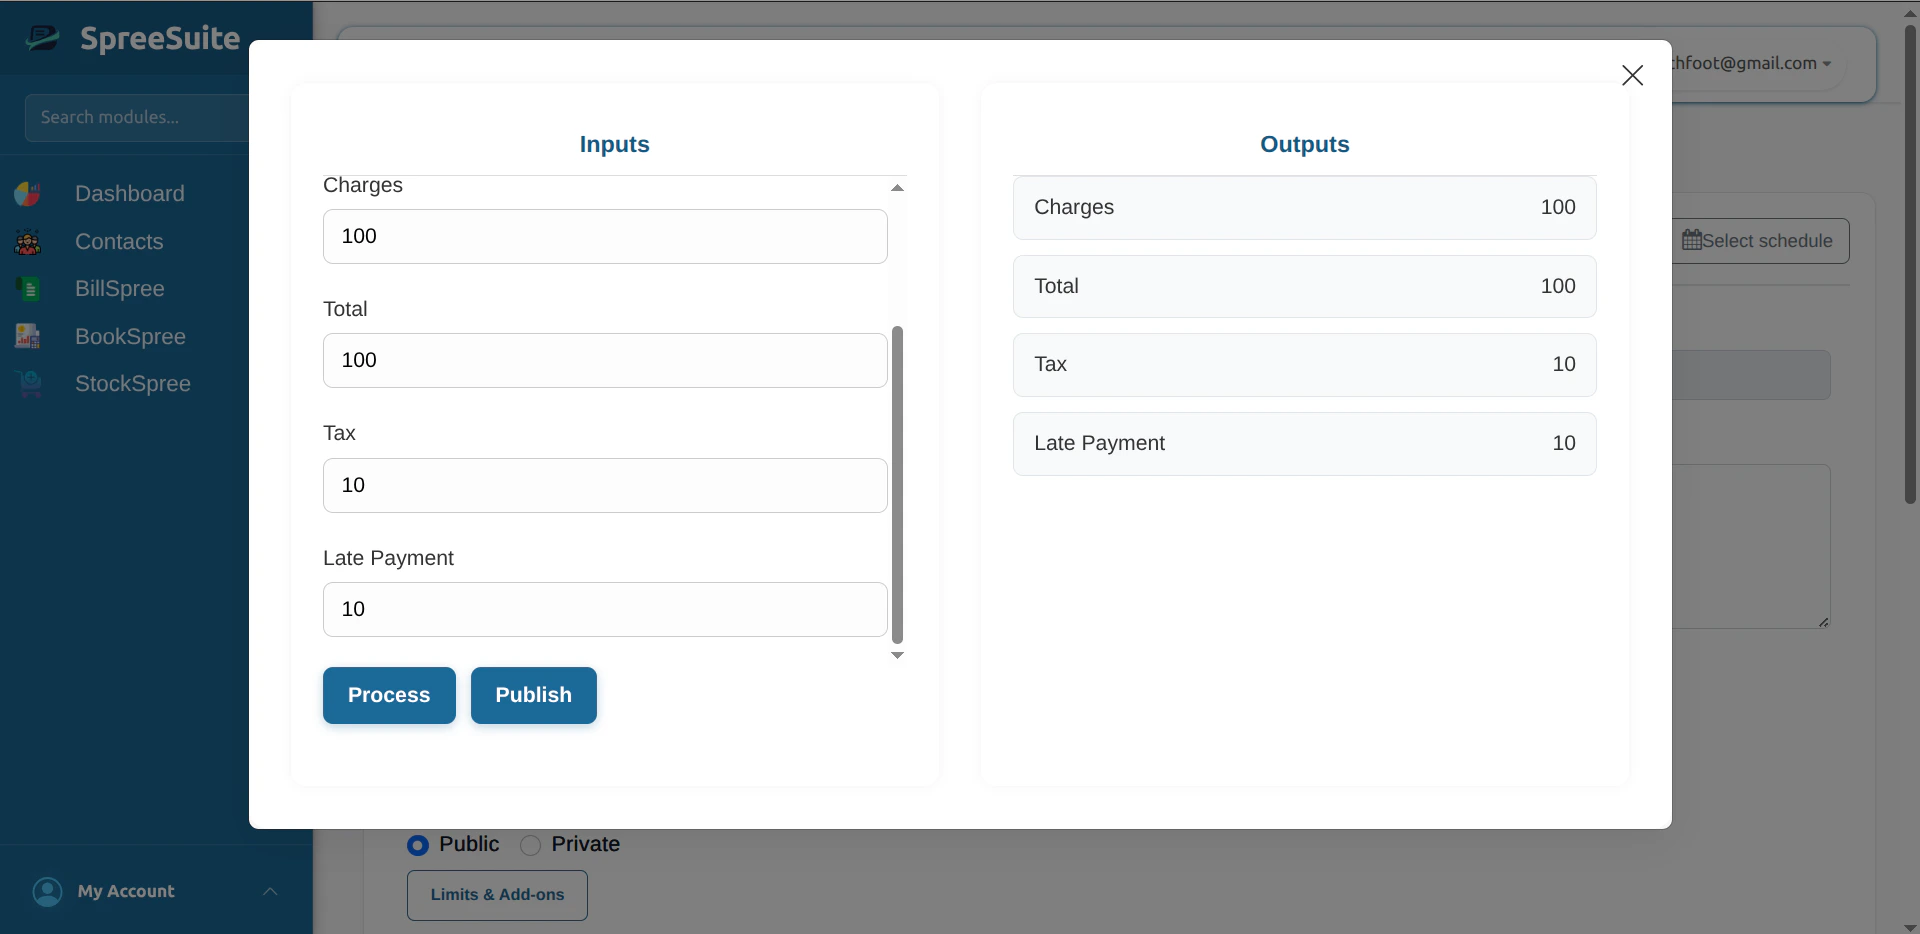 6. Click **Publish** when you want a **PDF bill** for that same test run. The app uses a bill **template** from your **pricing template**. If no template is available, fix the template on the pricing template, then try again. When publish succeeds, the PDF opens in the browser.
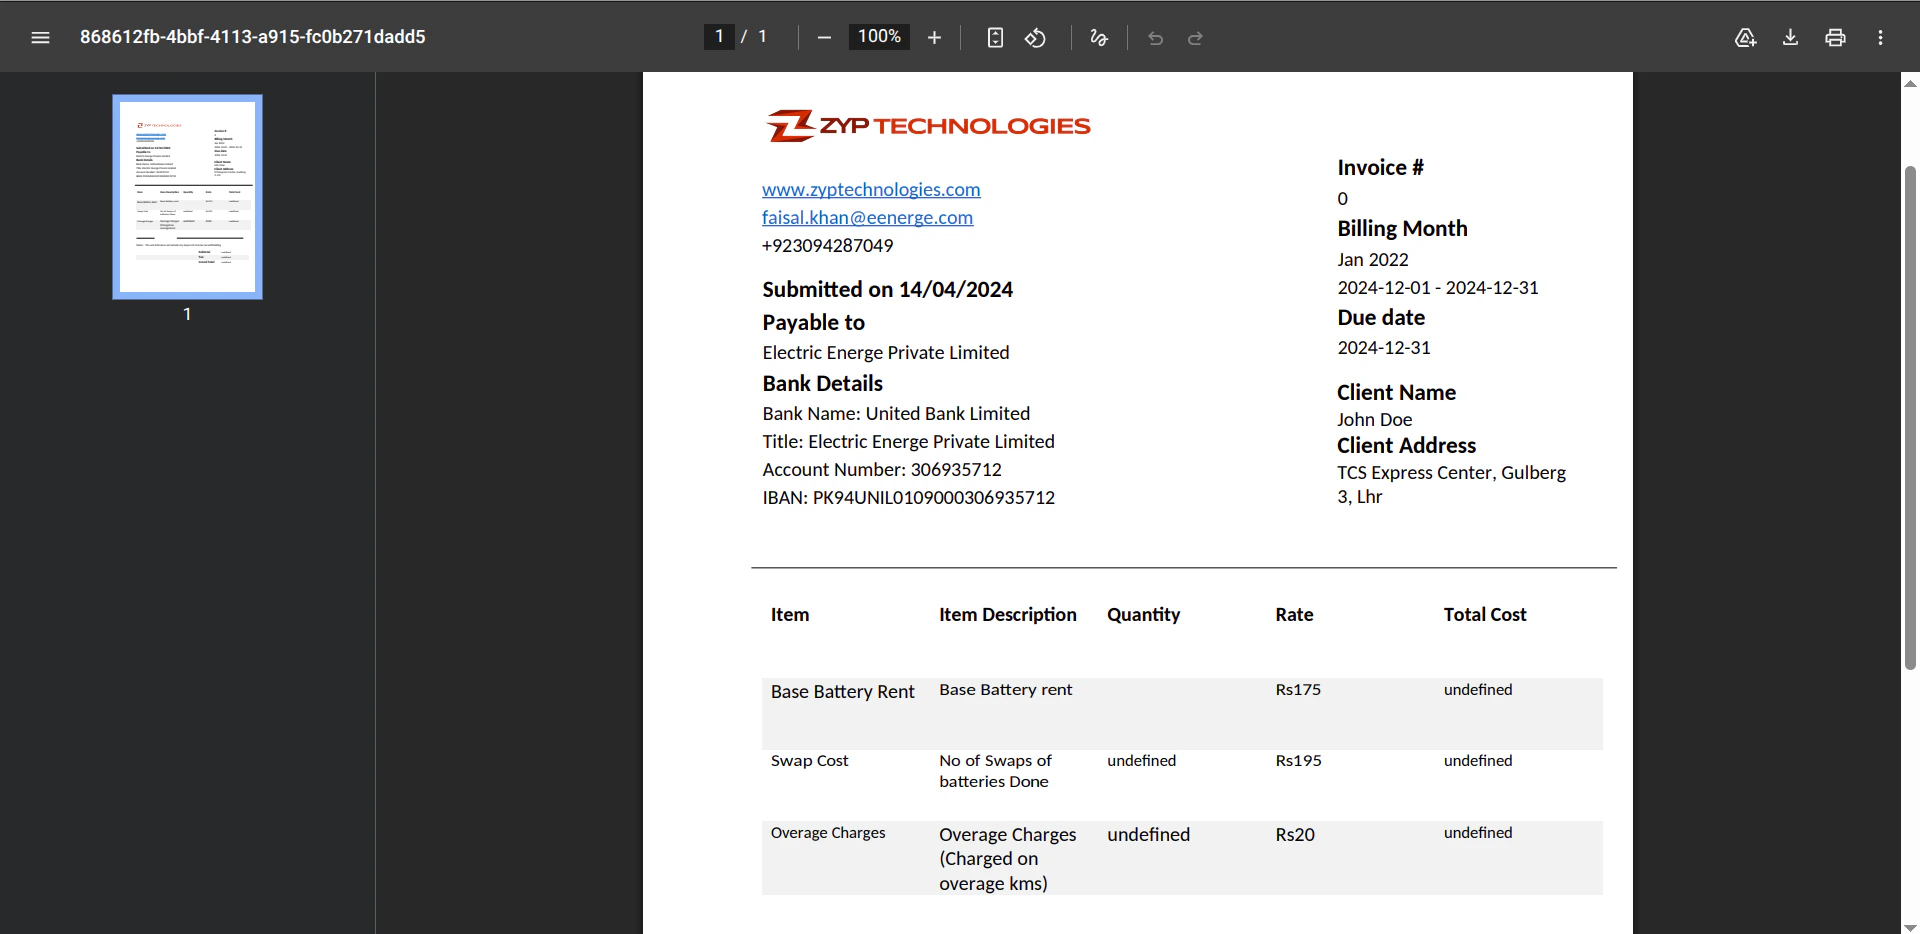 Run **Test Plan** again after you change **values**, **conditions**, or **formulas**, so you can confirm totals are correct.
***
### **2. Add a New Customer**
To add a new customer, follow these steps:
Click the **+ New** button in the top right corner of the Customers page.
Run **Test Plan** again after you change **values**, **conditions**, or **formulas**, so you can confirm totals are correct.
***
### **2. Add a New Customer**
To add a new customer, follow these steps:
Click the **+ New** button in the top right corner of the Customers page.
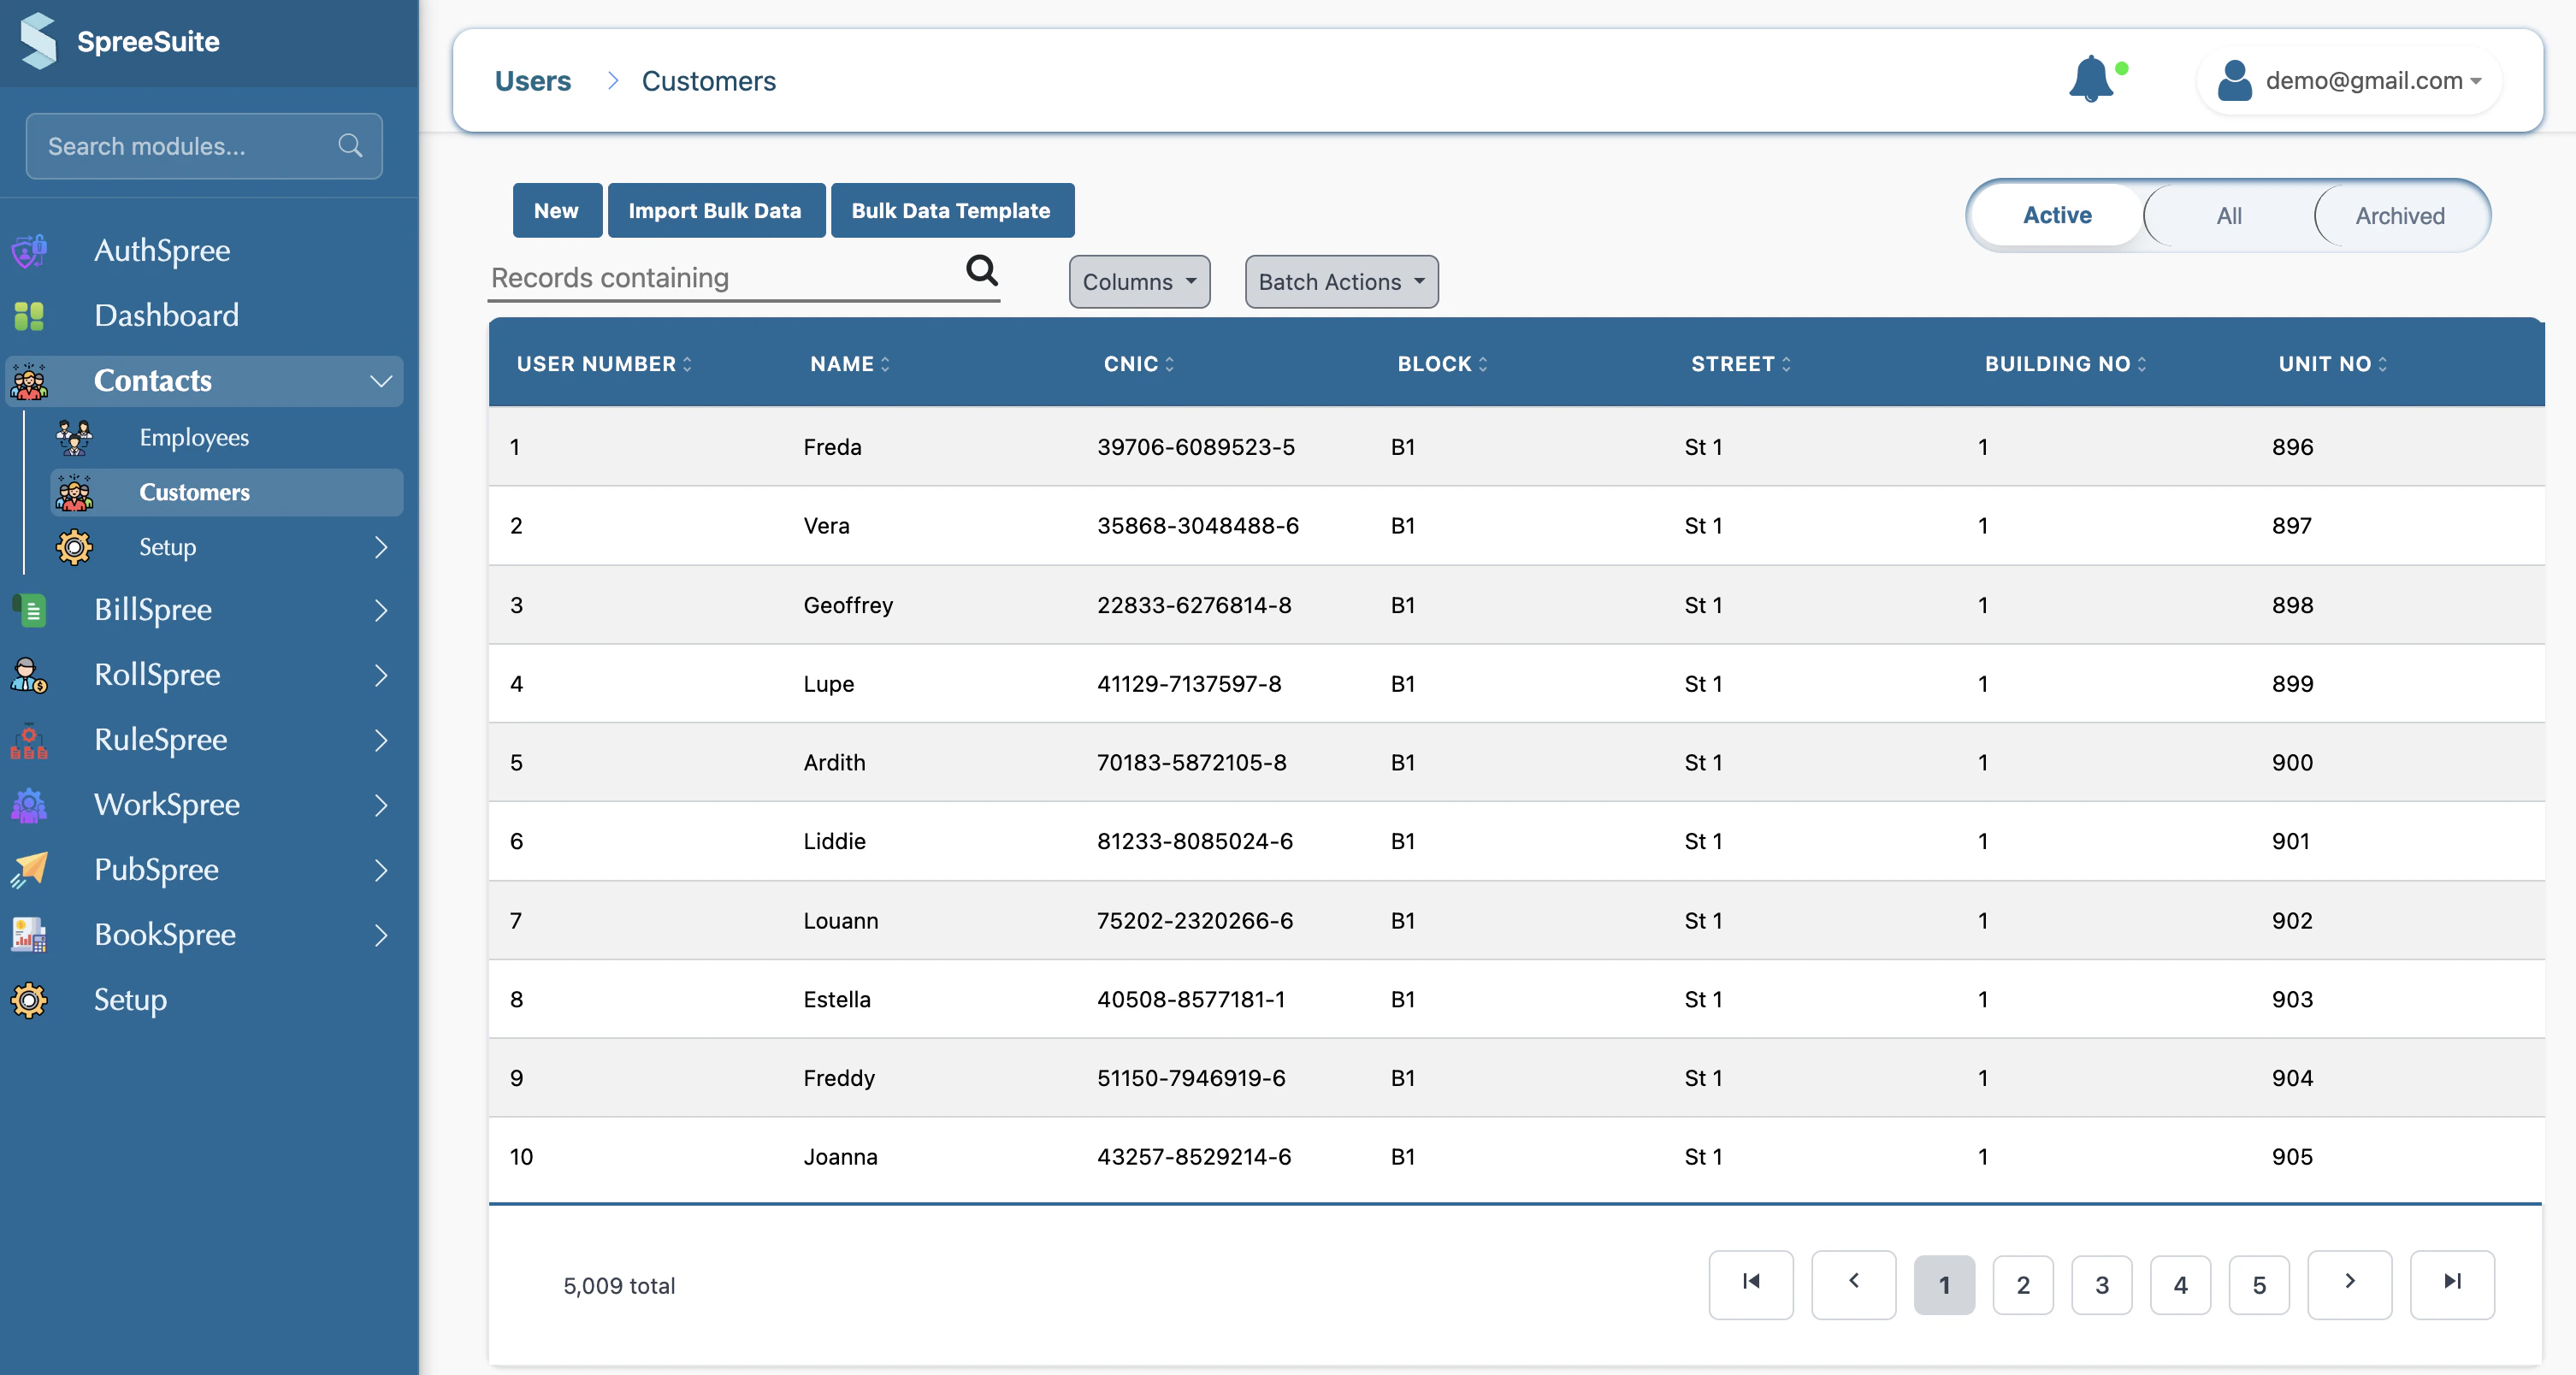 Fill in the basic contact details for the customer.
 * **Name**: The full name of the customer (Required).
* **Email**: The customer's primary email address for invoicing.
* **Phone Number**: A contact number for the customer.
* **Reference Number**: Your own internal identifier if applicable.
This section is crucial for tax compliance and accurate invoice delivery.
* **Name**: The full name of the customer (Required).
* **Email**: The customer's primary email address for invoicing.
* **Phone Number**: A contact number for the customer.
* **Reference Number**: Your own internal identifier if applicable.
This section is crucial for tax compliance and accurate invoice delivery.
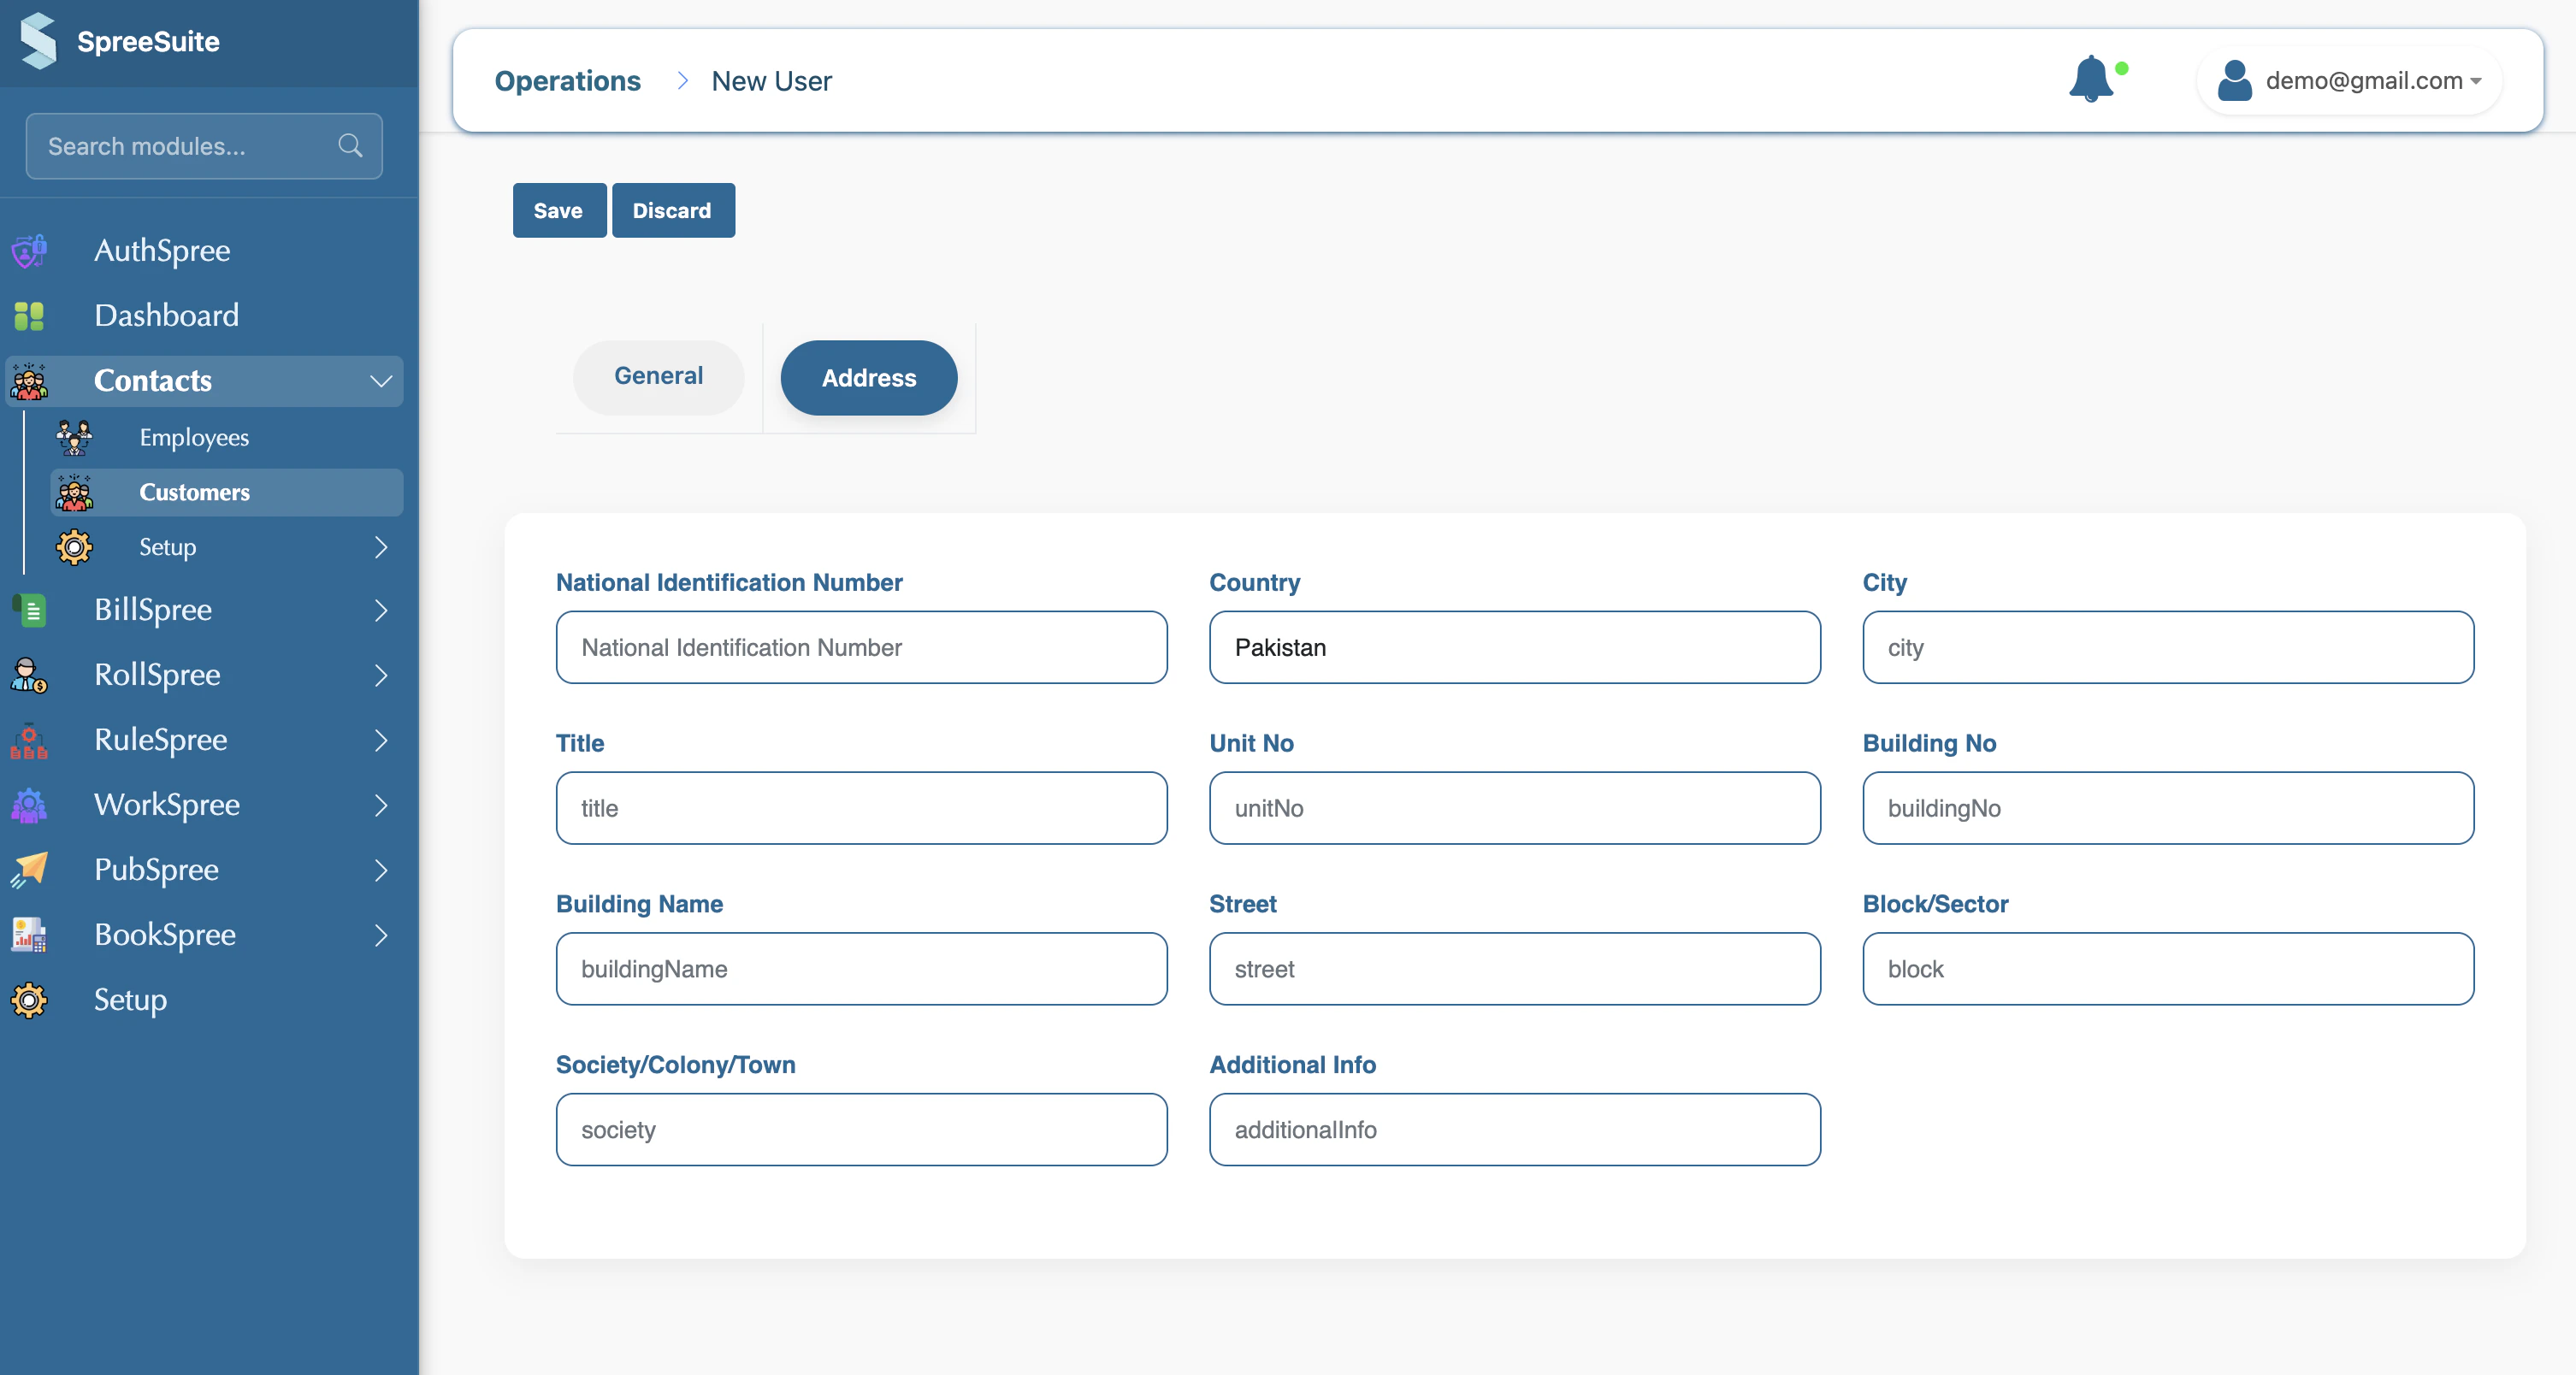 * **CNIC**: National identity number (if applicable in your region).
* **Country**: Select the customer's country.
* *Note: Other fields like Shop/Unit No, Building Name, and Street help in pinpointing the exact billing address.*
Once all details are filled, click the **Save** button. The customer will now appear in your list and can be linked to a subscription.
***
**2. Navigate to Subscriptions**
To view your active and disconnected subscriptions, click on **Subscriptions** in the main sidebar. You can manage existing records or create a new one by clicking the **+ New** button.
* **CNIC**: National identity number (if applicable in your region).
* **Country**: Select the customer's country.
* *Note: Other fields like Shop/Unit No, Building Name, and Street help in pinpointing the exact billing address.*
Once all details are filled, click the **Save** button. The customer will now appear in your list and can be linked to a subscription.
***
**2. Navigate to Subscriptions**
To view your active and disconnected subscriptions, click on **Subscriptions** in the main sidebar. You can manage existing records or create a new one by clicking the **+ New** button.
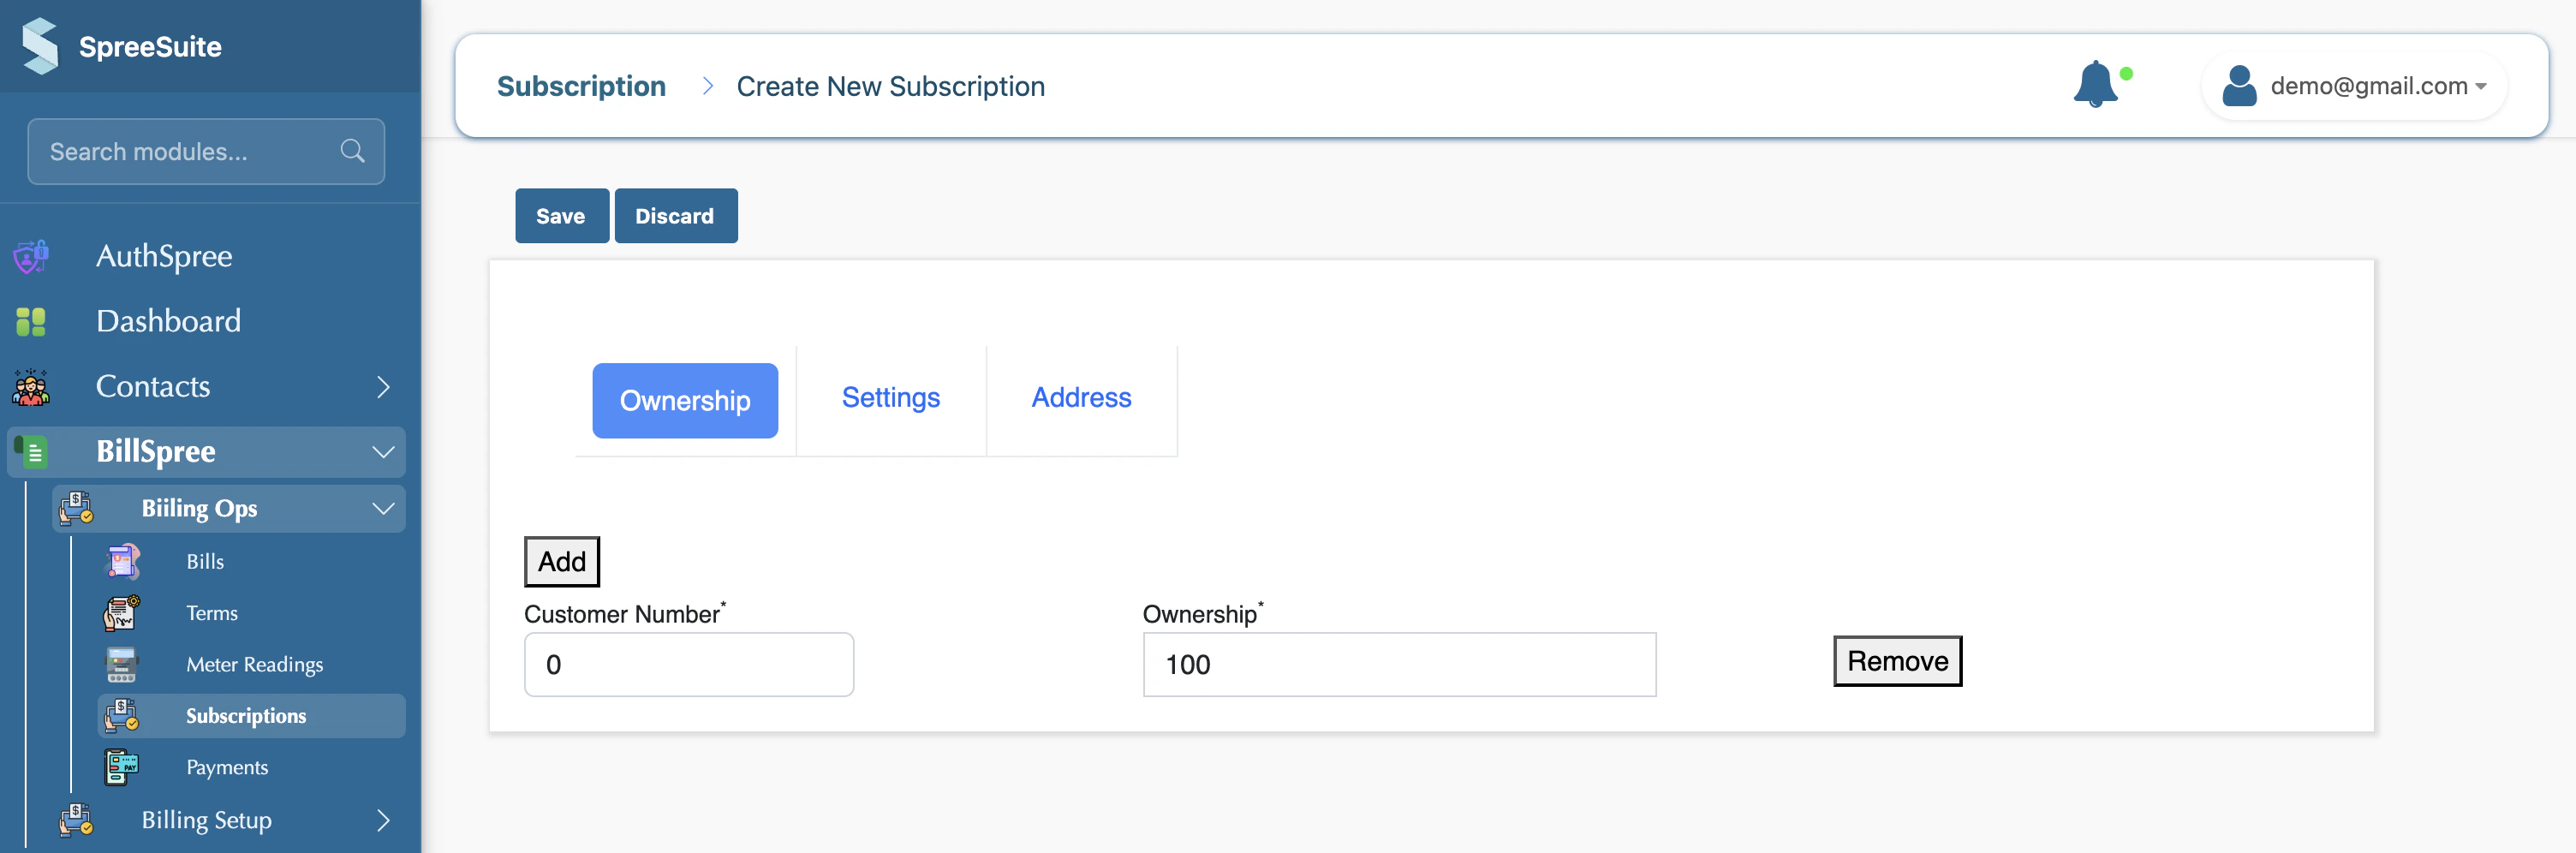
 **a. Select Customer number here.**
In the **Customer Details** section, you must provide the unique identifier for the customer you want to subscribe.
* **Customer Number**: Enter the system-generated ID for the customer.
**a. Select Customer number here.**
In the **Customer Details** section, you must provide the unique identifier for the customer you want to subscribe.
* **Customer Number**: Enter the system-generated ID for the customer.
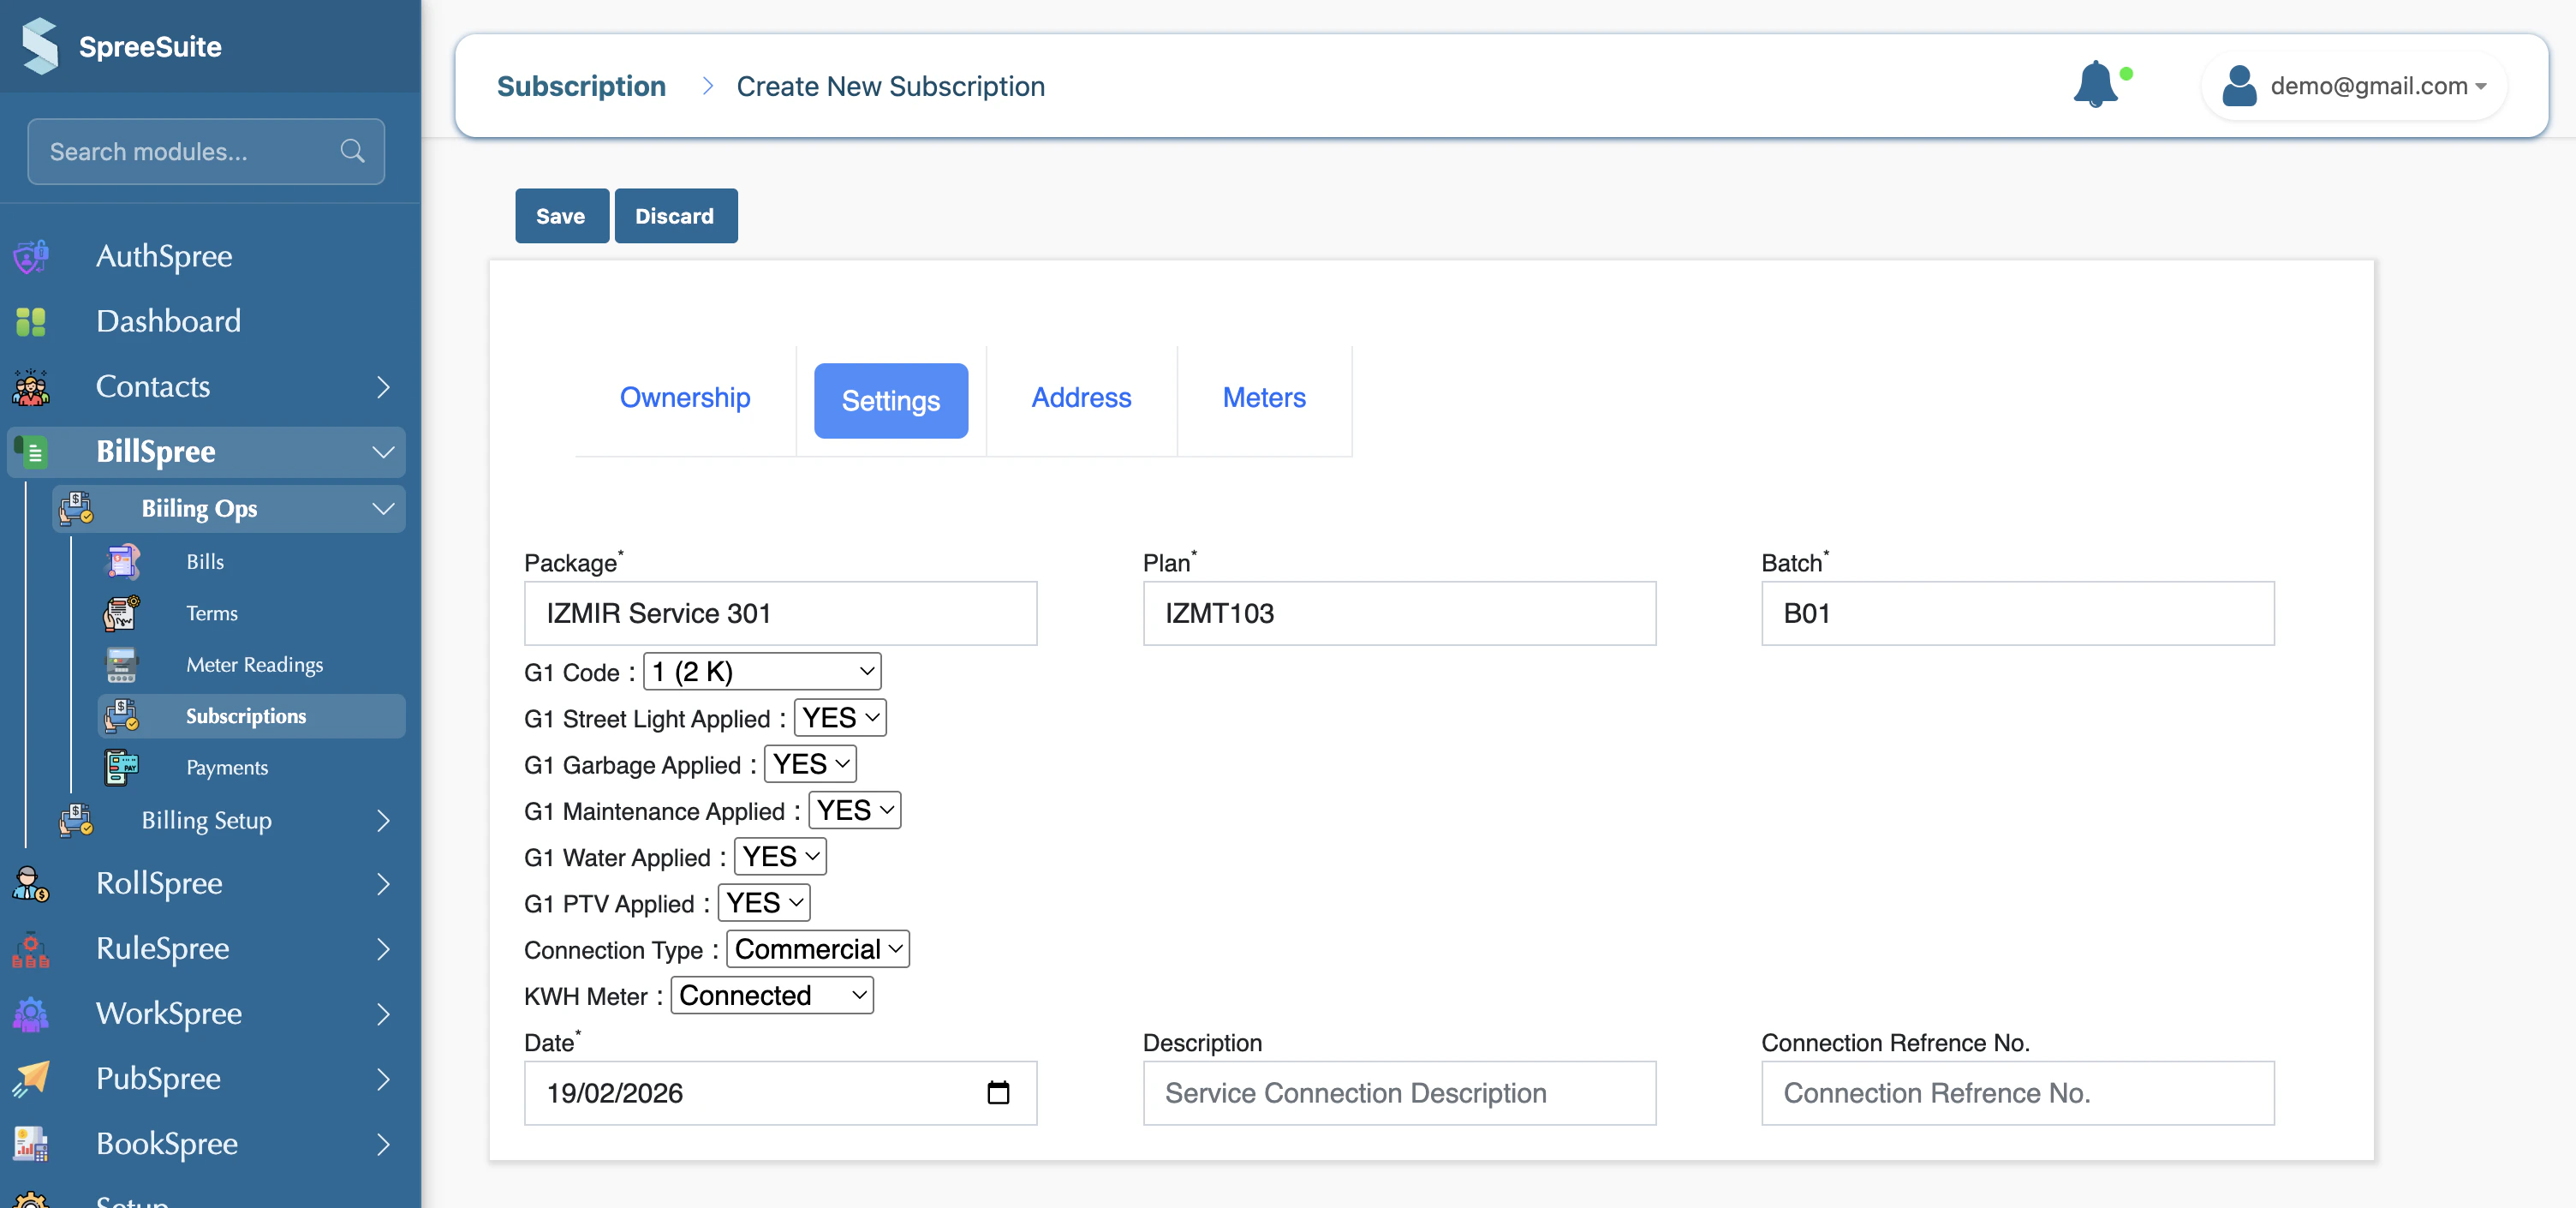
 b. Select Pricing Template, Plan variant, and Batch in the settings tab.
Click the **Select Pricing Template** dropdown to choose from your defined Plan variants
b. Select Pricing Template, Plan variant, and Batch in the settings tab.
Click the **Select Pricing Template** dropdown to choose from your defined Plan variants
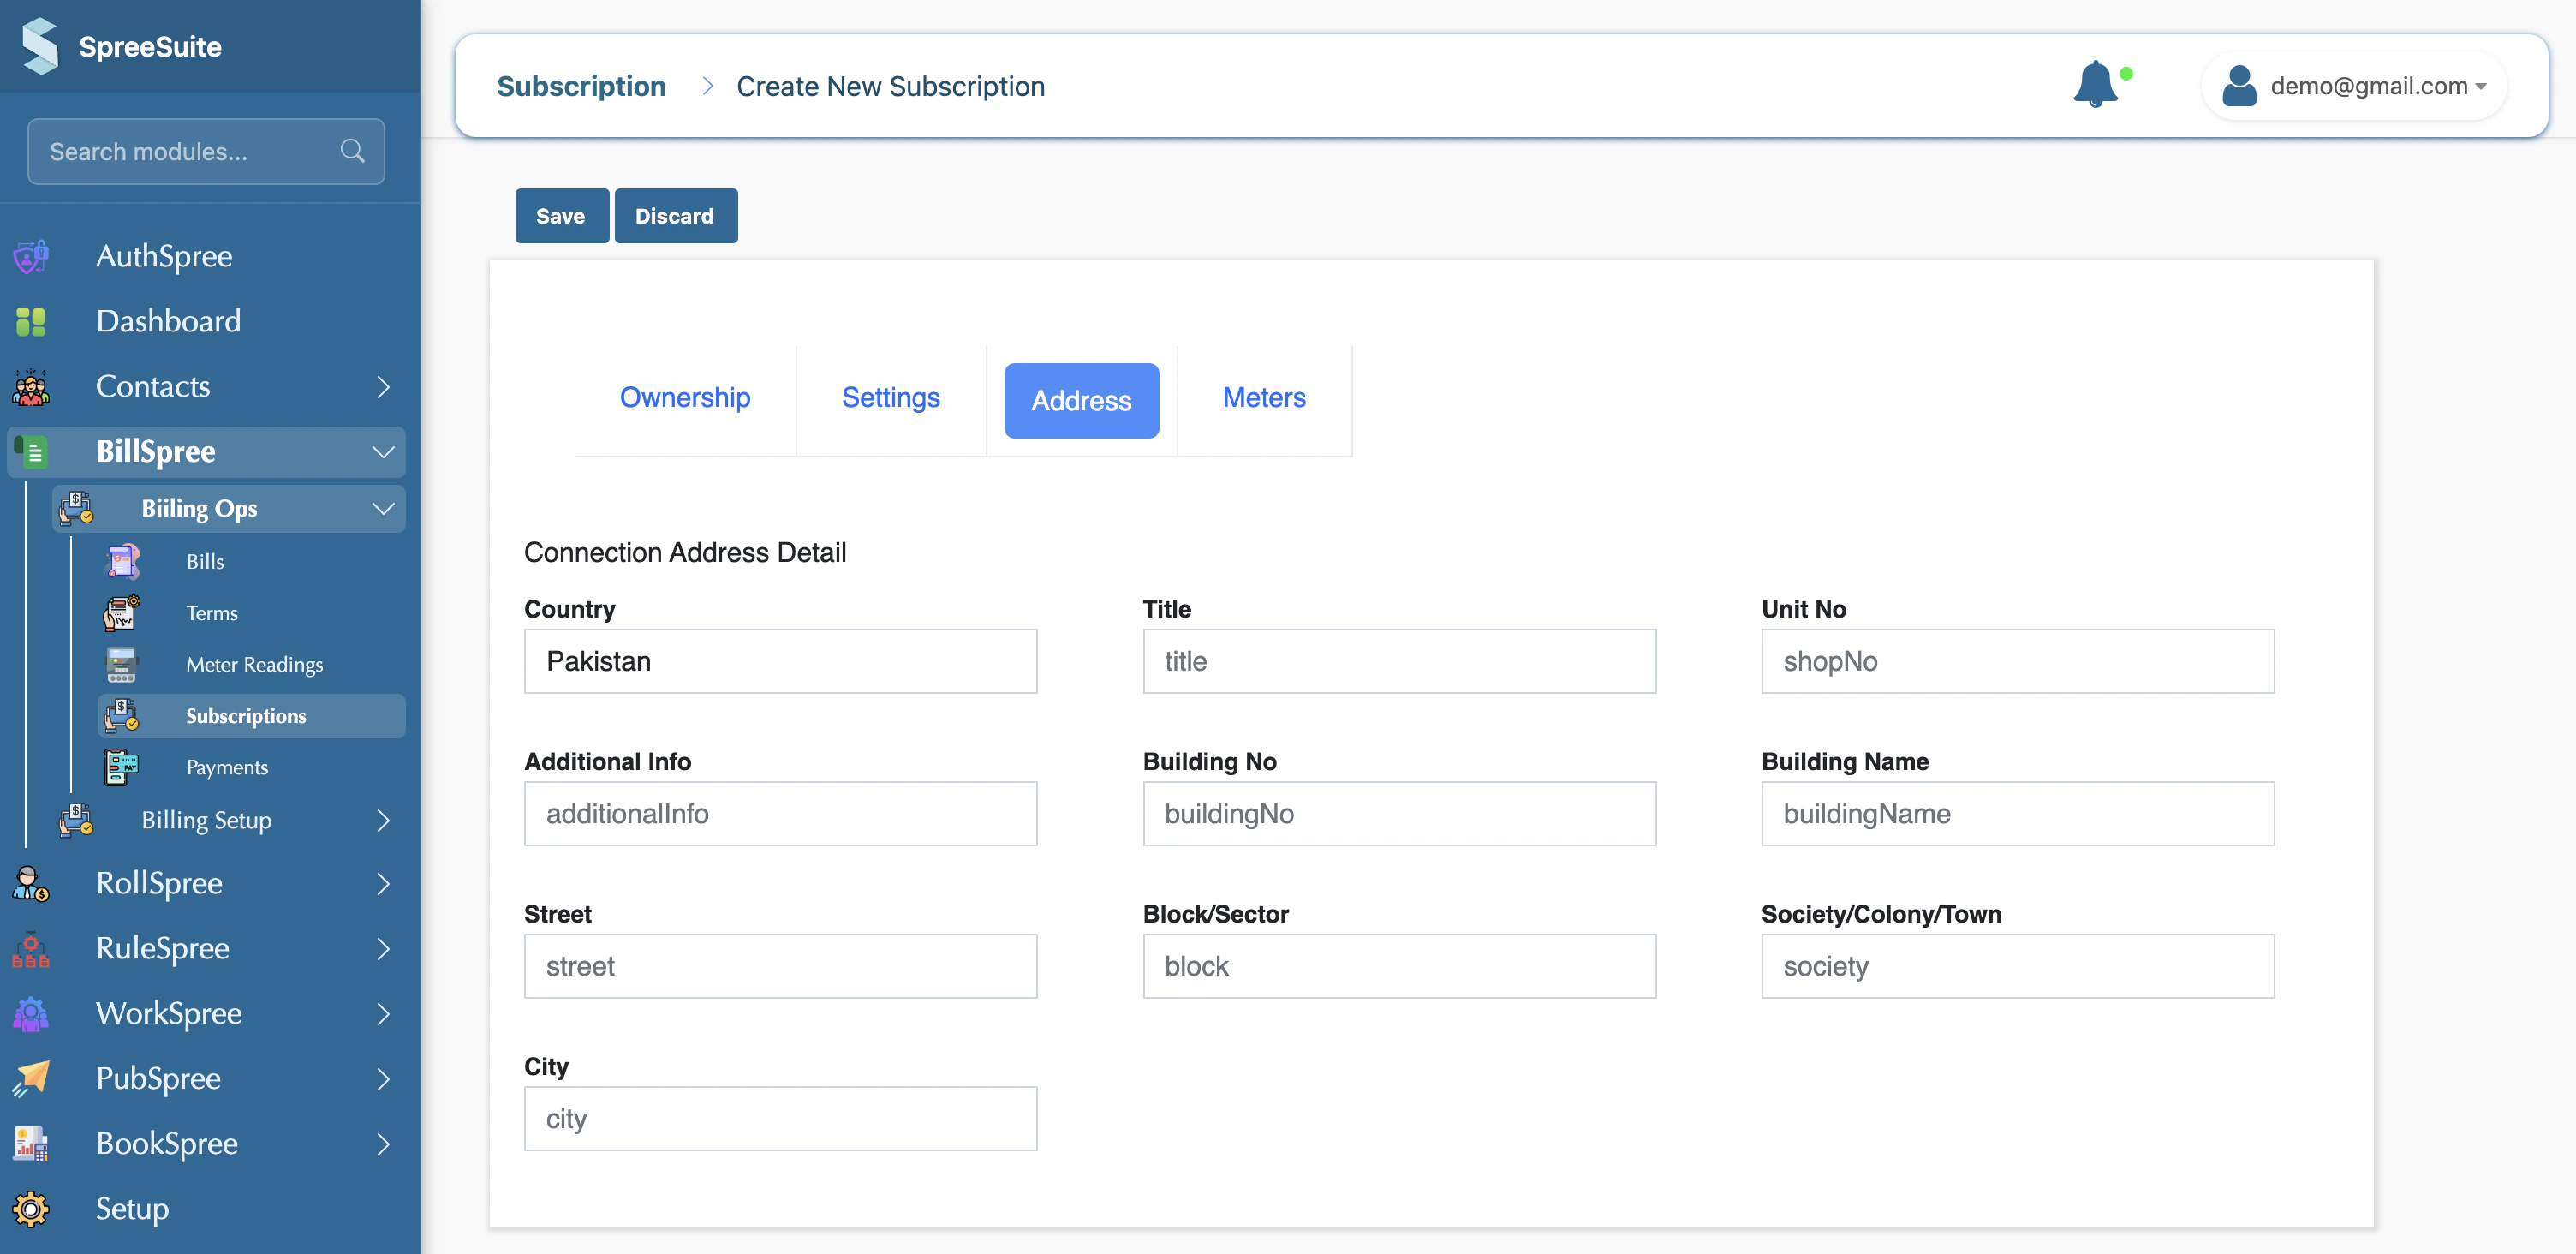
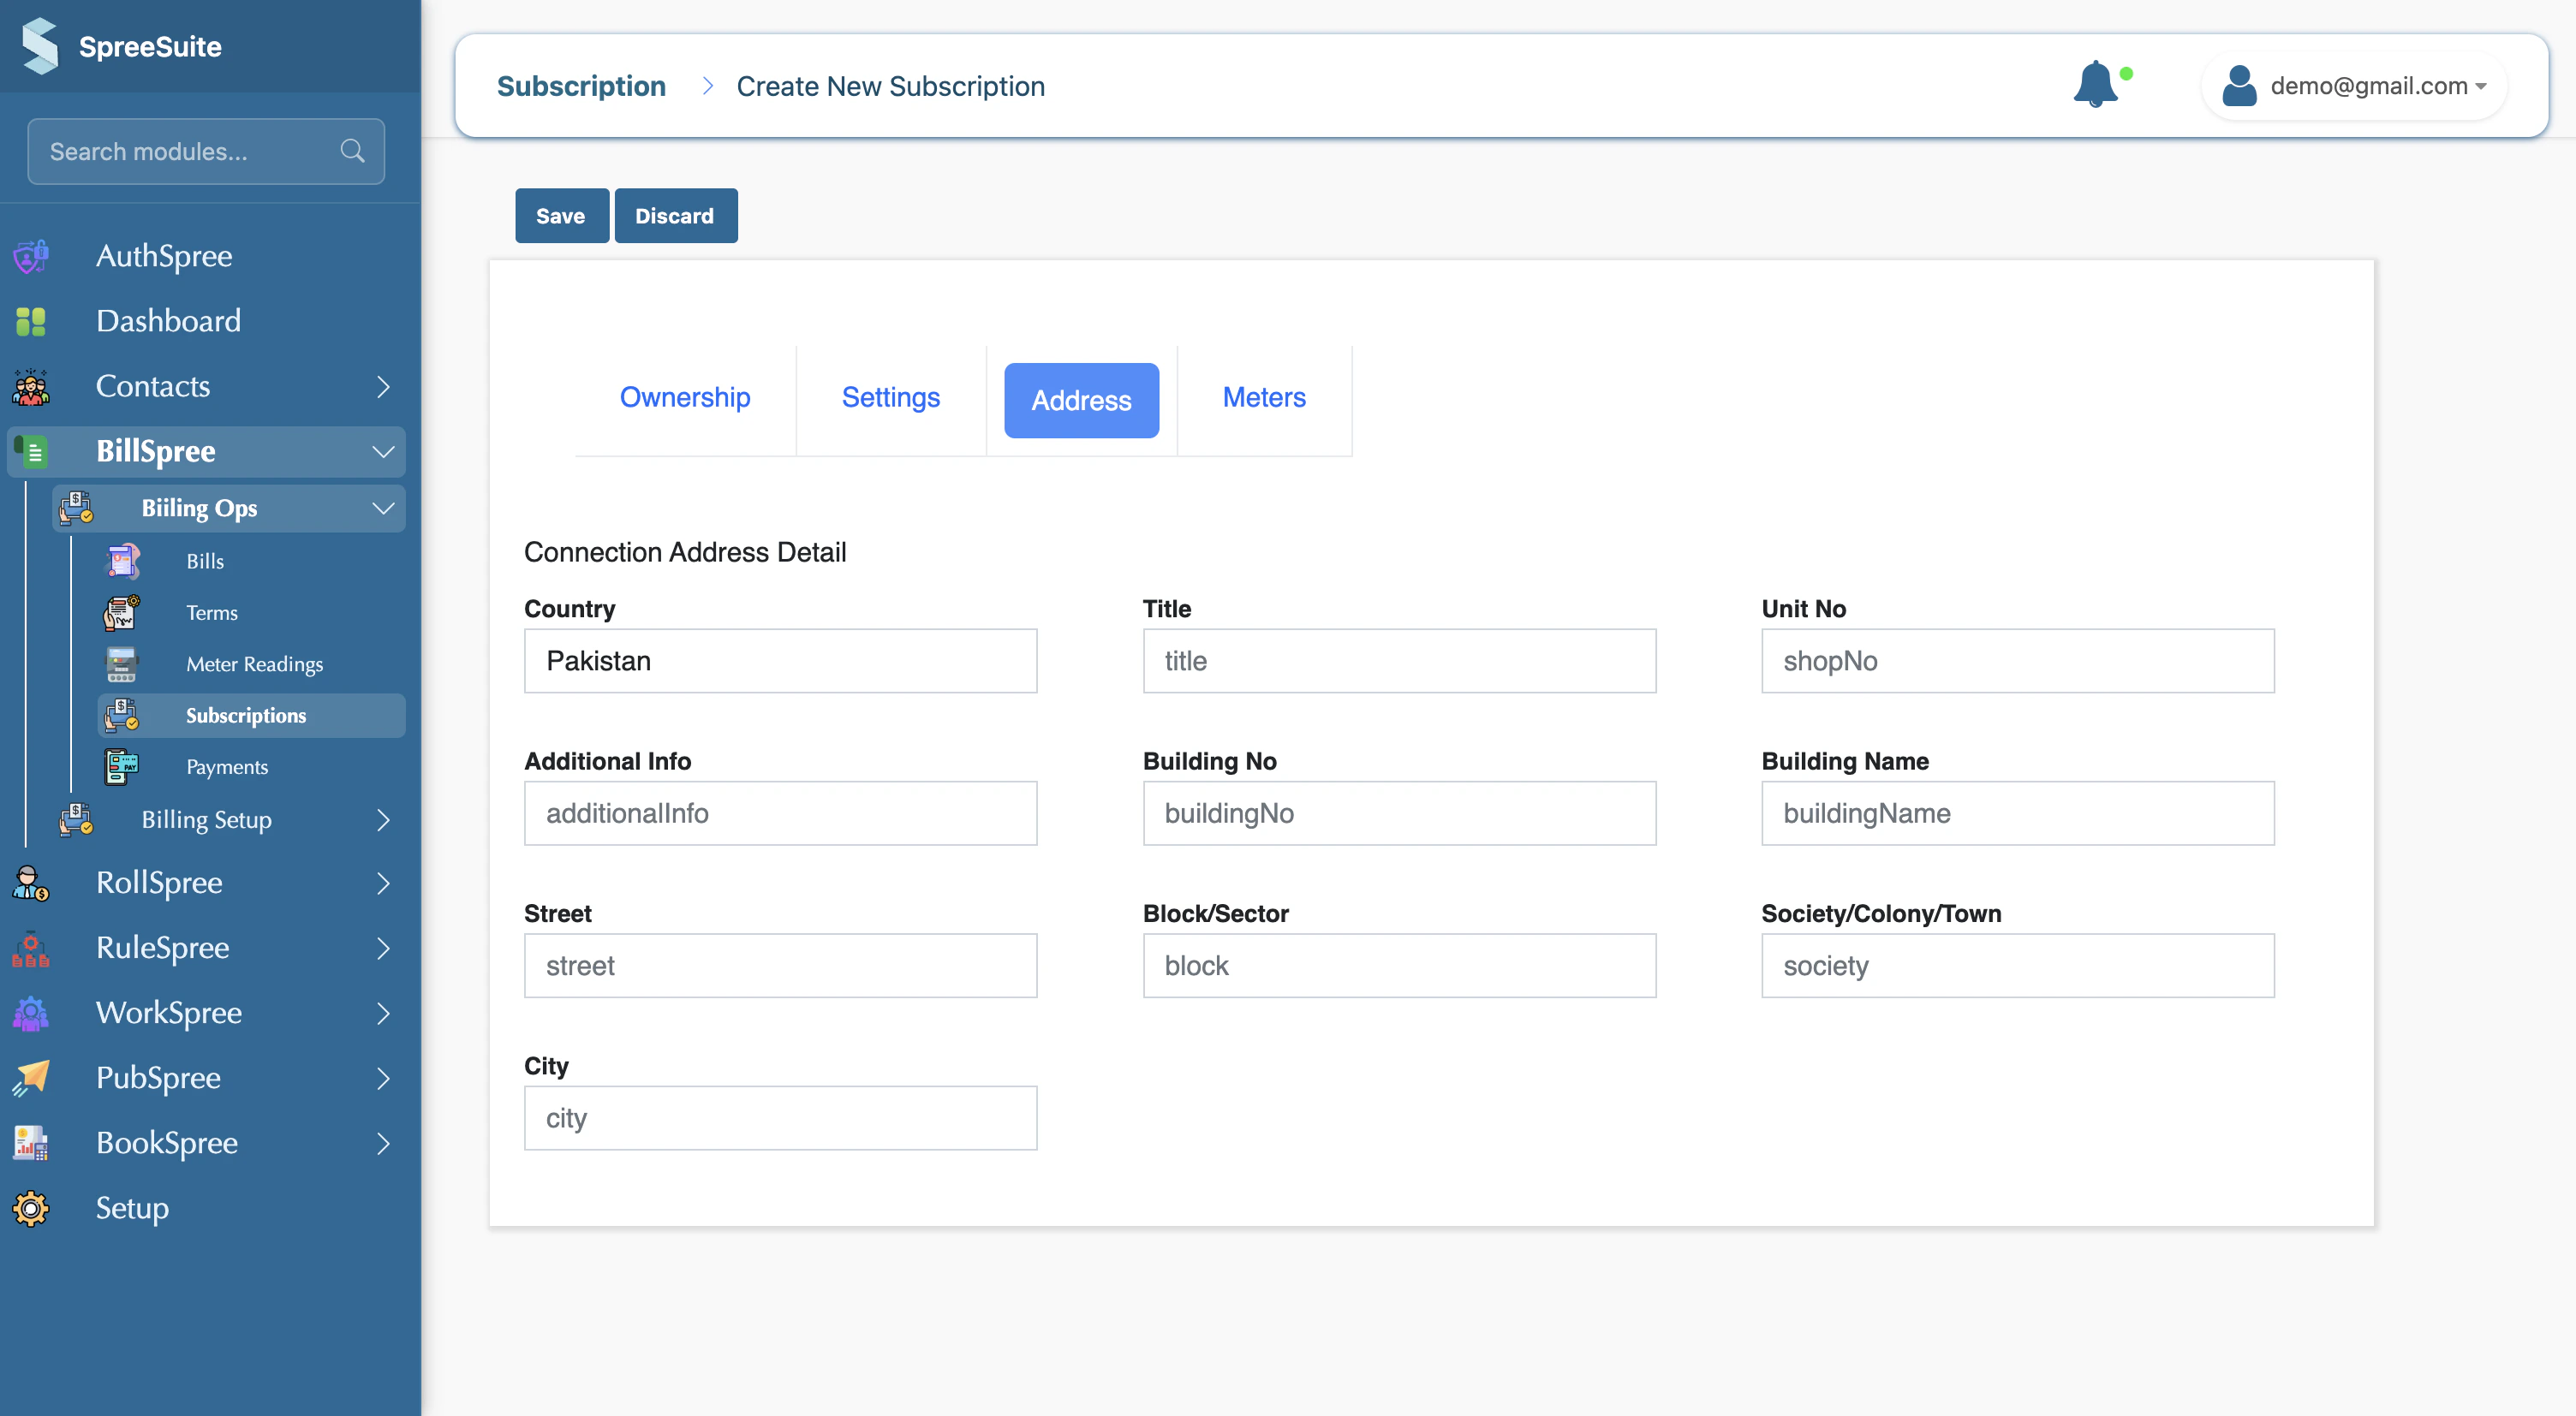
 ### Address
c. Add Address
### Address
c. Add Address
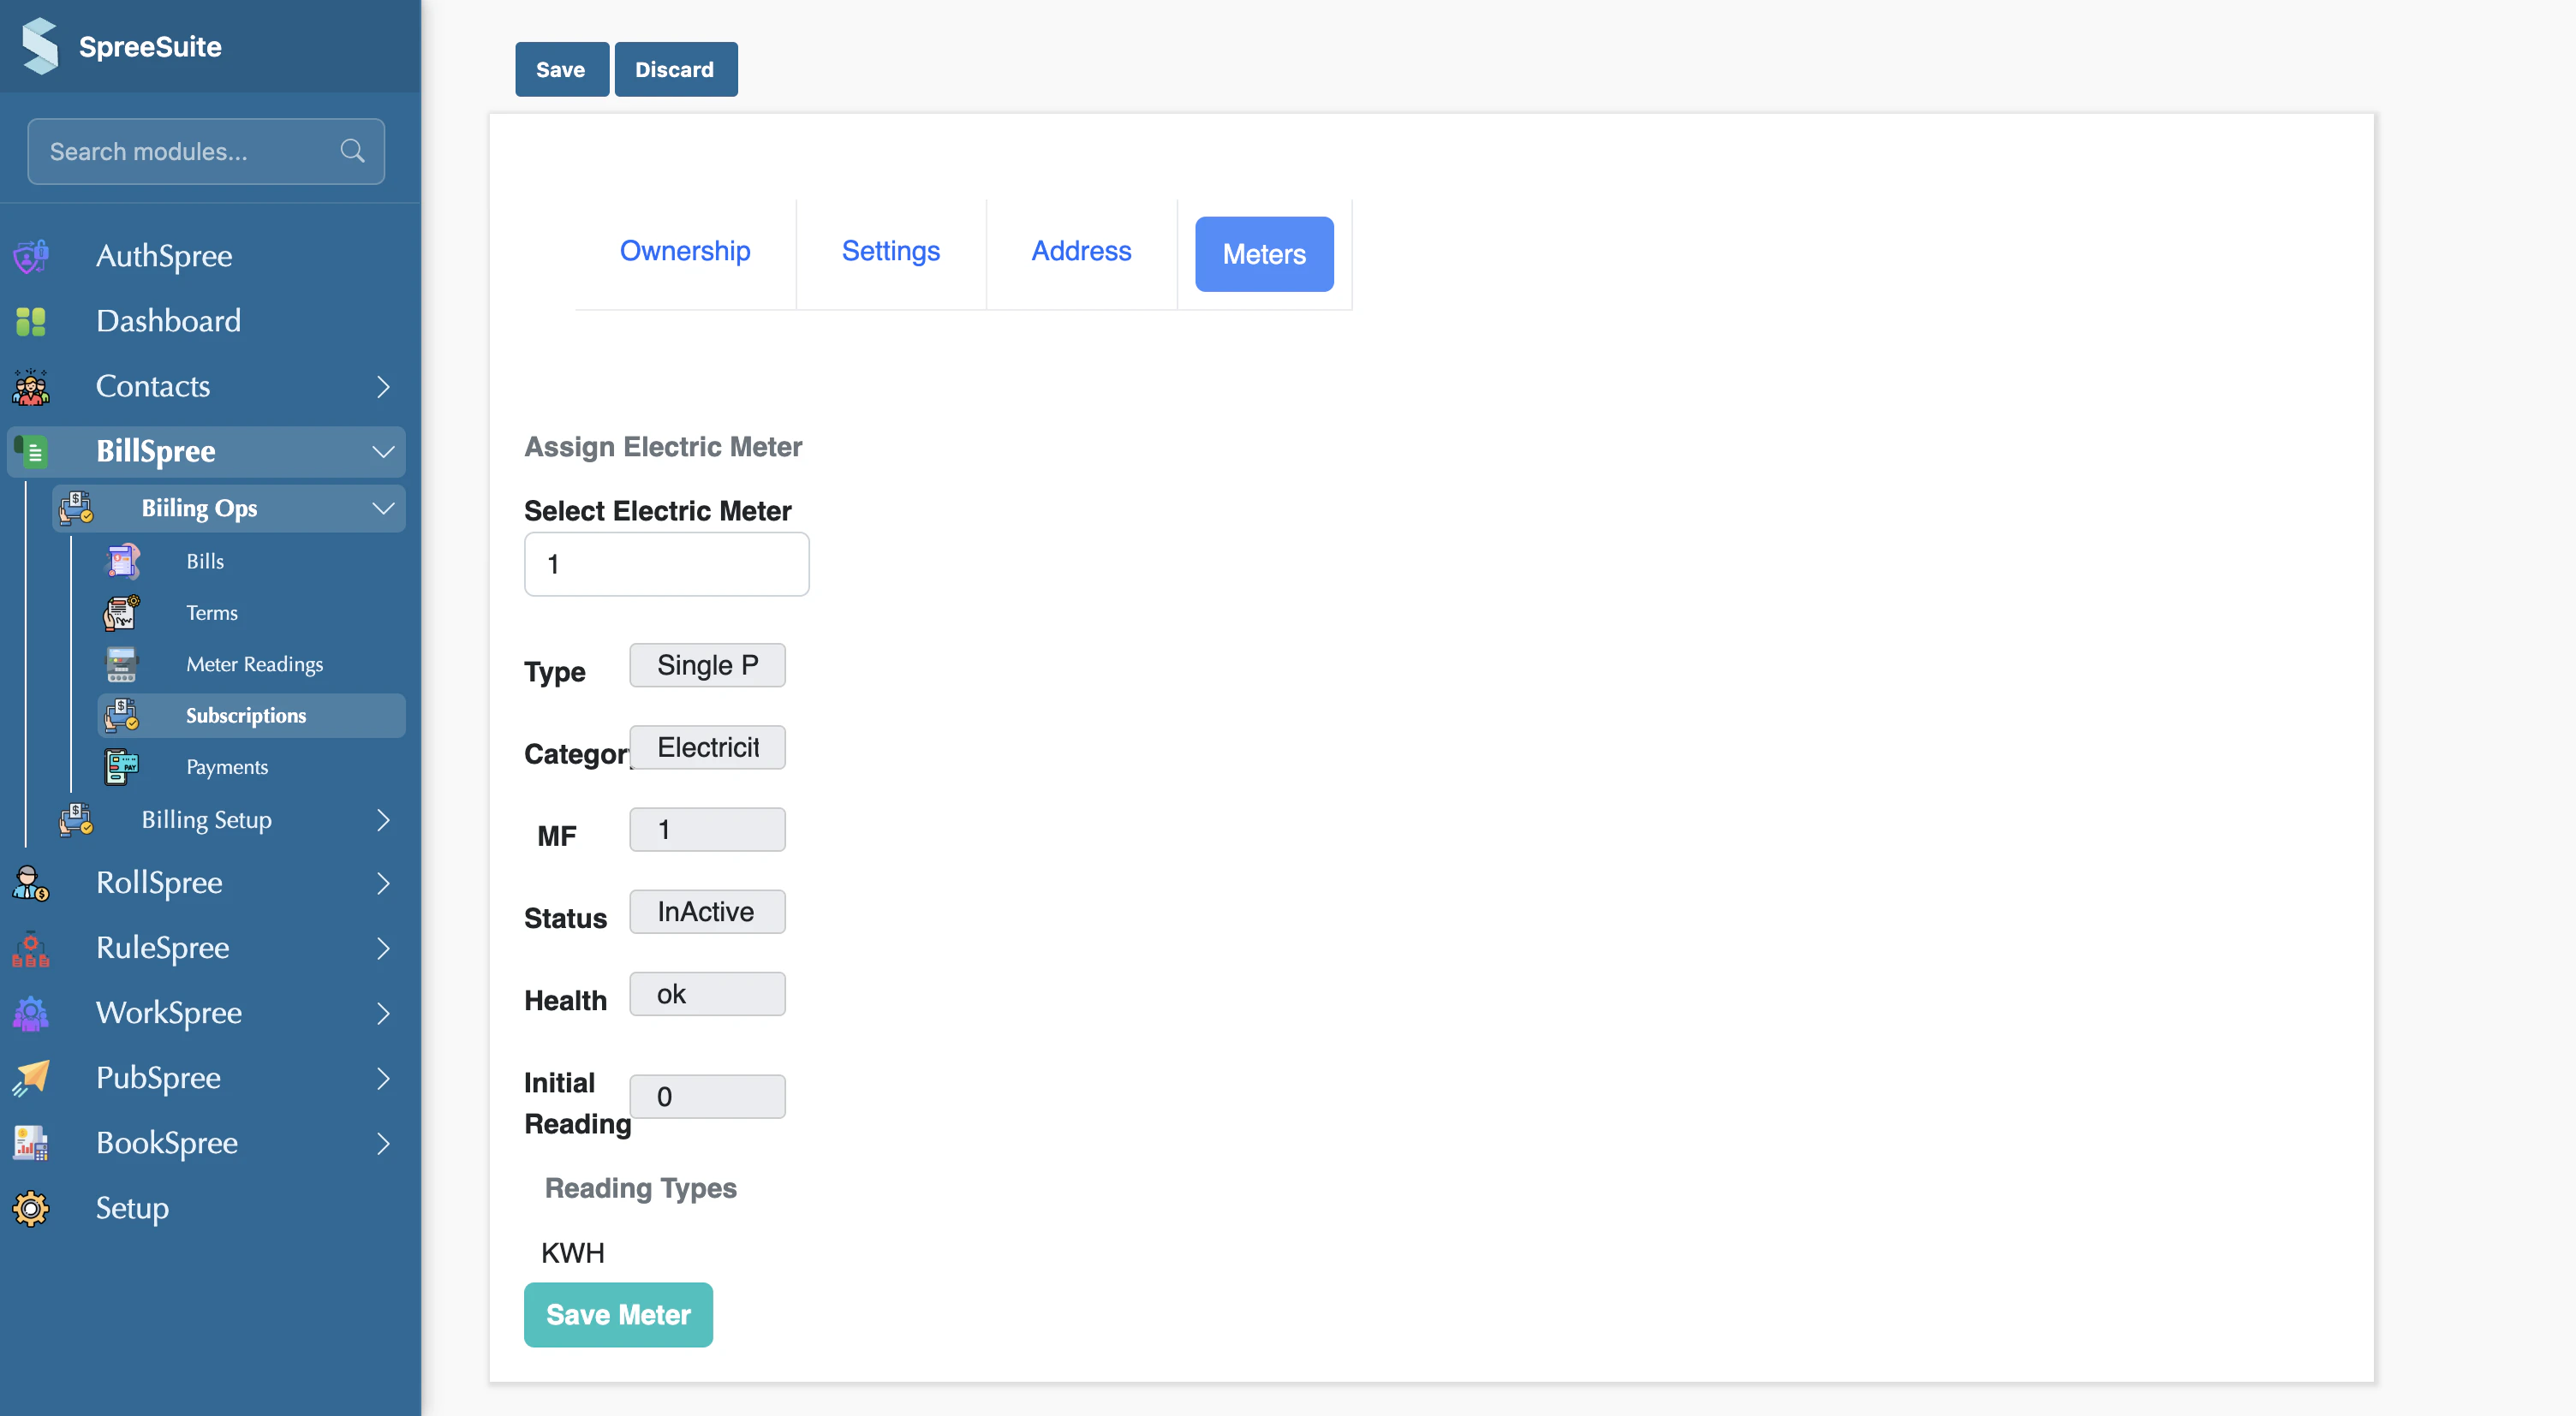
 ### Meters
d. Attach Meters
### Meters
d. Attach Meters
 ## Other Scenarios
### Upload Bulk subscription
You can also upload a subscription file in bulk
1. Click on Import Bulk Data
2. Select Pricing Template
## Other Scenarios
### Upload Bulk subscription
You can also upload a subscription file in bulk
1. Click on Import Bulk Data
2. Select Pricing Template
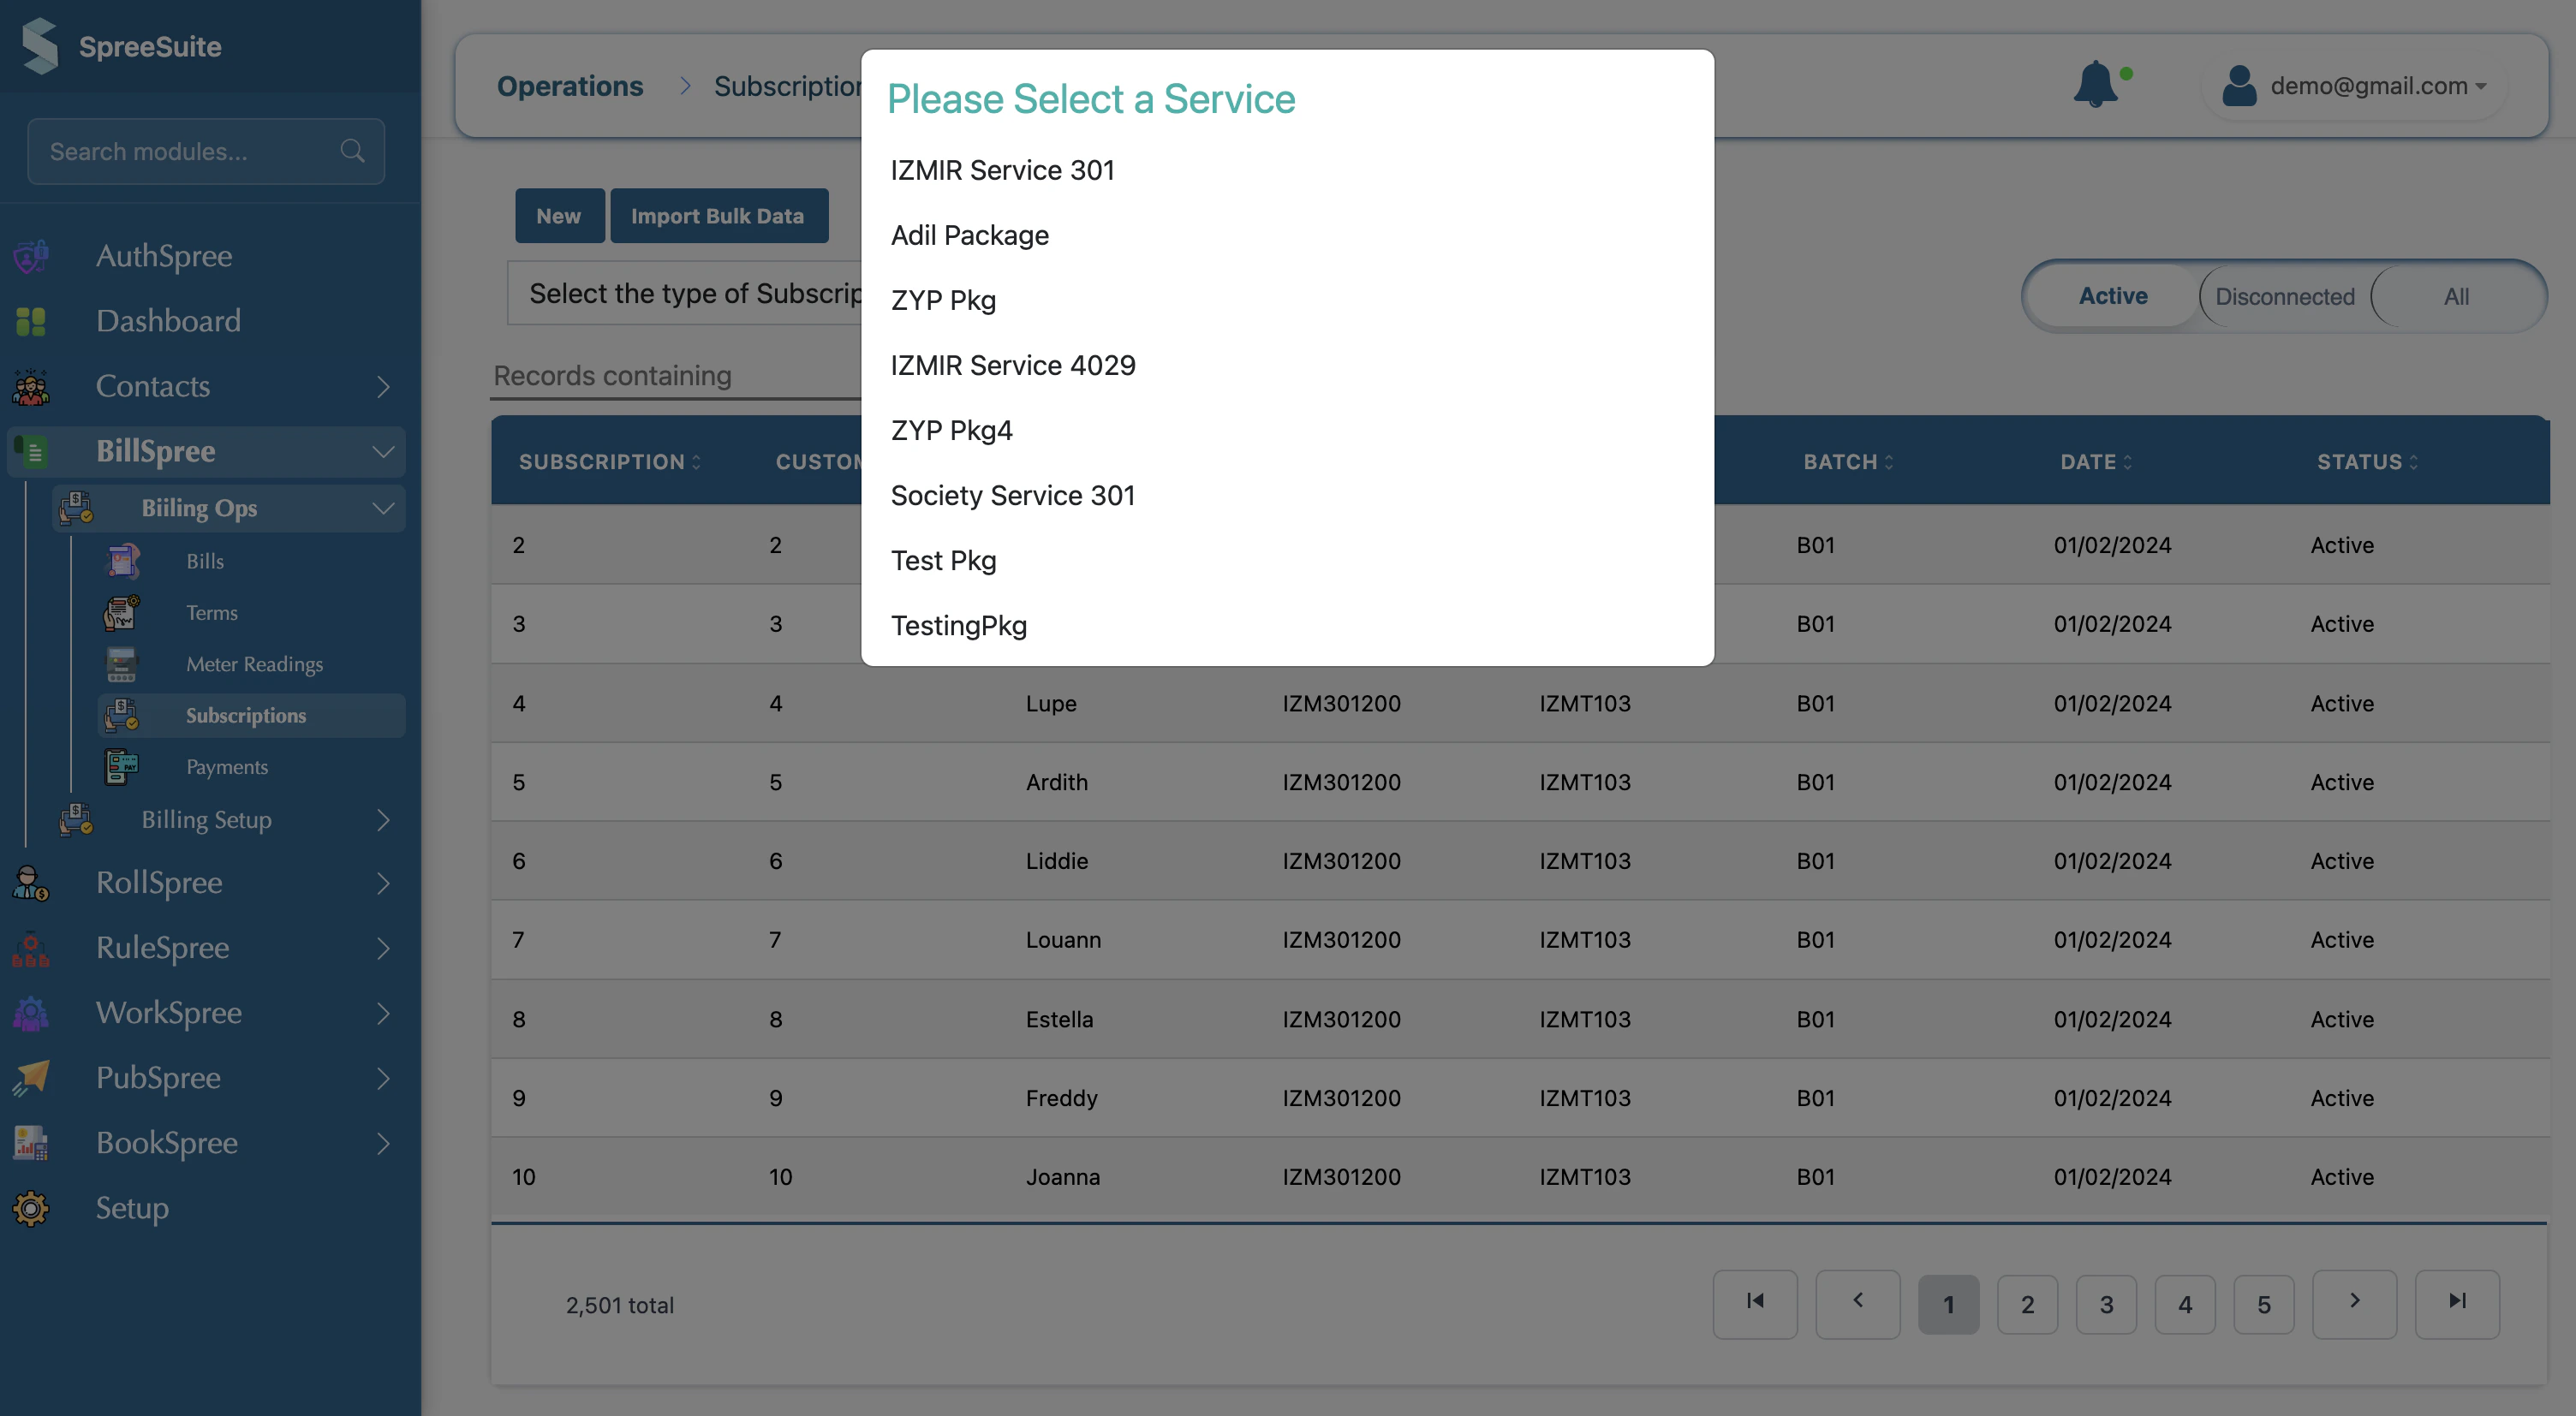 If you have a large number of subscribers to migrate, use the **Import Bulk Data** feature on the Subscriptions page to upload a CSV file
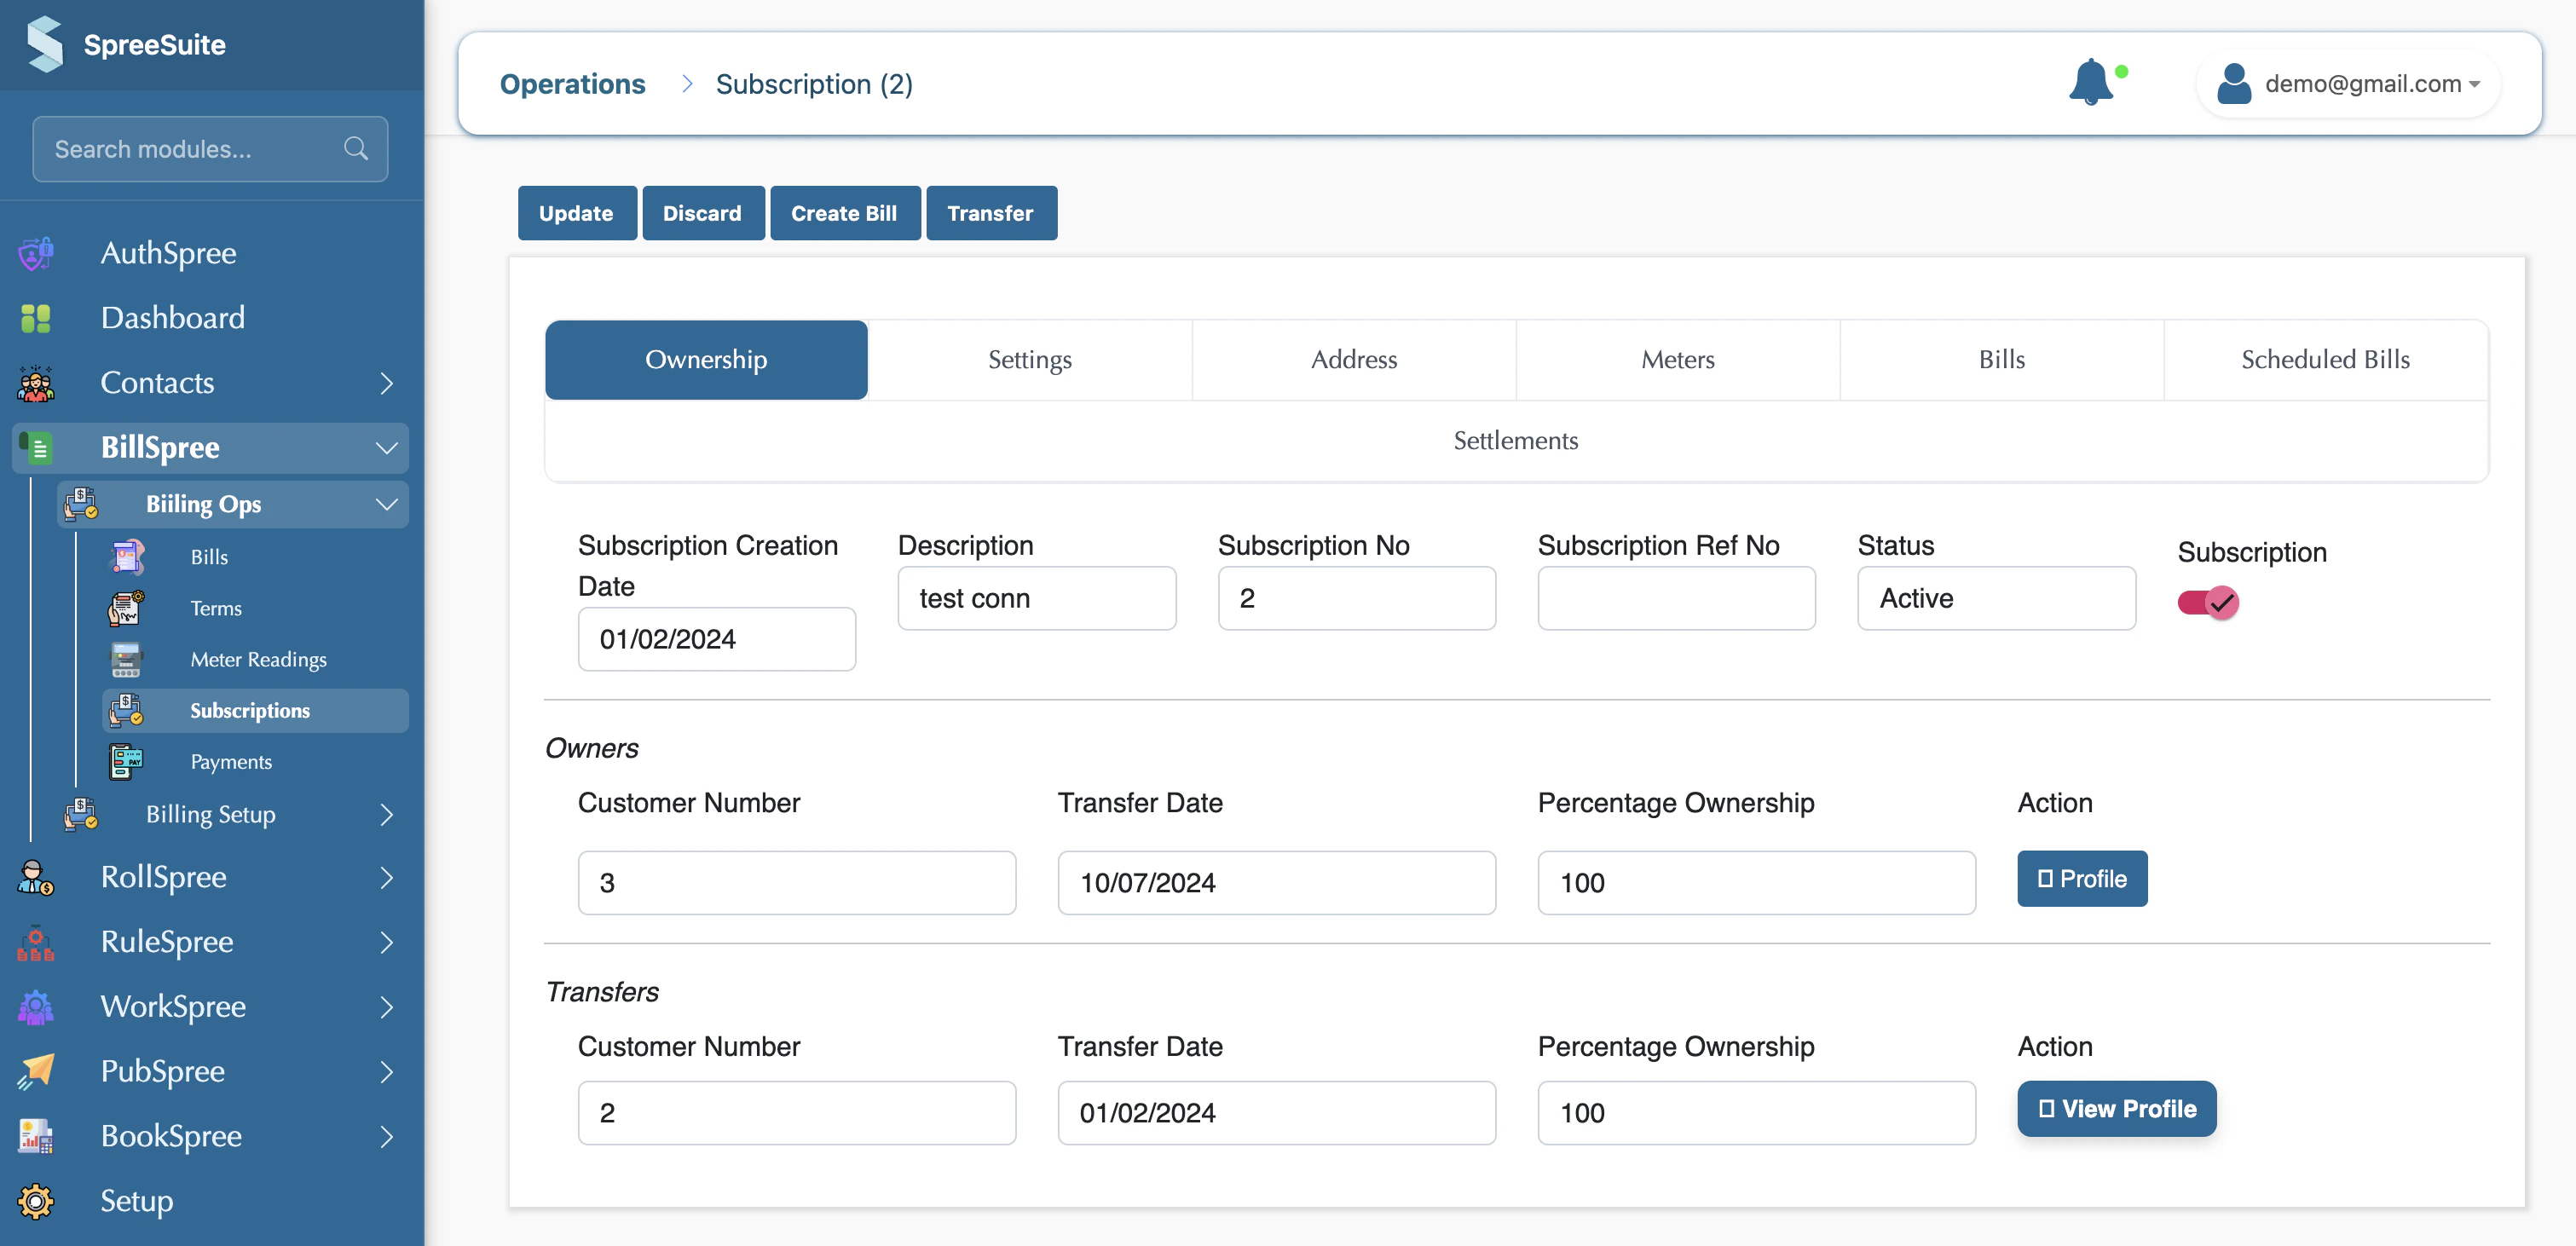
### RCO
You can reactivate the subscription by toggling the button
If you have a large number of subscribers to migrate, use the **Import Bulk Data** feature on the Subscriptions page to upload a CSV file
### RCO
You can reactivate the subscription by toggling the button
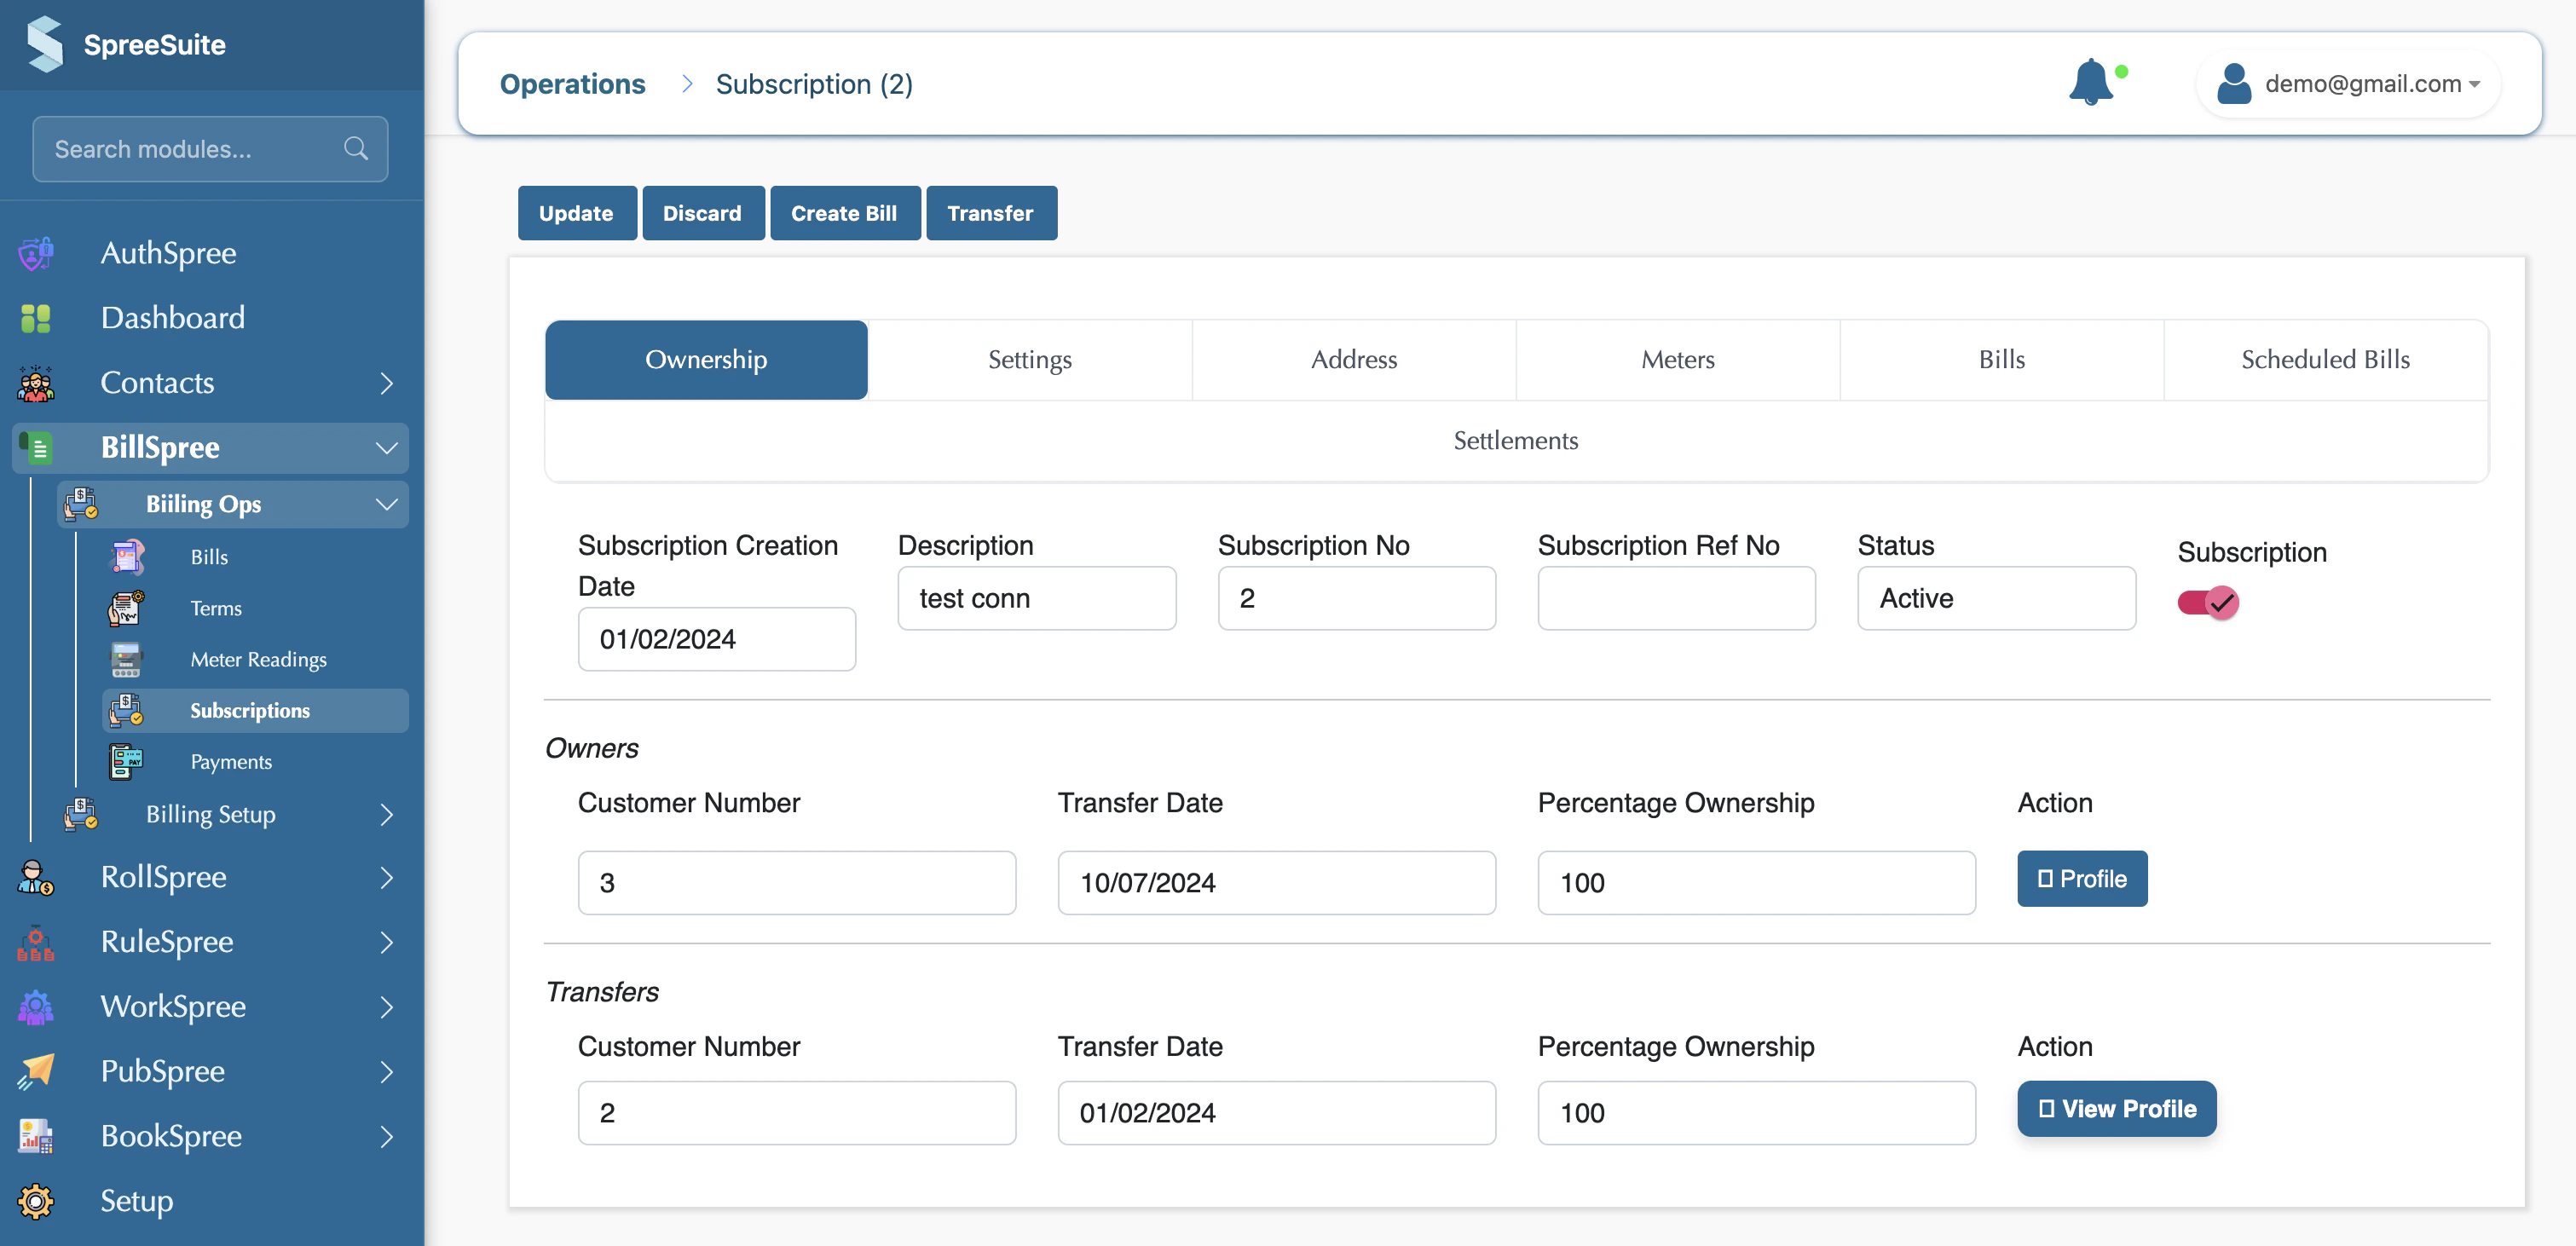
 ### DCO
You can deactivate the subscription by toggling the button
### DCO
You can deactivate the subscription by toggling the button
 ## Step-by-Step Payment Flow
1. Navigate to **BillSpree on the sidebar**
## Step-by-Step Payment Flow
1. Navigate to **BillSpree on the sidebar**
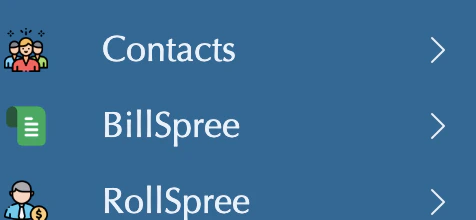 2. Click on BillSpree
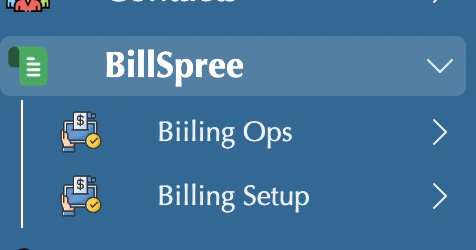 3. Click on Billing Ops
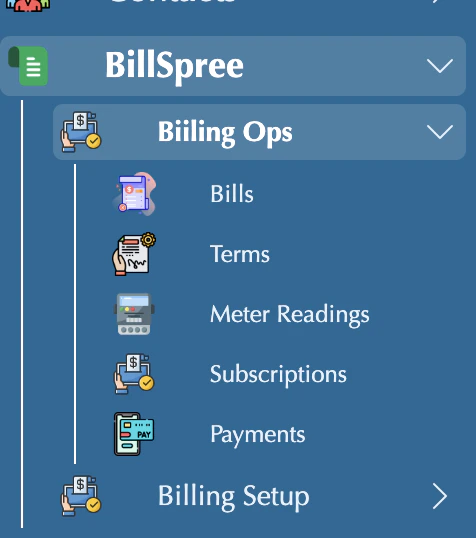 4. Click on Bills
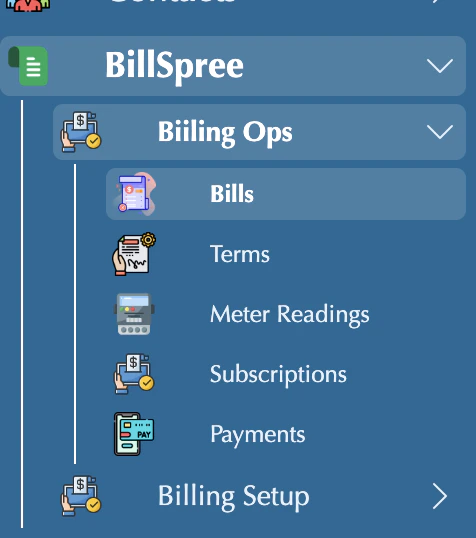 5. Bill's List View screen
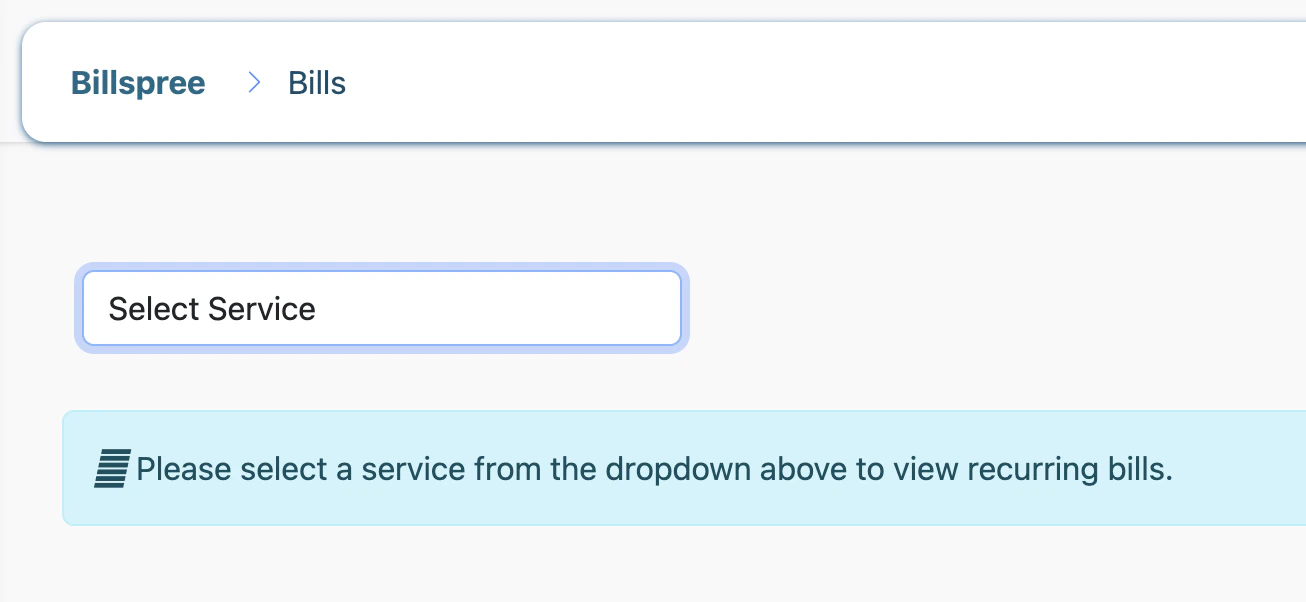 6. Select you package
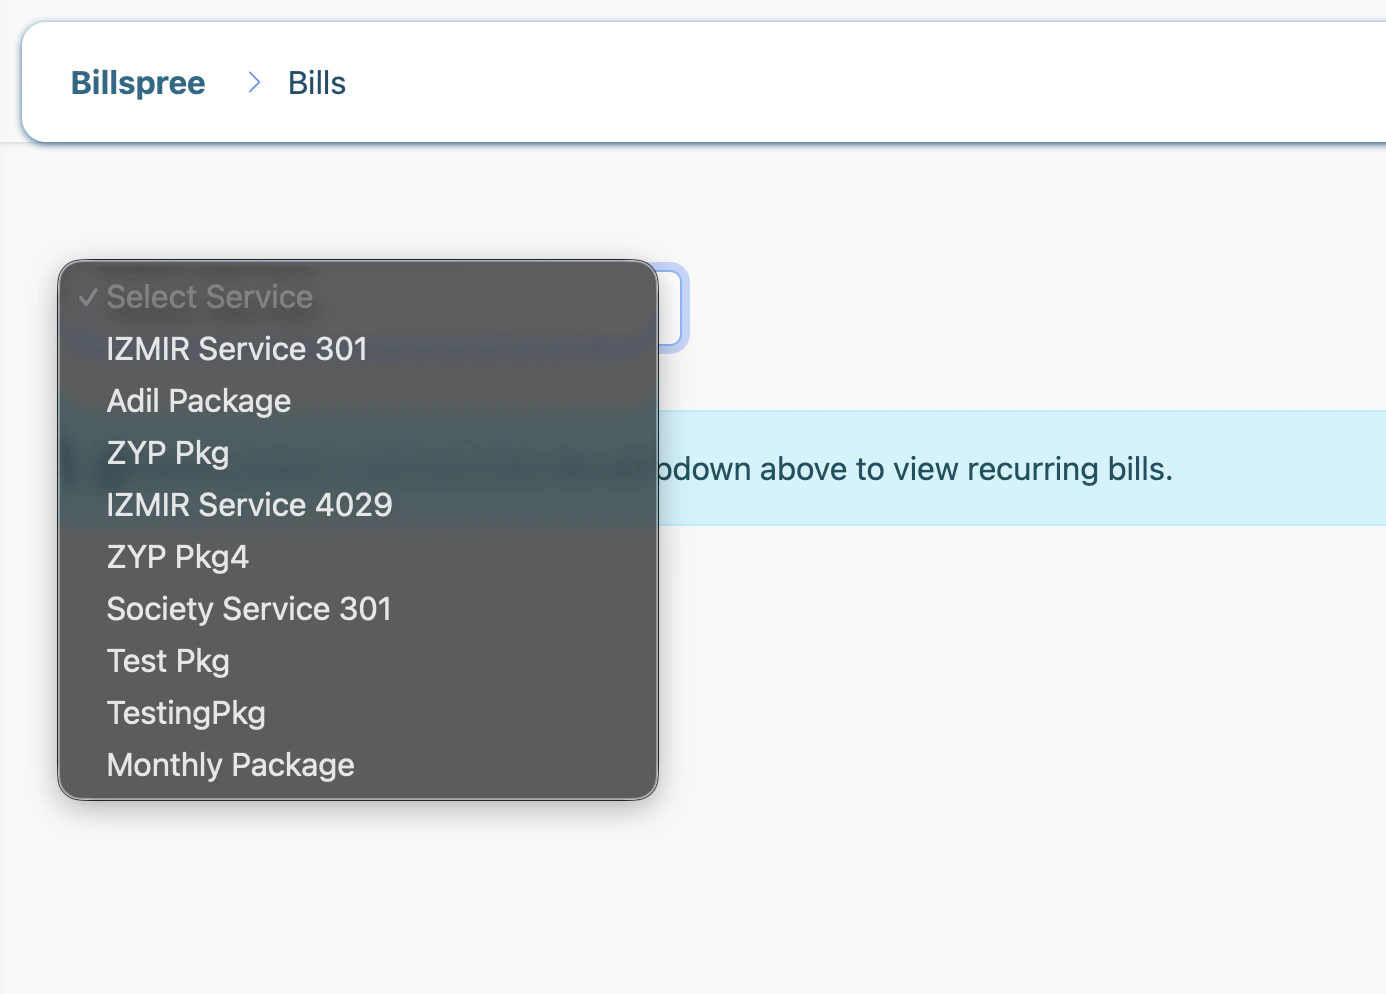 7. Your Bills are showing in the list
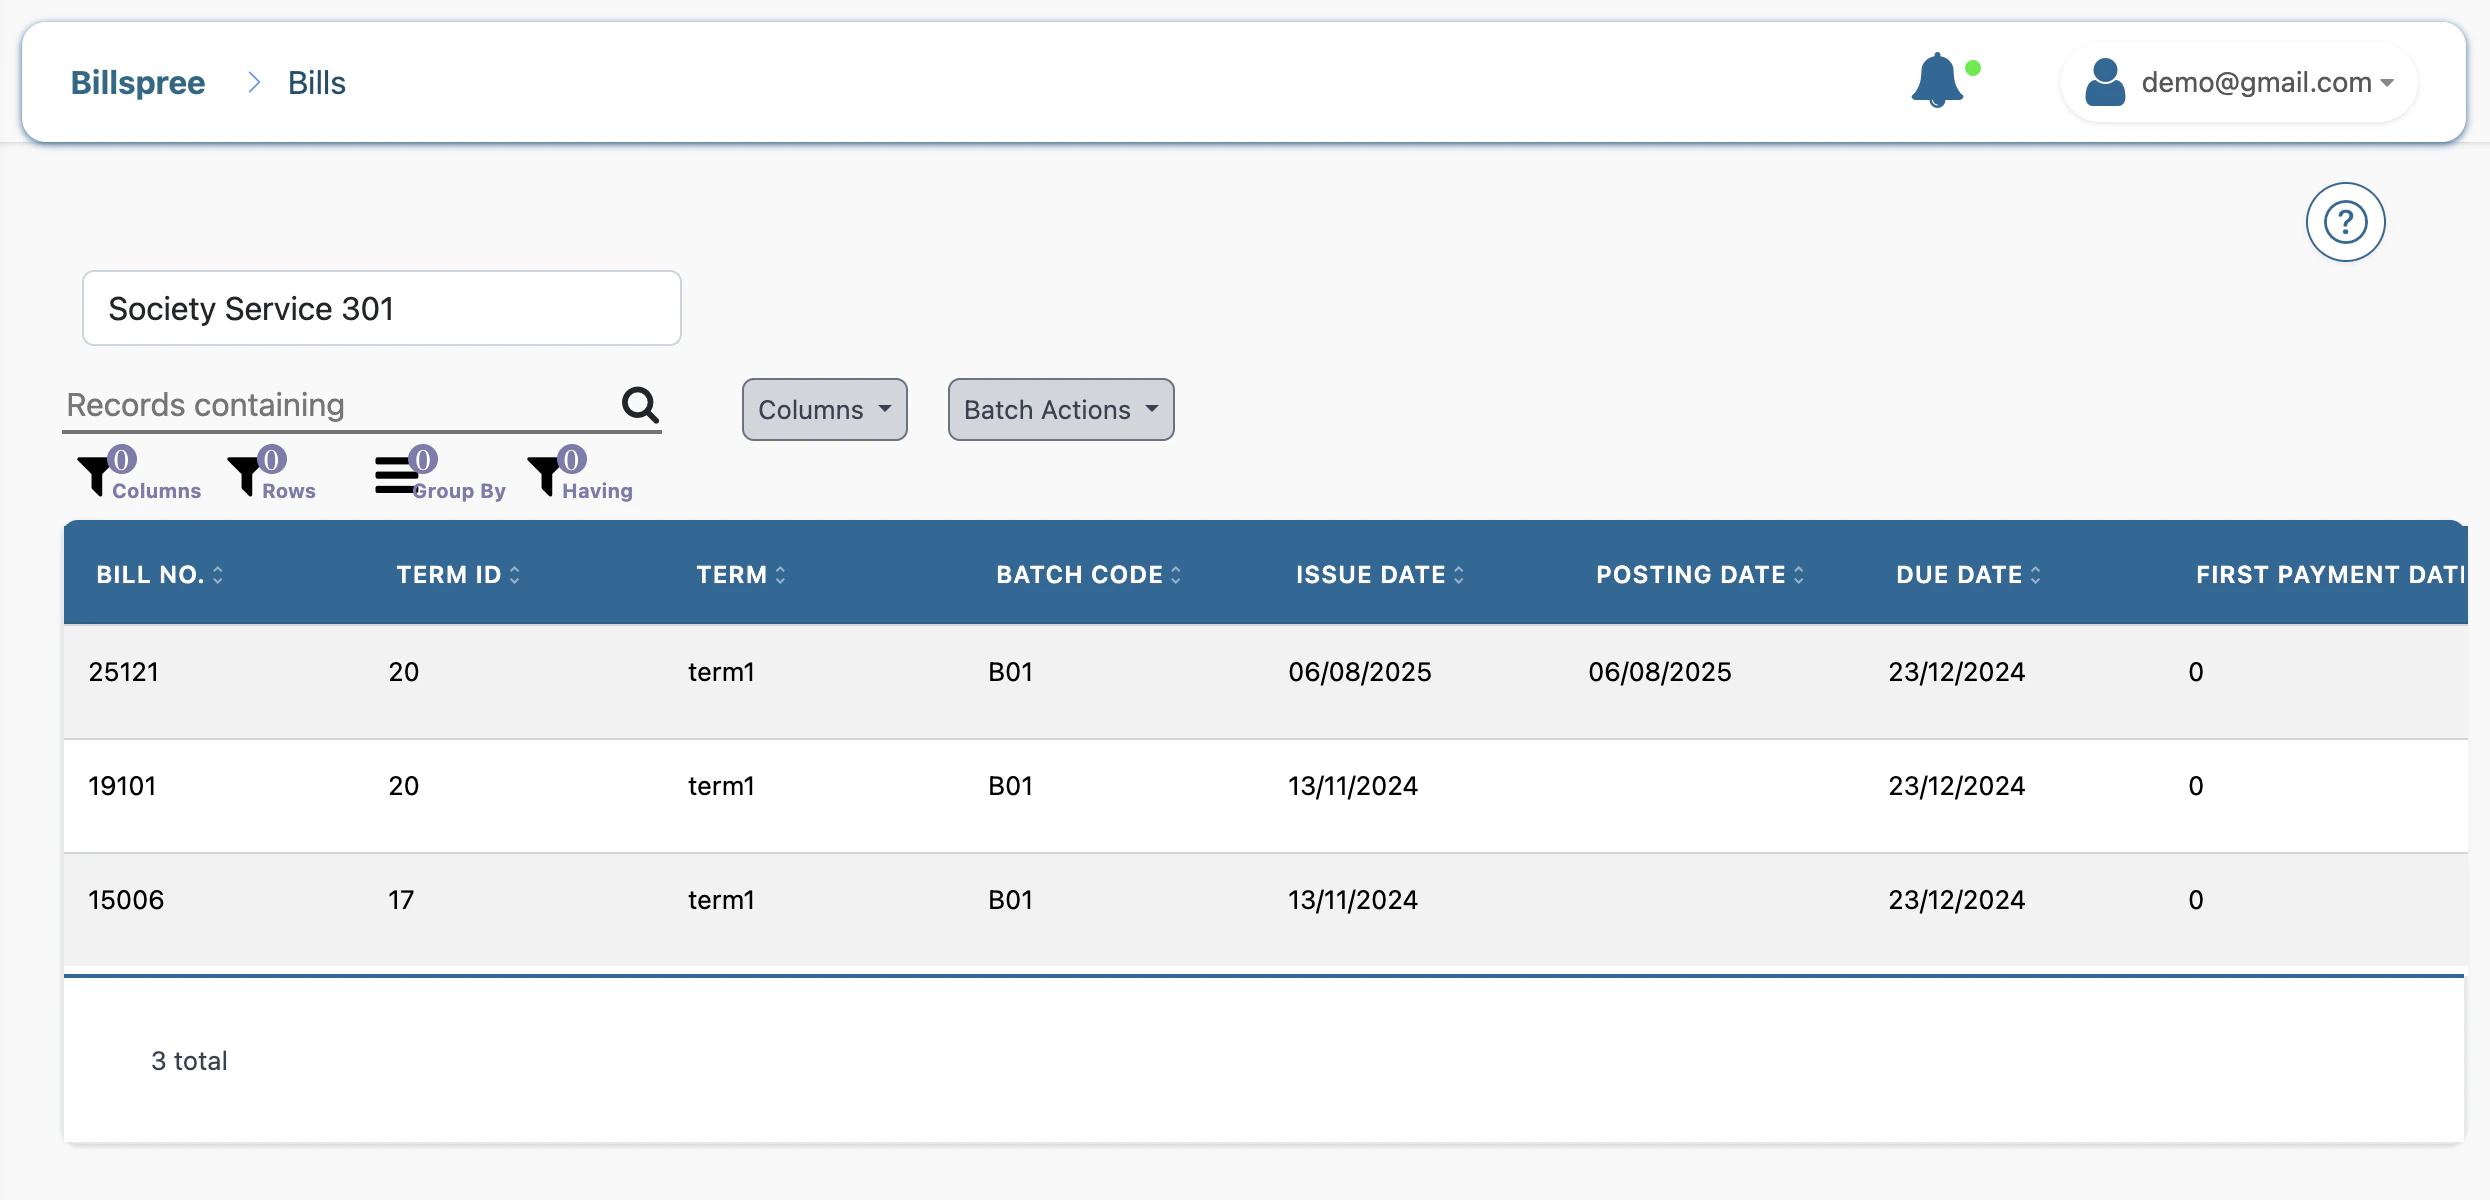 8. Click on your Bill
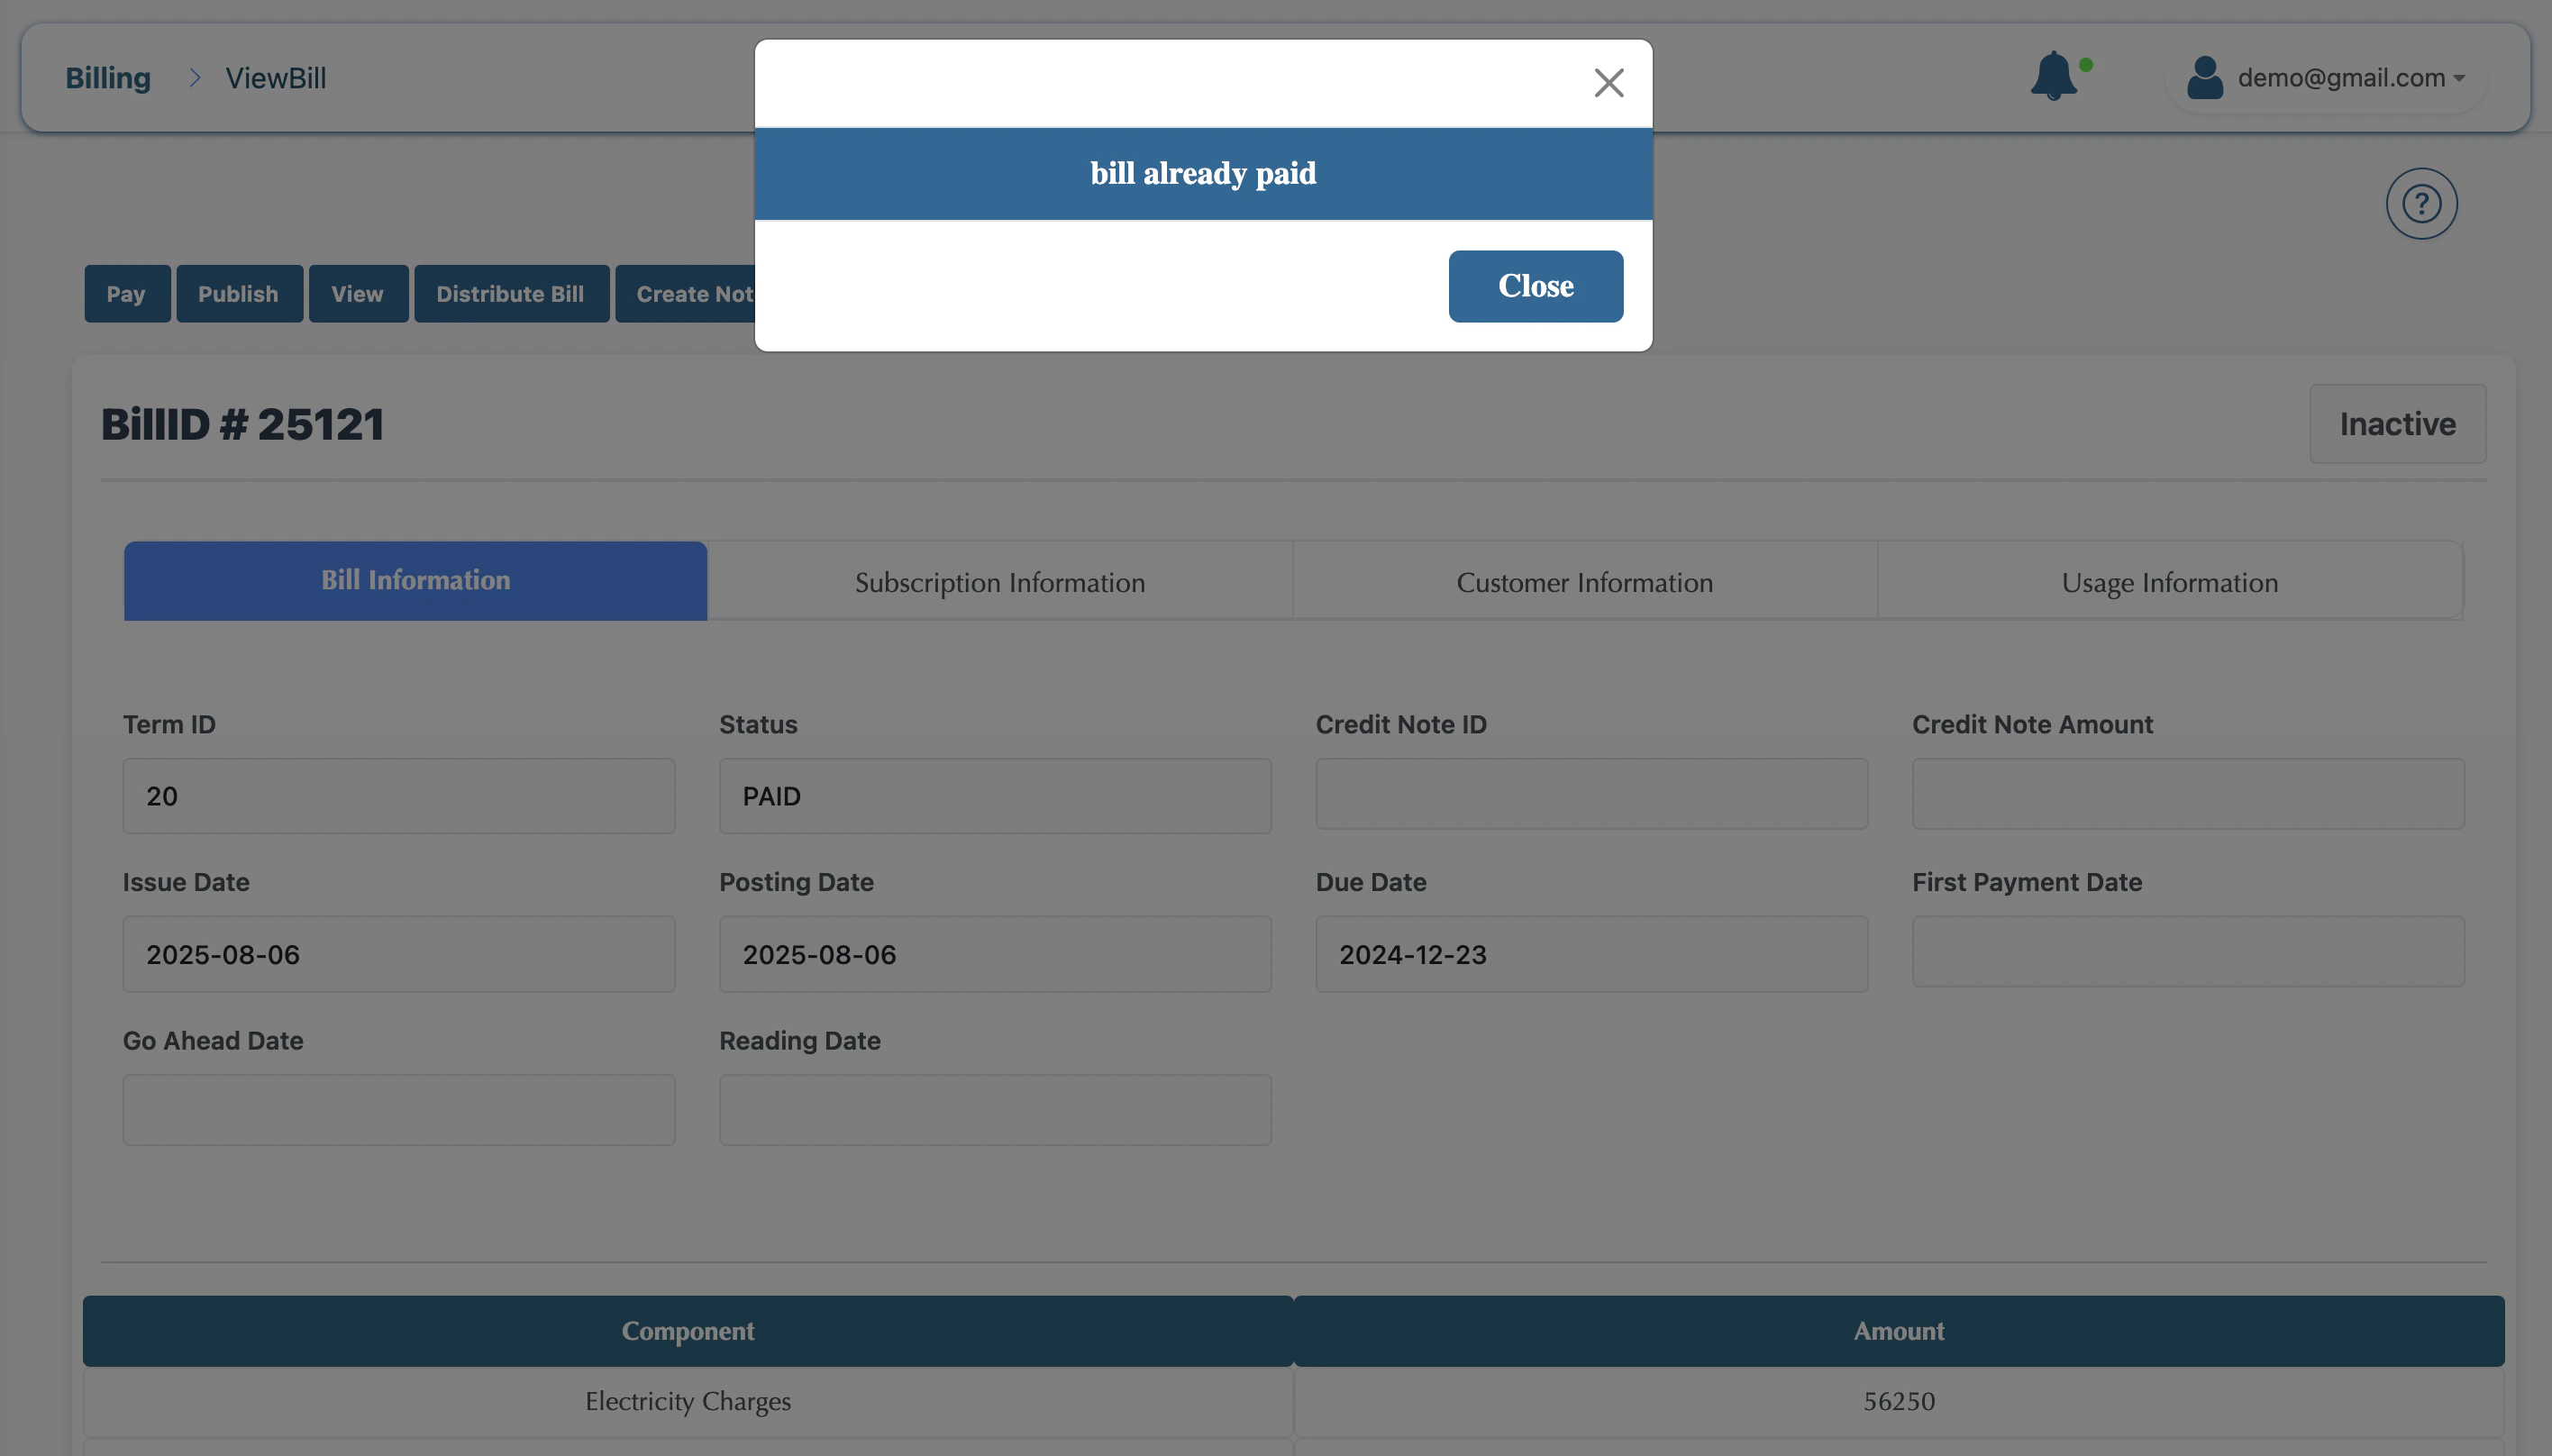
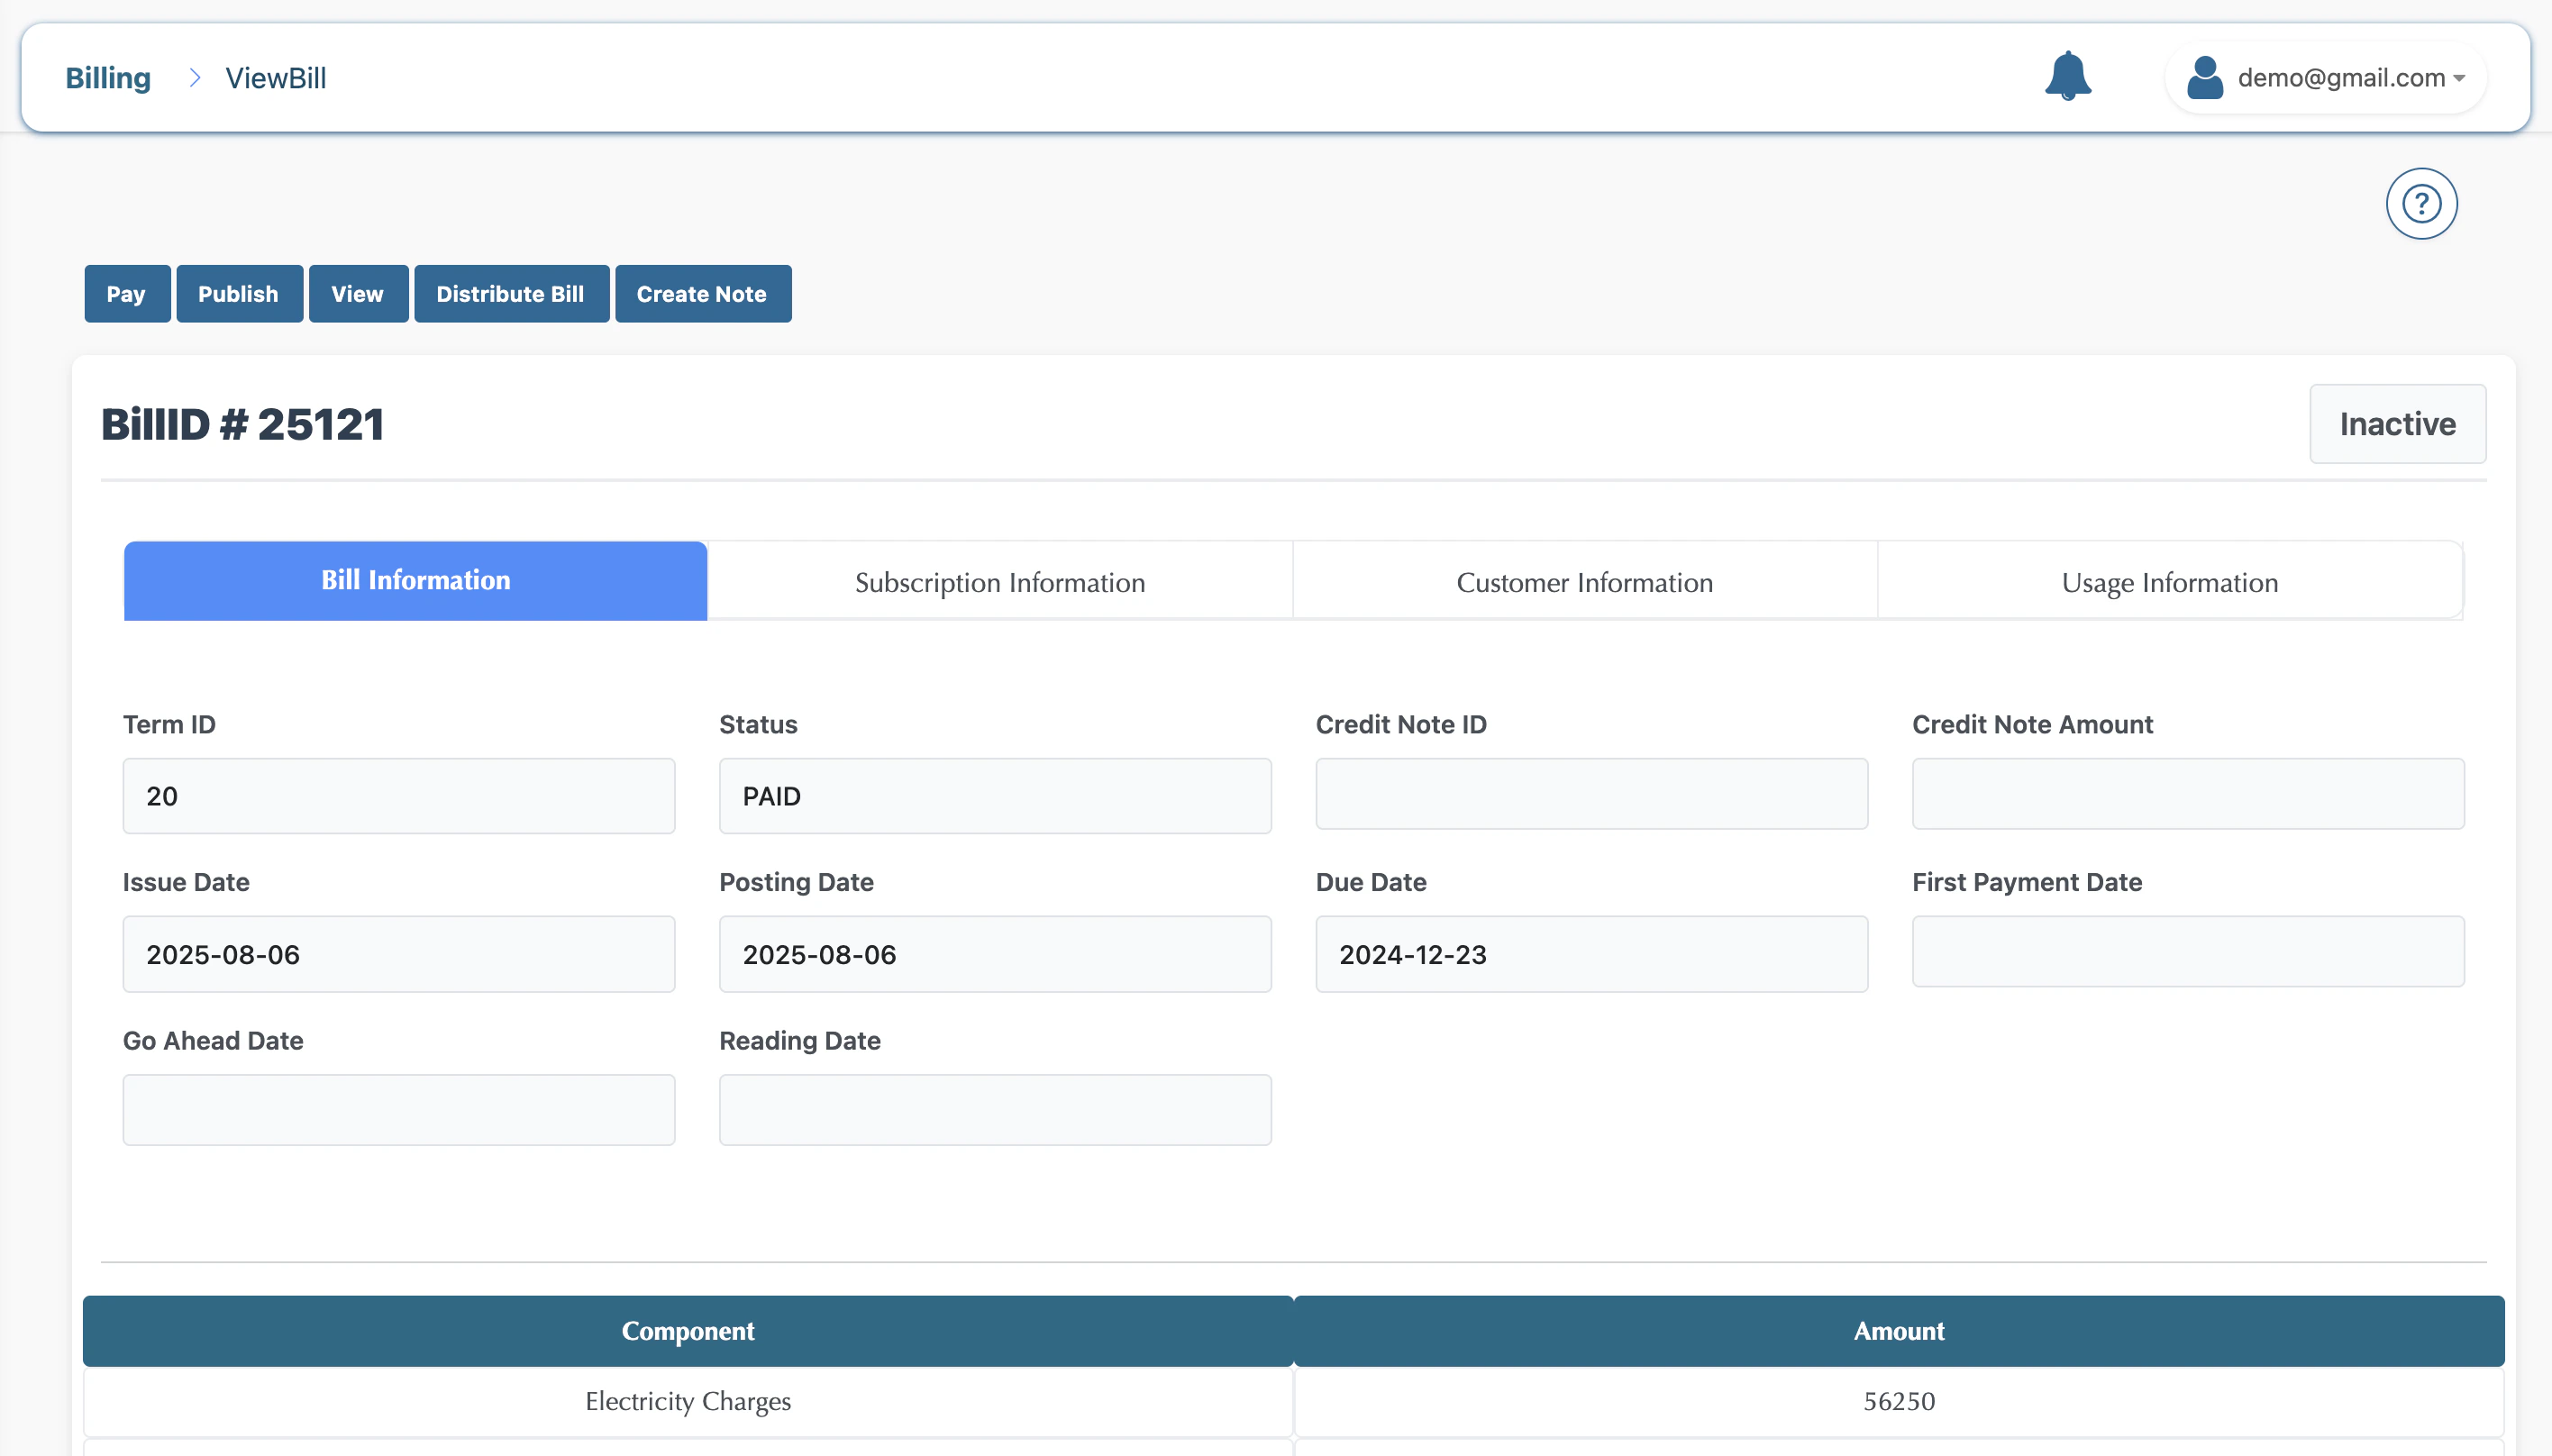 9. Click on Pay, and the modal opens
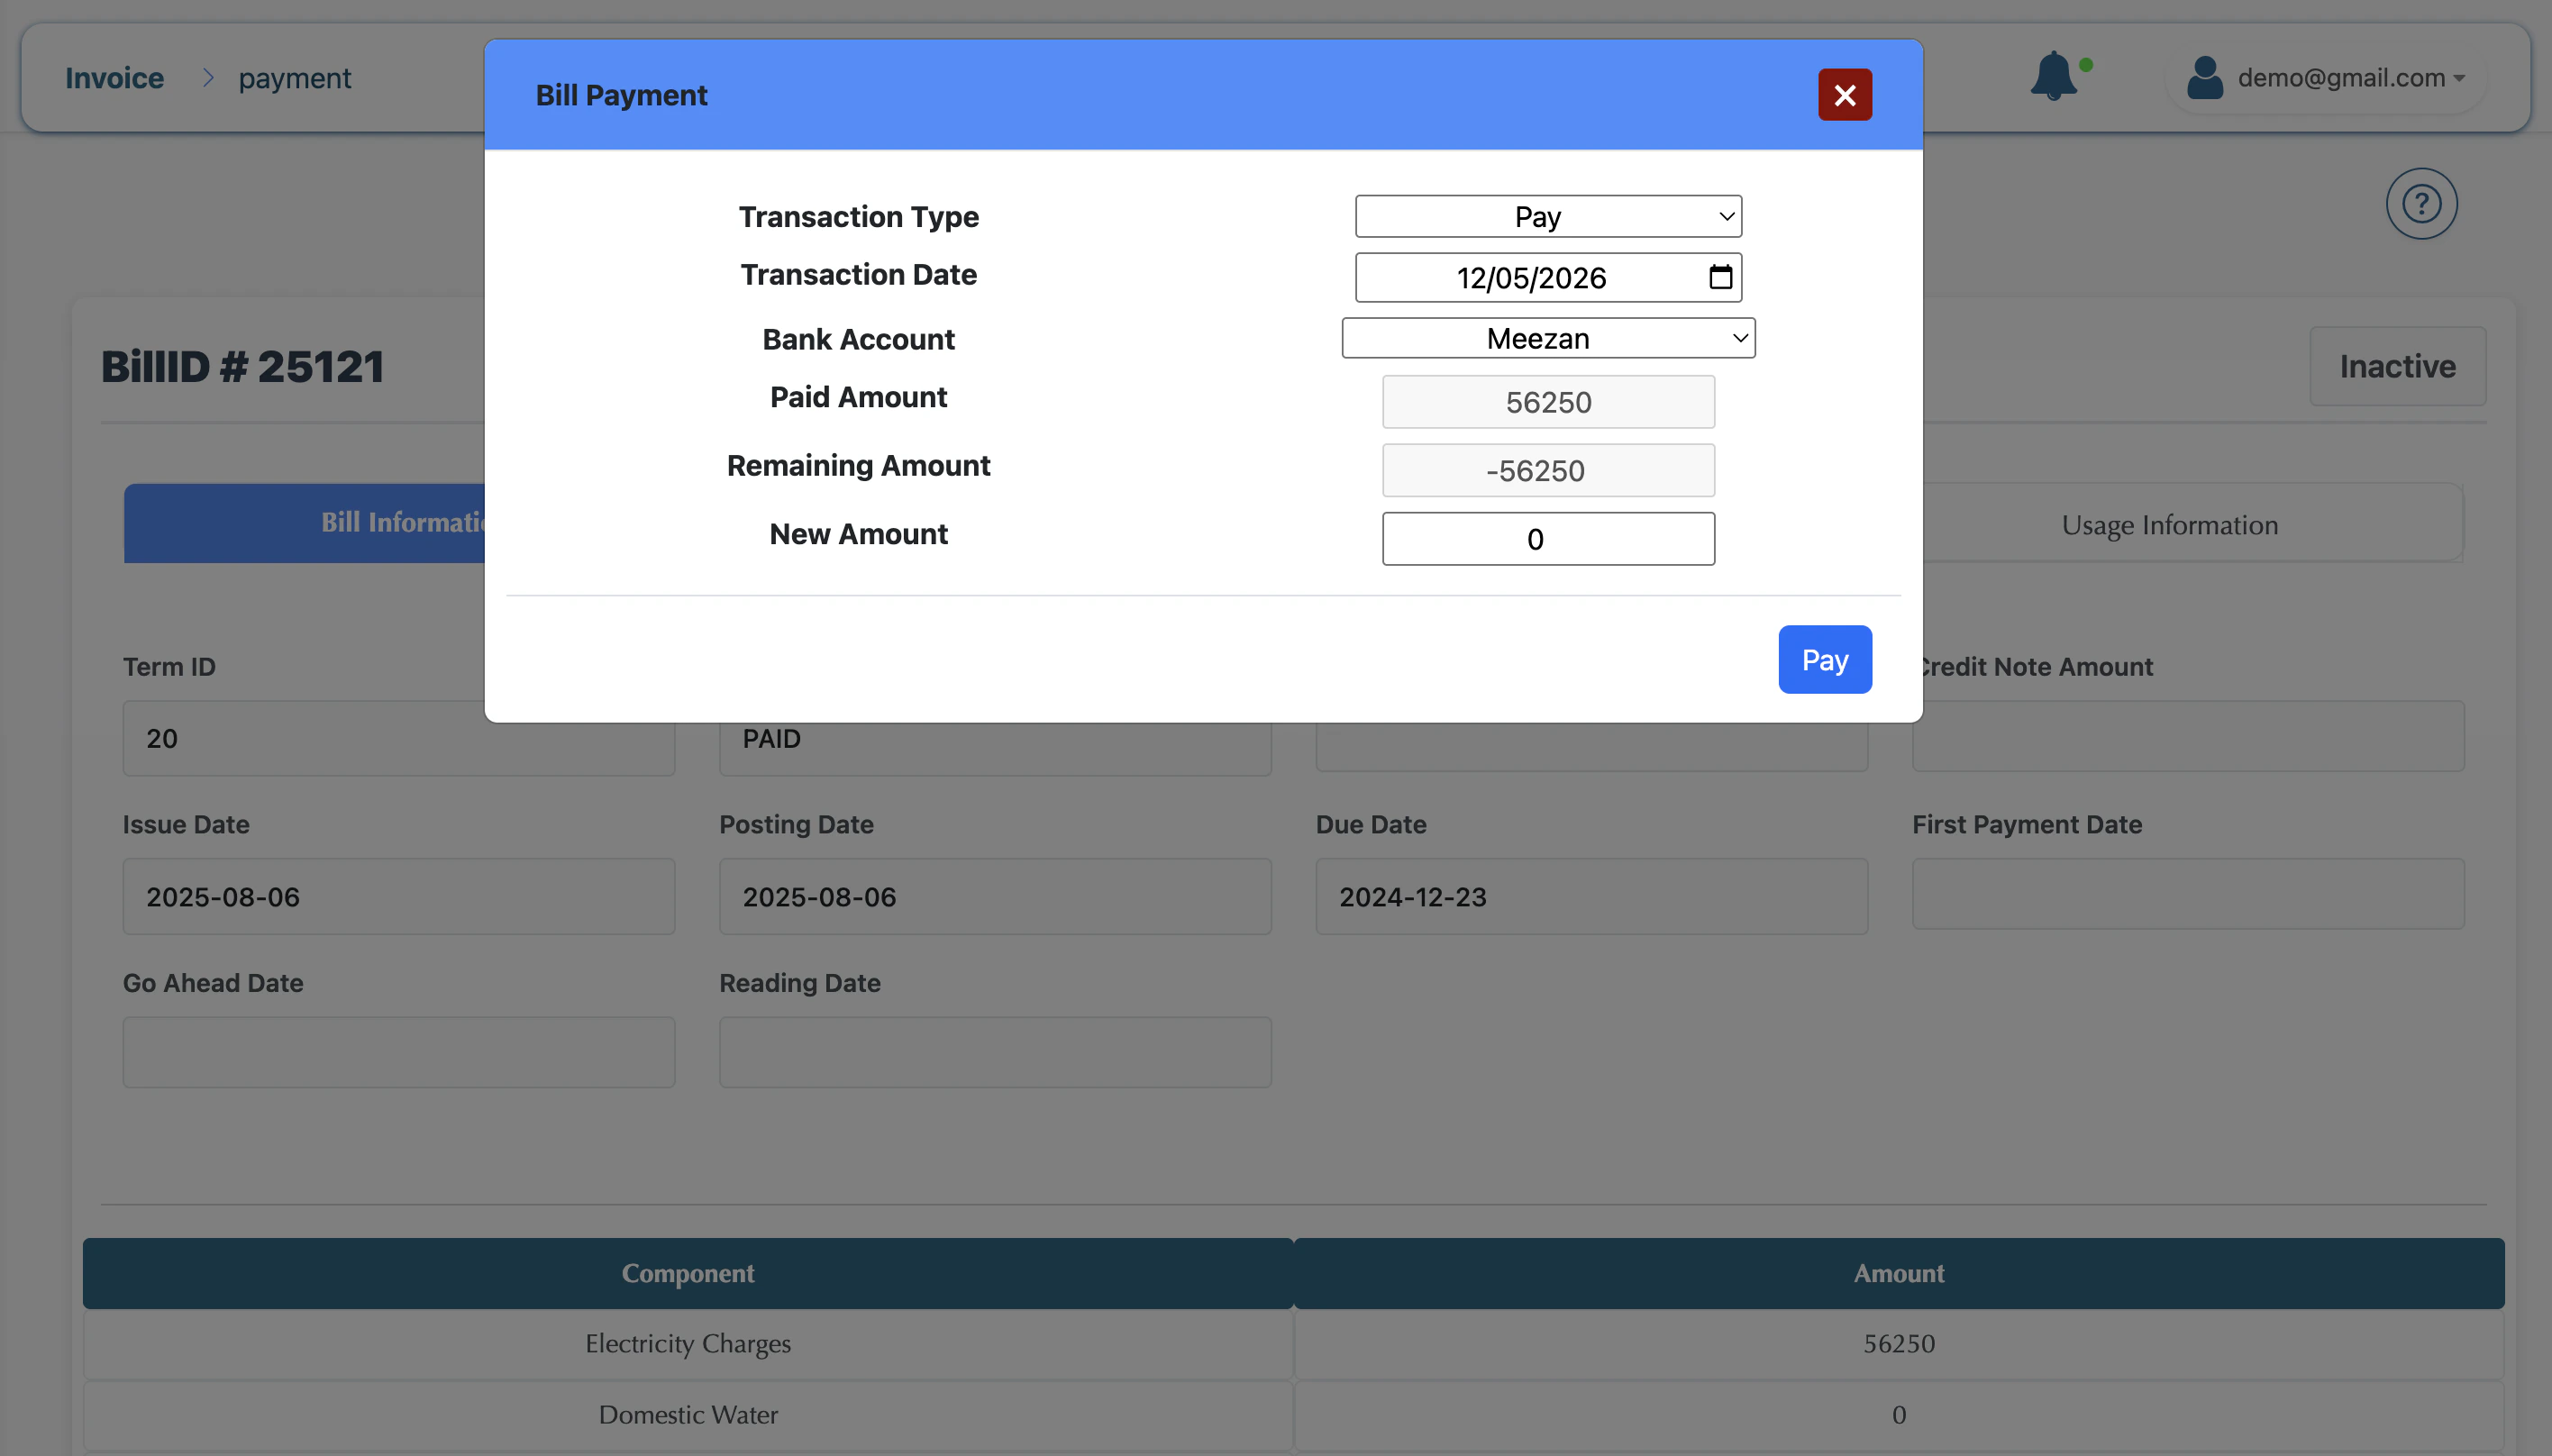 Enter your amount and click on pay bill
 ***
## 5. Key System Differences
* **For B2B**: Focus on **Adjustments**. Business clients often need "one-time credits" or "fee waivers," which you handle via the **Adjustment Modal** before processing.
* **For B2C**: Focus on **Automation**. Use the **Billing Schedule** to ensure thousands of customers are billed at the same time without manual effort.
***
> **Summary**: You don't need two systems. By simply toggling the **Party Type** and **Due Date Offset**, BillSpree transforms from an enterprise billing engine into a retail subscription platform.
***
## 5. Key System Differences
* **For B2B**: Focus on **Adjustments**. Business clients often need "one-time credits" or "fee waivers," which you handle via the **Adjustment Modal** before processing.
* **For B2C**: Focus on **Automation**. Use the **Billing Schedule** to ensure thousands of customers are billed at the same time without manual effort.
***
> **Summary**: You don't need two systems. By simply toggling the **Party Type** and **Due Date Offset**, BillSpree transforms from an enterprise billing engine into a retail subscription platform.